2018 Ford F-150 Lug Nut Torque Specs & Sequence Guide

The factory-recommended torque for a 2018 Ford F-150 is 150 lb-ft (204 Nm) for all wheel types. To ensure safety and prevent rotor warping, you must use a 21mm socket and follow a 6-lug star-pattern tightening sequence.
🎯 Key Takeaways
Recommended Best Deal Products


- Takeaway 1:Torque all 2018 F-150 lug nuts to exactly 150 lb-ft (204 Nm).
- Takeaway 2:Use a 21mm deep-well socket for standard factory lug nuts.
- Takeaway 3:Always apply torque in a crisscross star pattern for even seating.
- Takeaway 4:Re-torque every lug nut after driving 50 to 100 miles.
- Takeaway 5:Avoid using anti-seize or lubricants on wheel studs or nuts.
The 2018 Ford F-150 requires a precise lug nut torque of 150 lb-ft (204 Nm). This specification applies to all trim levels of the 2018 model year, regardless of whether you are driving the base XL, the popular XLT, or the high-end Limited and Raptor versions. Achieving this exact level of tension is vital because the F-150 uses a heavy-duty M14 x 1.5 thread size that demands significant clamping force to remain secure under the truck’s high towing and payload capacities.

Prime for Young Adults — 6 Months Free
Students and 18–24s get six months of Prime free, then half price.
Start 6 Months Free As an Amazon Associate I earn from qualifying purchases.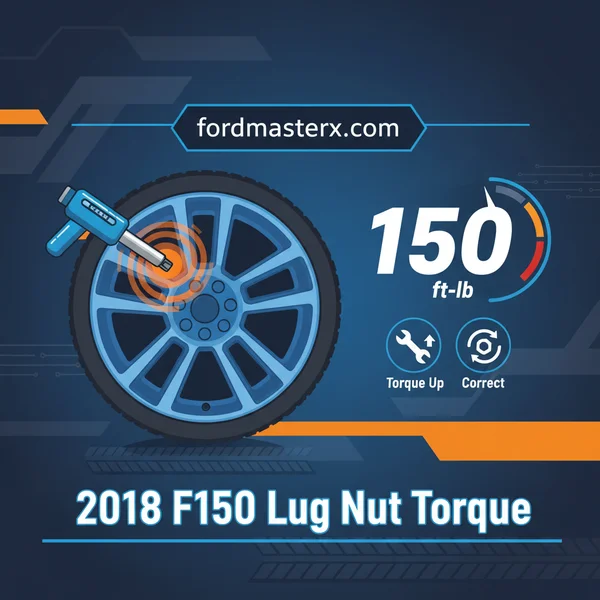
Applying the correct torque is not just about keeping the wheel on the truck; it is about protecting your braking system and wheel assembly. If you do not hit that 150 lb-ft mark, you risk uneven pressure on the brake rotors, which is a primary cause of rotor warping and “brake pulsation.” Conversely, over-tightening can stretch the wheel studs beyond their elastic limit, leading to snapped studs or cracked alloy wheels. Using a calibrated torque wrench ensures your truck remains safe and your components stay within factory tolerances.
Understanding the 150 lb-ft Torque Specification
The 150 lb-ft specification for the 2018 F-150 is significantly higher than what you might find on older half-ton trucks or smaller SUVs. This high torque value is necessary to create the required “stud stretch.” When you tighten a lug nut to 150 lb-ft, the steel stud actually stretches a microscopic amount. This tension acts like a heavy-duty spring, pulling the wheel firmly against the hub. Without this specific amount of tension, the vibrations from the road could slowly back the lug nuts off over time.

Dry Torque vs. Lubricated Torque
One of the most important factors in reaching the 150 lb-ft spec is the condition of the threads. Ford recommends a dry torque. This means you should not apply grease, oil, or anti-seize to the wheel studs or the lug nut seats. Lubricating the threads reduces friction, which can lead to over-torquing. If you apply 150 lb-ft to a lubricated stud, the actual clamping force could be 20% to 30% higher than intended, potentially snapping the stud or damaging the lug nut.
- Standard Spec: 150 lb-ft (204 Nm).
- Thread Size: M14 x 1.5.
- Condition: Clean and dry threads only.
- Applicability: All 2018 F-150 factory wheel types (Alloy and Steel).
The Impact of Heat on Torque Accuracy
You should always check or set your lug nut torque when the wheels are “cold.” If you have just finished a long drive or have been braking heavily, the heat from the rotors and hubs can cause the metal in the studs and wheels to expand. Setting the torque to 150 lb-ft while the components are hot may result in the nuts becoming slightly loose once the metal cools and contracts. For the most accurate results, let the truck sit for at least an hour before finalizing your torque settings.
2018 F150 Lug Nut Torque Made Easy: Your Essential Action Plan
Recommended Best Deal Products

This comprehensive guide covers the precise procedures required to safely and effectively torque the lug nuts on a 2018 Ford F-150. Whether you are rotating your tires, swapping to a winter set, or performing brake maintenance, adhering to the specific torque requirements is vital for your safety. Improperly torqued wheels can lead to catastrophic wheel loss, warped brake rotors, or snapped wheel studs. Since the 2018 F-150 uses a robust 150 lb-ft specification, traditional “hand-tightening” with a lug wrench is simply not enough. This walkthrough ensures your truck remains road-ready and mechanically sound.
Step 1: Preparation and Surface Safety
What you need: Level ground, wheel chocks, and your vehicle’s parking brake engaged.
Instructions: Before you even touch a tool, you must ensure the vehicle is on a hard, level surface such as a concrete garage floor or a flat driveway. Never attempt to torque wheels on grass, gravel, or an incline, as the truck could shift or the jack could sink. Engage the electronic parking brake (standard on most 2018 F-150 trims) to lock the rear wheels. If you are working on the front wheels, place wheel chocks behind the rear tires. If working on the rear, chock the front. This prevents any forward or backward rolling once the vehicle is raised.
Pro Tip: Always double-check that your transmission is in “Park.” On the 10-speed transmission found in the 2018 F-150, the parking pawl provides an extra layer of security, but the parking brake is your primary defense against movement.
Step 2: Gather Specific Tools and Identify Specs
What you need: A 1/2-inch drive torque wrench (capable of reaching at least 150 lb-ft), a 21mm deep-well socket, and a breaker bar.

Audible — Listen Free for 30 Days
One free credit a month and thousands of titles included.
Listen Free for 30 Days As an Amazon Associate I earn from qualifying purchases.Instructions: The 2018 F-150 uses M14 x 1.5 threaded studs. The factory specification for these lug nuts is exactly 150 lb-ft (204 Nm). You will need a high-quality torque wrench; do not use a small 3/8-inch drive wrench, as most do not reach this high torque range and will be inaccurate at their limit. A 21mm socket is the standard size for OEM Ford lug nuts. However, if your truck has aftermarket wheels, the nut size may differ (often 13/16-inch or 22mm). Test the fitment of the socket before applying pressure to ensure it is snug and won’t strip the nut.
Pro Tip: Avoid using “spline” sockets on standard hex nuts. If your 2018 F-150 still has the original “two-piece” capped lug nuts, they may have “swollen” due to corrosion. If a 21mm won’t fit, you might need a 21.5mm or a 22mm “flip” socket to remove them.
Step 3: Initial Loosening While Grounded
What you need: 1/2-inch drive breaker bar and the 21mm socket.
Instructions: While the truck is still firmly on the ground, use your breaker bar and socket to loosen each lug nut approximately half a turn. Do not remove them completely. The weight of the vehicle prevents the wheel from spinning while you break the initial tension. Since the factory torque is a heavy 150 lb-ft, these nuts will be very tight. Position the breaker bar so you are pulling upward or pushing down using your body weight. Never use your torque wrench to loosen lug nuts, as this can knock the internal mechanism out of calibration or damage the tool permanently.
Pro Tip: If the nuts are stuck, apply a small amount of penetrating oil to the base of the nut, but be extremely careful not to get any on the brake rotors or pads. Clean any excess oil off before proceeding.
Step 4: Lifting and Inspection
What you need: Floor jack (3-ton capacity recommended) and jack stands.
Instructions: Position your jack under the appropriate lift point. For the front, use the reinforced section of the frame rail behind the front wheel. For the rear, lift from the axle tube or the frame rail forward of the rear leaf spring mount. Raise the vehicle until the tire is roughly 2 inches off the ground. Immediately slide a jack stand under the frame for safety. Once the wheel is elevated and the truck is supported by the stand, remove the lug nuts fully and take the wheel off. Use this time to inspect the wheel studs for rust or stripped threads and check the mounting surface of the hub for debris.
Pro Tip: Use a wire brush to clean the surface of the hub and the back of the wheel. Any rust or dirt trapped between the wheel and the hub can cause “false torque,” where the nut feels tight, but the wheel is actually loose.
Step 5: Hand-Starting the Lug Nuts
What you need: The 6 lug nuts and your fingers.
Instructions: Lift the wheel back onto the studs, ensuring it sits flush against the hub. Take each lug nut and thread it onto the stud by hand. Rotate the nut clockwise until it is finger-tight. You should be able to get at least 3 to 5 full rotations by hand. This is a critical step to prevent cross-threading, which is a common and expensive mistake. If a nut feels gritty or stops prematurely, back it off, clean the stud threads, and try again. Do not use an impact wrench to start the nuts; the power of the tool can force a misaligned nut onto the stud, ruining the threads instantly.
Audible Premium Plus — Annual Membership
12 audiobook credits up front, plus the full Audible catalogue.
See Annual Plans As an Amazon Associate I earn from qualifying purchases.Pro Tip: If you are using aftermarket “conical” or “acorn” nuts, ensure they are centered in the wheel’s lug holes as you tighten them. The centering happens during this hand-tightening phase.
Step 6: The Snug-Down Phase (Star Pattern)
What you need: 21mm socket and a socket wrench (ratchet).
Instructions: Using a standard ratchet, tighten the lug nuts in a “star” or “criss-cross” pattern while the wheel is still in the air. For the 6-lug 2018 F-150, follow this sequence: top nut, bottom nut, top-right, bottom-left, top-left, bottom-right. This ensures the wheel is pulled evenly against the hub. Continue tightening until the wheel no longer wobbles and the nuts are snug. You are not trying to reach the full 150 lb-ft yet; you are simply seating the wheel. If the wheel spins while you do this, you may need a helper to press the brake pedal, or you can proceed to the next step to provide resistance.
Pro Tip: Imagine a clock face for the 6-lug pattern: start at 12, go to 6, then 2, 8, 10, and finally 4. This pattern is the gold standard for even clamping force.
Step 7: Final Torquing to 150 lb-ft
What you need: Calibrated torque wrench and 21mm socket.
Instructions: Lower the jack until the tire makes enough contact with the ground to prevent it from spinning, but do not let the full weight of the truck down yet. Set your torque wrench to 150 lb-ft (204 Nm). Holding the head of the wrench steady with one hand, pull the handle smoothly until you hear and feel the wrench “click.” Stop immediately after the click to avoid over-torquing. Follow the same 6-lug star pattern (12, 6, 2, 8, 10, 4) used in the previous step. Once all six are clicked, lower the vehicle completely and remove the jack. Perform one final pass in the star pattern to verify every nut is at the full 150 lb-ft spec.
Pro Tip: Never “bounce” on the torque wrench or apply sudden jerks. A smooth, steady pull provides the most accurate torque reading. Always return your torque wrench to its lowest setting (usually 10-20 lb-ft) before storing it to maintain its calibration.
Step 8: The Road Test and Re-Torque
What you need: The torque wrench (kept in the truck for the day).
Instructions: After completing the job, take the truck for a short 10-to-20-mile drive. This allows the wheels to settle and any microscopic gaps between the wheel and hub to close. Heat cycles from braking can also cause slight expansion and contraction. After the drive, park the vehicle and use the torque wrench to check the nuts one last time at 150 lb-ft. If any nut moves significantly before the wrench clicks, it means the wheel wasn’t perfectly seated. This final check is the difference between a successful DIY job and a potential roadside emergency.
Pro Tip: If you have recently painted your wheels or hubs, you may need to re-torque more than once, as paint can compress or flake away under the clamping pressure, leading to loosened nuts.
✅ Final Checklist
- Verified that the torque wrench was set specifically to 150 lb-ft (204 Nm).
- Confirmed that a 6-lug star/criss-cross pattern was used during final tightening.
- Ensured all lug nuts were hand-threaded before using tools to prevent cross-threading.
- Verified that the vehicle was lowered and the final “click” was heard on all 6 nuts per wheel.
- Checked that the parking brake is disengaged and wheel chocks are removed before driving.
Important Notes:
- Safety Warning: Never lubricate the threads of the wheel studs with grease or anti-seize. Torque specifications are calculated for “dry” threads. Lubricating them can lead to over-tensioning and snapped studs.
- Seek Professional Help: If you notice a wheel stud is broken, or if the lug nut threads are stripped and won’t tighten, do not drive the vehicle. Contact a mobile mechanic or have the truck towed to a shop.
- Estimated Time: 30–45 minutes for all four wheels.
- Estimated Cost: $0 if you own the tools; approximately $80–$150 to purchase a quality torque wrench and socket set.
Essential Tools for 2018 F-150 Wheel Maintenance
To properly maintain the wheels on a 2018 F-150, you cannot rely on the basic lug wrench provided in the roadside emergency kit. That tool is designed for emergencies only and does not provide the leverage or accuracy needed to hit 150 lb-ft reliably. Because the torque requirement is so high, using the wrong tools can result in rounded lug nuts or inaccurate tension that puts your safety at risk.
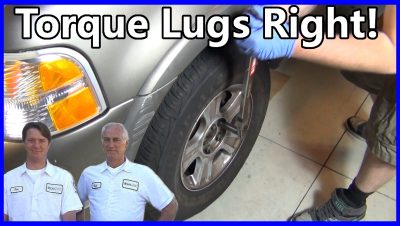
The 21mm Socket and the “Swelling” Issue
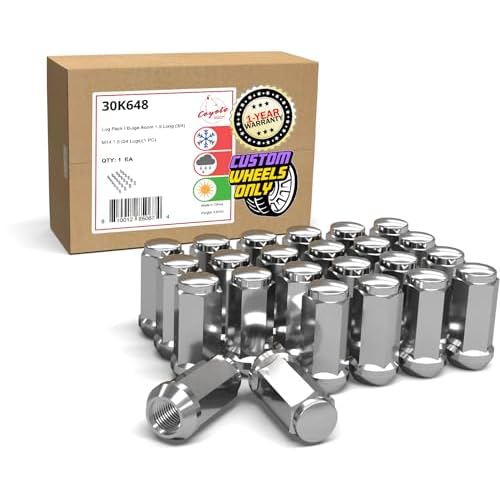
The factory lug nuts on a 2018 F-150 are 21mm. However, many owners encounter a common issue where the chrome-clad “two-piece” lug nuts begin to swell due to moisture getting trapped between the steel core and the decorative cap. When this happens, a standard 21mm socket may no longer fit. In these cases, many mechanics use a 21.5mm “flip socket” to remove the damaged nuts. If you notice your socket is difficult to seat, it is time to replace your factory lug nuts with high-quality one-piece aftermarket versions.
- Primary Socket Size: 21mm (deep well preferred).
- Backup Socket: 21.5mm (for swollen factory nuts).
- Drive Size: 1/2-inch drive tools are mandatory for 150 lb-ft.
Choosing and Using a Torque Wrench
For a 2018 F-150, a 1/2-inch drive “click-type” torque wrench is the best choice. Most 3/8-inch drive wrenches do not go up to 150 lb-ft, and even those that do are operating at their absolute limit, which reduces accuracy. When using your torque wrench, apply steady, even pressure until you hear the “click.” Do not “double-click” or bounce on the wrench, as this can add extra torque beyond the 150 lb-ft setting.
Always remember to use a breaker bar for the initial loosening of the lug nuts. Using a torque wrench to break loose stuck nuts can knock the tool out of calibration. Once the nuts are hand-tightened, the torque wrench should only be used for the final tightening phase to ensure every nut is exactly at the factory-specified 150 lb-ft.
The Importance of the 6-Lug Star Tightening Pattern
Recommended Best Deal Products


When you’re dealing with the 2018 Ford F-150, the order in which you tighten the nuts is just as critical as the final torque value itself. Because the F-150 uses a 6-lug configuration, simply going in a circle is a recipe for disaster. Using a star pattern ensures that the wheel seats perfectly flat against the hub assembly, providing a stable foundation for the thousands of pounds of truck resting on it.
Achieving Even Pressure Distribution
Think of the wheel as a lid on a jar; if you tighten one side all the way down first, the other side might tilt up slightly. By following a criss-cross or star pattern, you apply pressure evenly across the entire surface of the rotor. This prevents the wheel from being “cocked” on the hub, which can lead to several performance issues:
- Persistent Wheel Vibration: Even if your tires are perfectly balanced, an unevenly seated wheel will cause annoying shaking at highway speeds.
- Stud Stress: Tightening in a circle puts lateral tension on the wheel studs, increasing the risk of them snapping under heavy load or during sharp turns.
- Hub Assembly Wear: Uneven pressure can lead to premature wear on your wheel bearings, potentially leading to a much more expensive repair down the road.
Preventing Brake Rotor Warp
One of the most overlooked consequences of an improper tightening sequence is brake pulsation. If the lug nuts are tightened unevenly, it can actually distort the brake rotor. Over time, as the brakes heat up and cool down during normal driving, this minor distortion becomes a permanent warp. By consistently using the proper 6-lug star sequence, you are essentially protecting your braking system and ensuring a smooth stop every time you hit the pedal.
Common Issues: Lug Nut Swelling and Over-Torquing Risks
The 2018 F-150 is a legendary workhorse, but it does have a few quirks when it comes to its wheel hardware. Owners often run into two specific problems: the physical deformation of the nuts themselves and the mechanical failure caused by too much “elbow grease” during installation.
The Notorious Ford “Swollen” Lug Nut
Ford often utilizes “two-piece” lug nuts, which consist of a steel core with a decorative chrome cap pressed over the top. While they look great on the showroom floor, they are notoriously prone to “swelling.” Moisture gets trapped between the steel core and the chrome cap, causing corrosion that expands the outer shell. This leads to several practical problems:
- Socket Fitment Issues: A swollen 21mm lug nut may require a 21.5mm or even a 22mm socket to remove, which most standard toolkits do not include.
- Roadside Emergencies: If you get a flat tire and your lug nuts are swollen, the factory lug wrench provided in your truck’s toolkit likely won’t fit, potentially leaving you stranded.
- Practical Tip: Many F-150 owners choose to replace these factory units with high-quality, solid one-piece aftermarket lug nuts to avoid this headache entirely.
The Dangers of “Guesstimating” Torque
It is incredibly tempting to just “crank it down” with a breaker bar or an impact wrench until it stops moving. However, over-torquing is just as dangerous as under-torquing. Excessive force can stretch the wheel studs beyond their elastic limit. Once a stud is stretched, it loses its clamping force and is significantly more likely to shear off while driving. Always use a calibrated torque wrench rather than relying on “feel” or the imprecise power of an air tool to reach that 150 lb-ft mark.
Final Thoughts on F-150 Wheel Maintenance
Maintaining the proper torque on your 2018 Ford F-150 is one of the simplest yet most vital maintenance tasks you can perform. By sticking to the 150 lb-ft specification and always employing the 6-lug star pattern, you ensure that your wheels stay securely attached, your rotors remain flat, and your ride stays smooth. Keep a close eye out for signs of lug nut swelling, as catching that issue early can save you from a major headache during a roadside tire change.
Next Steps: Verify your torque wrench is calibrated and consider upgrading to solid one-piece lug nuts if you notice your current ones are becoming difficult to fit into a standard socket. Remember to check your torque again after driving 50 to 100 miles following any wheel removal. Drive safe and keep that F-150 running strong!
❓ Frequently Asked Questions
Why is the 2018 F-150 torque spec higher than older trucks?
Ford increased the specification to 150 lb-ft to account for higher payload and towing capacities, ensuring the wheel stays secured under extreme stress.
What are the risks of over-torquing F-150 lug nuts?
Over-torquing can stretch the wheel studs, damage the lug nut threads, and is a leading cause of warped brake rotors and steering wheel vibration.
Why don’t my 21mm sockets fit my 2018 F-150 lug nuts anymore?
Ford uses ‘two-piece’ lug nuts with a chrome cap that often swells due to corrosion, often requiring a ‘half-size’ socket like a 21.5mm for removal.
Can I use anti-seize on the wheel studs?
No, you should never use anti-seize on F-150 studs as it acts as a lubricant, which can lead to over-torquing and potential stud failure.
Does the 2018 Raptor have a different torque spec?
No, the 2018 Ford Raptor shares the same 150 lb-ft torque requirement as the standard F-150 models.
When should I perform a re-torque check?
It is critical to re-verify the 150 lb-ft torque after the first 50 to 100 miles of driving after a wheel has been removed and reinstalled.