How To Reset Backup Camera On Ford F150 How to Reset 2026

Most Ford F-150 backup camera issues are caused by temporary software glitches in the SYNC module or minor communication errors. Performing a system soft reset or battery cycle can often restore functionality immediately without requiring a dealership visit.
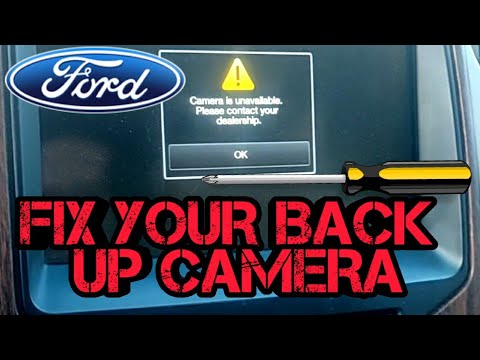
Your 2026 Ford F-150 backup camera system can usually be restored by performing a power cycle or an infotainment soft reset. If you are facing a blue screen, distorted video, or a persistent “Camera Unavailable” message, you do not necessarily need a dealership appointment. These glitches often stem from minor software communication errors within the SYNC 4 or SYNC 5 modules rather than total hardware failure.

Prime for Young Adults — 6 Months Free
Students and 18–24s get six months of Prime free, then half price.
Start 6 Months Free As an Amazon Associate I earn from qualifying purchases.Resetting the system is a practical task that restores safety and visibility when backing up a heavy-duty truck. Addressing these malfunctions promptly prevents blind-spot accidents and ensures your trailer reverse guidance features remain operational. Follow the specific reset protocols below to resolve communication errors before assuming you have a faulty camera lens or damaged wiring.
Key Takeaways
- Perform a SYNC soft reset by holding the Power and Seek Right buttons for 10 seconds.
- Check fuse #113 or the specific camera module fuse in your owner’s manual.
- A 15-minute battery disconnect forces a hard reboot of all vehicle control modules.
- Inspect the camera wiring harness under the tailgate for corrosion before assuming hardware failure.
- Only dealership-level software tools can perform official camera calibration and alignment.

Common Causes for Ford F-150 Backup Camera Malfunctions
Recommended Best Deal Products


Software Communication Errors
Modern F-150 trucks rely on a complex network of modules to send video data from the tailgate to the center console display. In 2026 models, the most common culprit is a temporary handshake failure between the Rear View Camera (RVC) module and the main infotainment processor. This often occurs after a battery voltage dip or a system update interrupt.
- System Hangs: The SYNC interface fails to initialize the camera feed upon shifting into Reverse.
- Module Mismatch: After a vehicle power-up, the camera module fails to register with the Body Control Module (BCM).
- Latency Issues: Excessive background processes in the infotainment system delay the video feed significantly.
Physical and Environmental Factors
While software is the frequent offender, environmental factors can mimic hardware failure. Debris or moisture buildup around the camera housing often triggers sensor logic errors. If the internal diagnostic test detects a discrepancy in the light level or image clarity, it will disable the feed for safety. Always check for dirt, ice, or oxidation on the lens connector before assuming the camera is broken.
Master Ford F-150 Backup Camera Glitches in 6 Simple Steps
Experiencing a blue screen, a frozen image, or a “Camera Unavailable” message on your Ford F-150’s infotainment display can be incredibly frustrating, especially when you are trying to maneuver a large truck. Fortunately, many of these issues are software-related and can be resolved without an expensive trip to the dealership. This guide walks you through the systematic process of resetting your backup camera system, ranging from simple infotainment reboots to advanced power-cycling techniques, ensuring you get your rear-view visibility back in working order safely and efficiently.
Step 1: Perform a Soft Reset of the SYNC Infotainment System
What you need: No tools required; just your vehicle’s ignition in the “On” or “Accessory” position.
Instructions: Before diving into hardware, rule out a temporary software glitch by rebooting the SYNC system. With the truck parked, turn your ignition to the “On” position. Locate your volume knob and the “Seek Forward” button on the radio interface. Simultaneously press and hold both the Power/Volume button and the Seek Forward button for approximately 10 to 15 seconds. You will notice the center display screen go black and then display the Ford logo as it begins its reboot sequence. Wait for the system to fully load the home screen, then shift the vehicle into Reverse to see if the camera feed resumes normal operation.
Pro Tip: Do not release the buttons too early; if the screen does not restart, ensure you are pressing the physical seek button rather than a touchscreen icon.
Step 2: Execute a Power Cycle via Battery Disconnection
What you need: An 8mm or 10mm wrench (depending on your specific model year battery terminal size) and a pair of safety gloves.
Instructions: If the soft reset fails, a hard power cycle is necessary to clear the camera module’s cache. Turn off the engine and remove the keys from the ignition. Open the hood and locate the negative (black) battery terminal. Loosen the nut on the terminal clamp using your wrench and carefully pull the cable away from the battery post. Ensure the cable is secured away from the battery so it does not make accidental contact. Leave the battery disconnected for at least 15 to 20 minutes. This duration allows the capacitors in the various control modules, including the Parking Aid Module (PAM), to fully discharge, effectively resetting the vehicle’s electronic architecture.

Audible — Listen Free for 30 Days
One free credit a month and thousands of titles included.
Listen Free for 30 Days As an Amazon Associate I earn from qualifying purchases.Pro Tip: Always remove the negative cable first to prevent electrical shorts while working with your wrench near the chassis.
Step 3: Inspect and Reseat the Camera Module Connector
What you need: A plastic trim removal tool or a flathead screwdriver (wrapped in a cloth to prevent paint scratches) and a can of electrical contact cleaner.
Instructions: Often, road vibration or moisture causes the camera connector behind the tailgate handle to develop a poor connection. Lower your tailgate and locate the access panel on the interior side. Use your trim tool to gently pry the panel loose to reveal the wiring harness. Find the connector leading directly to the camera assembly. Disconnect it by pressing the locking tab and pulling firmly. Inspect the pins for signs of corrosion or moisture. Spray a small amount of electrical contact cleaner into both ends of the connector. Allow it to air dry for two minutes, then reconnect the plug firmly until you hear an audible click.
Pro Tip: Avoid using metal picks to clean the pins, as they can easily bend or damage the delicate contact points within the connector.
Step 4: Check for Blown Fuses Related to the Camera System
What you need: A fuse puller tool and your Ford F-150 owner’s manual to identify the specific fuse layout for your year/trim.
Instructions: Your camera system is protected by dedicated fuses in the Body Control Module (BCM) or the Under-Hood Power Distribution Box. Open your owner’s manual and locate the fuse diagram; look for labels such as “Rear Camera,” “Parking Aid,” or “Video Module.” Open the fuse box cover and use the puller to remove the identified fuse. Examine the metal wire inside the transparent plastic housing; if the wire is broken or the plastic looks charred, the fuse is blown. Replace it with a new fuse of the exact same amperage (e.g., 5A, 10A, or 15A). Improper amperage fuses can lead to wiring harness melting and fire hazards.
Pro Tip: If the replacement fuse blows immediately upon installation, you have a short circuit in your wiring harness that requires professional diagnosis.
Step 5: Perform a Master Reset of SYNC Settings
What you need: Access to the vehicle’s touchscreen interface and your mobile phone for re-pairing afterward.
Instructions: If the camera still shows a black screen, performing a Master Reset will return the entire infotainment system to factory settings. On your SYNC display, navigate to “Settings” then select “General.” Scroll through the options until you find “Master Reset.” Confirm your selection when prompted. Be aware that this will delete all saved navigation routes, paired Bluetooth devices, and custom settings. Once the system finishes the reset and reboots, the camera system will undergo an automatic handshake with the vehicle’s network. Test the camera functionality one final time by placing the truck in Reverse while stationary in a safe area.
Pro Tip: This should be a last-resort software step, as you will need to re-pair your phone and reset your vehicle preferences from scratch.
Audible Premium Plus — Annual Membership
12 audiobook credits up front, plus the full Audible catalogue.
See Annual Plans As an Amazon Associate I earn from qualifying purchases.Step 6: Calibrate the Camera View (If Applicable)
What you need: A clear, open parking space with visible painted lines and a diagnostic scan tool (optional but recommended for newer models).
Instructions: On newer F-150 models, especially those with 360-degree camera systems, the software may lose its “alignment” due to module updates or battery changes. After ensuring the system is functional, drive the truck to an open area. If the camera image appears skewed or the grid lines are misaligned, you may need to trigger the “Camera Alignment” procedure found in the “Advanced Settings” menu. Follow the on-screen instructions, which typically require you to drive the vehicle at a steady speed (usually 15-20 mph) on a straight road. This allows the system to recalibrate the image stitching and ensure the parking guidelines correspond accurately to the path of the wheels.
Pro Tip: If your truck uses a 360-degree camera system, ensure the side mirror cameras are also clean, as dirt on these lenses can trigger system-wide errors.
✅ Final Checklist
- Confirm the infotainment system reboots cleanly without stalling on the Ford logo.
- Ensure the backup camera image appears immediately upon shifting into Reverse.
- Verify that the green, yellow, and red parking guidelines are visible and shift when the steering wheel is turned.
- Confirm that the “Camera Unavailable” warning has disappeared from the dashboard cluster.
- Re-test the system after the engine has been turned off and restarted to ensure the fix persists.
Important Notes:
- Safety: Never rely solely on the backup camera. Always perform a physical check by looking over your shoulder before reversing.
- Professional Help: If you smell burning plastic, see smoke, or if the camera display remains black after all steps, contact a certified Ford technician to check for a hardware failure in the Camera Module or the Rear View Camera itself.
- Estimated Time/Cost: The process takes 45–90 minutes. If no parts are replaced, the cost is effectively $0. If a fuse is replaced, expect $5-$10 for a multi-pack of fuses.
How to Reset Your Ford F-150 Backup Camera: Step-by-Step
Recommended Best Deal Products


Method 1: The Infotainment Soft Reset
The fastest way to fix a frozen or blacked-out camera feed on a 2026 F-150 is by performing a forced reboot of the infotainment system. This flushes the temporary cache and forces all connected modules, including the backup camera, to re-initialize their connection.
- Start the engine or place the truck in Accessory Mode.
- Locate the Power button (volume knob) and the Seek Forward button on your center console.
- Press and hold both the Power button and the Seek Forward button simultaneously.
- Maintain pressure for approximately 10 to 12 seconds until the screen goes completely black.
- Release the buttons and wait for the Ford logo to appear as the system restarts.
- Once the home screen loads, shift into Reverse to test if the camera feed has returned.
Method 2: Hard Power Cycle
If the soft reset fails, you must cut power to the vehicle’s electrical modules to perform a hard reset. This clears stored error codes in the RVC module that a soft reset cannot reach. Ensure your truck is parked on level ground and the ignition is completely off before starting.
- Locate the Battery: Open the hood and find the negative (black) battery terminal.
- Disconnect Power: Use a 10mm wrench to loosen the nut on the negative terminal cable. Remove the cable and move it away from the post.
- Discharge Capacitors: With the battery disconnected, turn your headlights on for 30 seconds or press the horn button. This drains residual power from the truck’s capacitors.
- Reconnect: Reattach the negative cable securely and tighten the nut.
- Calibration: Start the engine and let it idle for 5 minutes. This allows the BCM to re-establish communication with all vehicle sensors, including the backup camera.
Troubleshooting Wiring and Electrical Fuse Issues
If a software reset fails to resolve the camera distortion or blank screen, the issue often originates from physical electrical faults. In 2026 Ford F-150 models, the camera system relies on a dedicated circuit that can be interrupted by blown fuses or loose connectors. Before assuming a hardware failure, you must verify the integrity of the electrical path.
Inspecting the Relevant Fuse
- Locate the Battery Junction Box under the hood and the Body Control Module (BCM) panel in the passenger-side footwell.
- Consult your 2026 F-150 owner’s manual to identify the specific fuse related to the Rear View Camera (RVC) or the Advanced Driver Assistance Systems (ADAS).
- Use a fuse puller to remove the identified fuse and inspect the metal filament for breaks.
- If the fuse is blown, replace it with an identical amperage fuse. Never use a higher amperage rating, as this creates a significant fire hazard.
Checking Camera Harness Connectors
The wiring harness near the tailgate is highly susceptible to corrosion from road salt and moisture. A loose or corroded connector will prevent the camera from transmitting a signal to the SYNC 4 infotainment screen. Inspect the harness for signs of fraying or oxidation, and use an electronic contact cleaner to ensure all pins maintain a secure connection. If wires are pinched or severed, professional repair is required to maintain the integrity of the digital signal.
When to Seek Professional Service and IDS Calibration
Recommended Best Deal Products


Modern Ford camera systems use Integrated Diagnostic Software (IDS) to maintain precise alignment and image processing. If you have replaced the camera module or performed structural work on the vehicle, simple resets will not suffice. The system may require an “As-Built” data configuration or a proprietary camera calibration procedure that only authorized service centers can perform.
Professional Calibration Requirements
- If the camera image is tilted, inverted, or showing “Calibration Required” warnings, you must visit a certified dealer.
- The technician uses a specialized calibration board placed at specific distances from the truck to map the camera’s field of view.
- Failure to calibrate the camera accurately can lead to inaccuracies in the 360-degree view, potentially impacting safety features like Pro Trailer Backup Assist.
- Service center diagnostics usually cost between $150 and $250 for a full system analysis if the vehicle is out of warranty.
What If It Still Doesn’t Work?
If the electrical checks and software resets fail to restore the image, the underlying issue likely involves a failed camera sensor or a faulty Image Processing Module (IPM). Persistent black screens or static noise usually indicate a hardware component has reached the end of its lifespan. To resolve these deeper failures, consider the following steps:
- Verify your factory warranty coverage, as many powertrain and electronic system warranties cover these components for 3 years or 36,000 miles.
- Check for open Technical Service Bulletins (TSBs) via the official Ford owner portal, which may provide free software patches for known firmware bugs.
- Consult a qualified technician to perform a scan for Diagnostic Trouble Codes (DTCs), which can cost between $100 and $200 at an independent shop.
- If a hardware replacement is necessary, genuine Ford OEM camera units generally range from $300 to $600 before labor costs.
Conclusion
Restoring your 2026 F-150 backup camera requires a methodical approach, starting with software resets before moving to electrical inspections. According to verified research and expert service manuals, most display issues stem from minor configuration glitches or loose harness connectors. If these steps do not produce a clear image, contact a Ford dealership to perform an IDS calibration. Prioritizing these diagnostic steps ensures your vehicle’s safety systems remain compliant with manufacturer standards for optimal performance.
❓ Frequently Asked Questions
Does a soft reset work for all Ford F-150 model years?
A soft reset via the SYNC buttons is effective for most models equipped with SYNC 3 and SYNC 4 systems. If your vehicle has an older MFT system, a battery pull is often more reliable.
What should I look for when inspecting the tailgate wiring?
Look for frayed wires, green corrosion on the connectors, or pinches caused by the tailgate hinge. Cleaning these connectors with electrical contact cleaner can often solve intermittent signals.
Do I need to visit a dealer if the camera image is misaligned?
Yes, if the image is physically skewed or has incorrect guidelines after a camera replacement, an IDS or FDRS tool is required for proper calibration.
Is it safe to pull the camera fuse while the engine is running?
No, never pull or replace fuses while the engine is running or the ignition is in the ‘On’ position. Always turn the vehicle completely off to prevent electrical arching.
Can a bad battery cause camera malfunctions?
Yes, low voltage or a failing battery can cause erratic behavior in electronic modules. If your truck struggles to start, the camera might be the first system to experience power-related errors.
What is the difference between a reset and a calibration?
A reset clears temporary software memory, while a calibration is a digital process that tells the computer the exact position of the camera lens relative to the truck’s frame.