2010 Ford Taurus Fuse Box Diagram: Both Panels and Fuse Charts

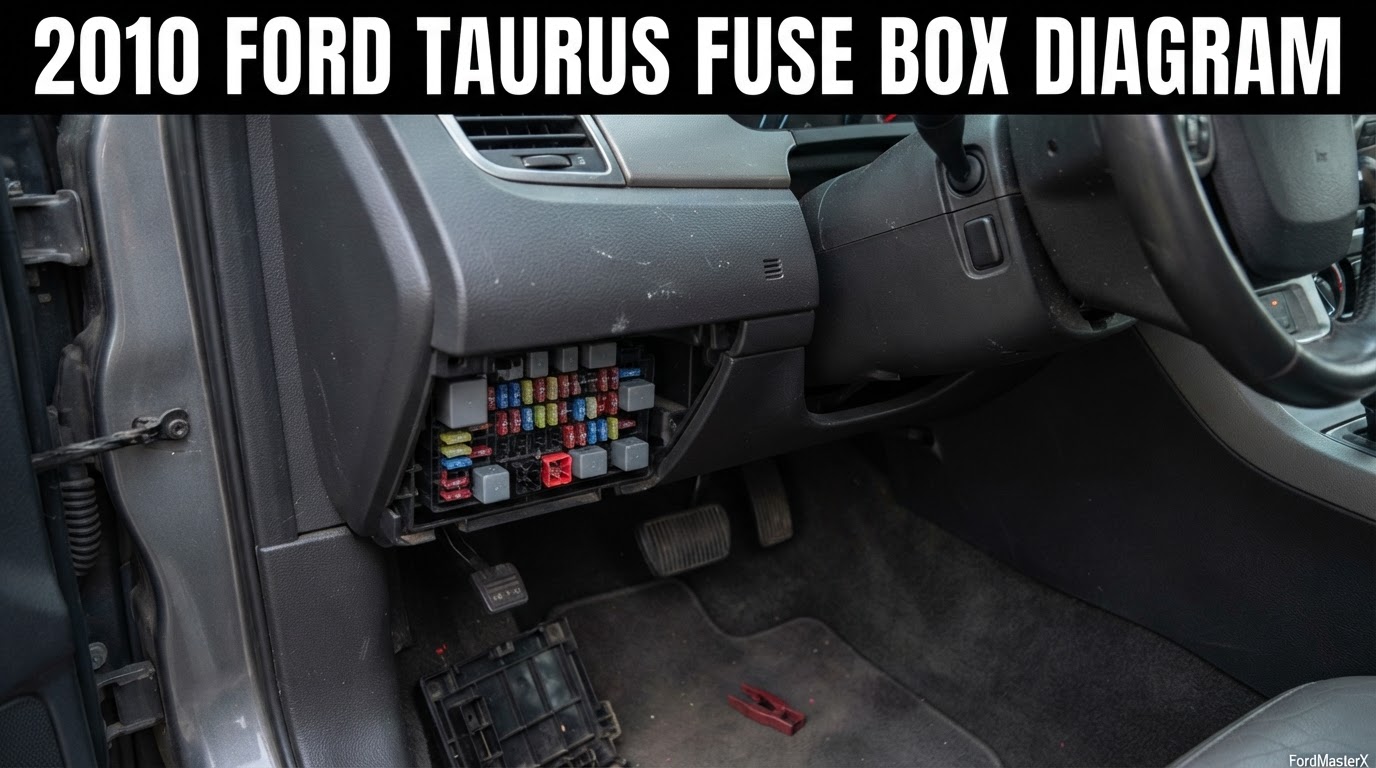
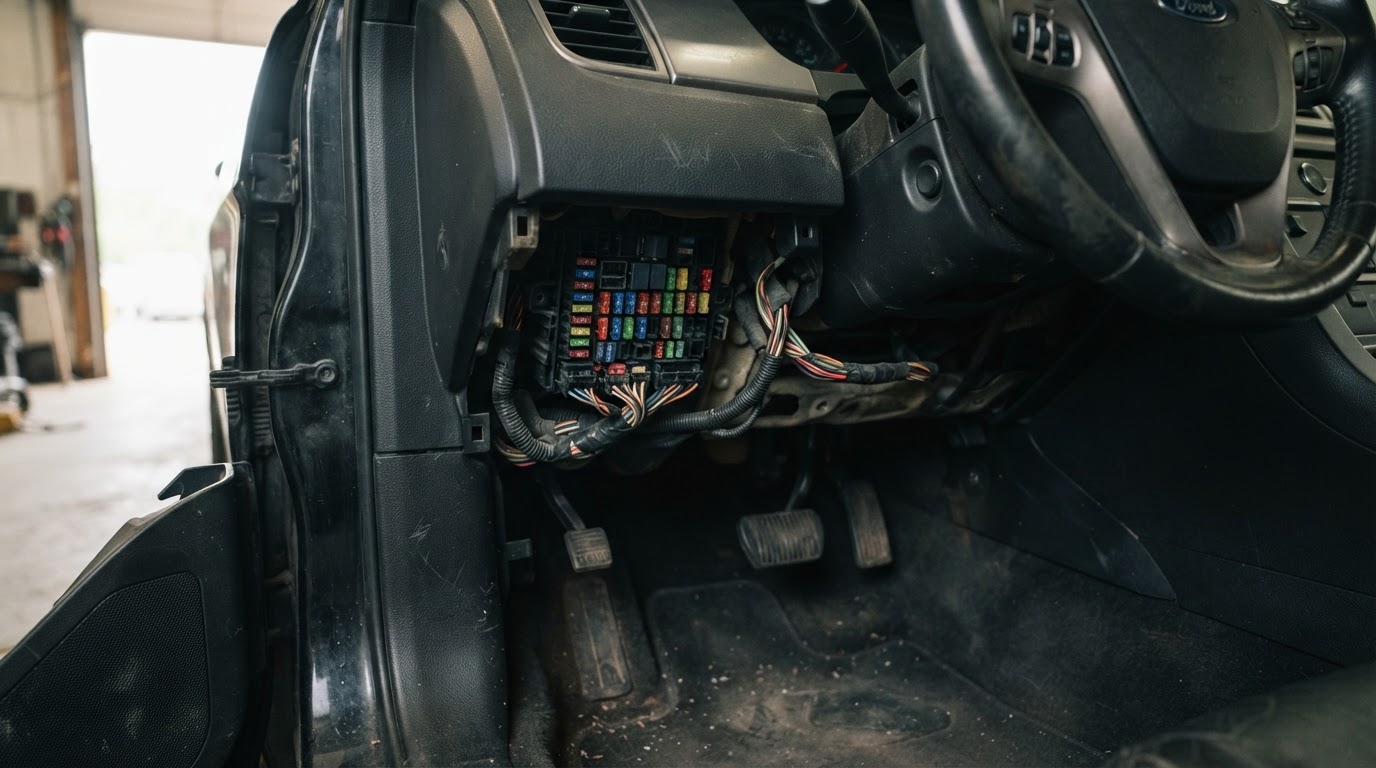
Your 2010 Ford Taurus has two fuse boxes. The Smart Junction Box fuse panel sits under the instrument panel, to the left of the steering wheel. The Power Distribution Box is under the hood.
The fuel pump relay runs through fuse 27 in the Power Distribution Box. It is rated 25A, confirmed directly from Ford’s own owner’s guide.
Most generic charts for this body style blend 2010 through 2019 into one table. Ford kept this plain numbered scheme through the 2012 model year. It then redesigned both boxes for the 2013 facelift and reused several position numbers for unrelated circuits. A chart built from a 2013 or newer Taurus will send you to the wrong fuse on this one.
Skip to what a popular online chart gets wrong about this exact box if that is why you are here.
Where are the fuse boxes on a 2010 Ford Taurus?


Smart Junction Box fuse panel. Passenger compartment, under the instrument panel to the left of the steering wheel. That location comes directly from Ford’s printed 2010 Taurus owner’s guide.
Power Distribution Box. Engine compartment, under the hood. It carries the high current fuses: the starter relay, both cooling fan fuses and the fuel pump fuse.
Worth knowing: the box cover on your specific car has a label printed on the underside. Trim level and options move things around in ways a generic chart cannot see. That label is the final authority.
What a popular online chart gets wrong about this exact box


Ford’s printed 2010 Taurus owner’s guide is the primary source behind every value in this article. Checked against it, one widely circulated fuse chart for this generation gets several high current positions wrong.
| Circuit | What one popular chart shows | What Ford’s owner’s guide shows |
|---|---|---|
| Engine cooling fan | Fuse 7, 50A | Fuse 28, 80A |
| PCM relay | Fuse 11, 50A | Fuse 11, 30A |
| Fuse position 13 | Instrument panel power point, 20A | Adaptive cruise control, 15A |
| Fuel pump relay | Fuse 27, 15A | Fuse 27, 25A |
A 50A fuse cannot carry the load Ford built this circuit for. Trust that chart, put a 50A fuse where the engine cooling fan needs 80A, and it blows again almost immediately. That usually happens right after sitting in traffic with the air conditioning running.
Smart Junction Box fuse chart: fuses 1 to 48


The chart below comes from Ford’s own 2010 Taurus owner’s guide. A second, independent reading of the 2011 model year returns the identical table, position for position.
Positions marked “Not used” carry no live circuit on any trim.
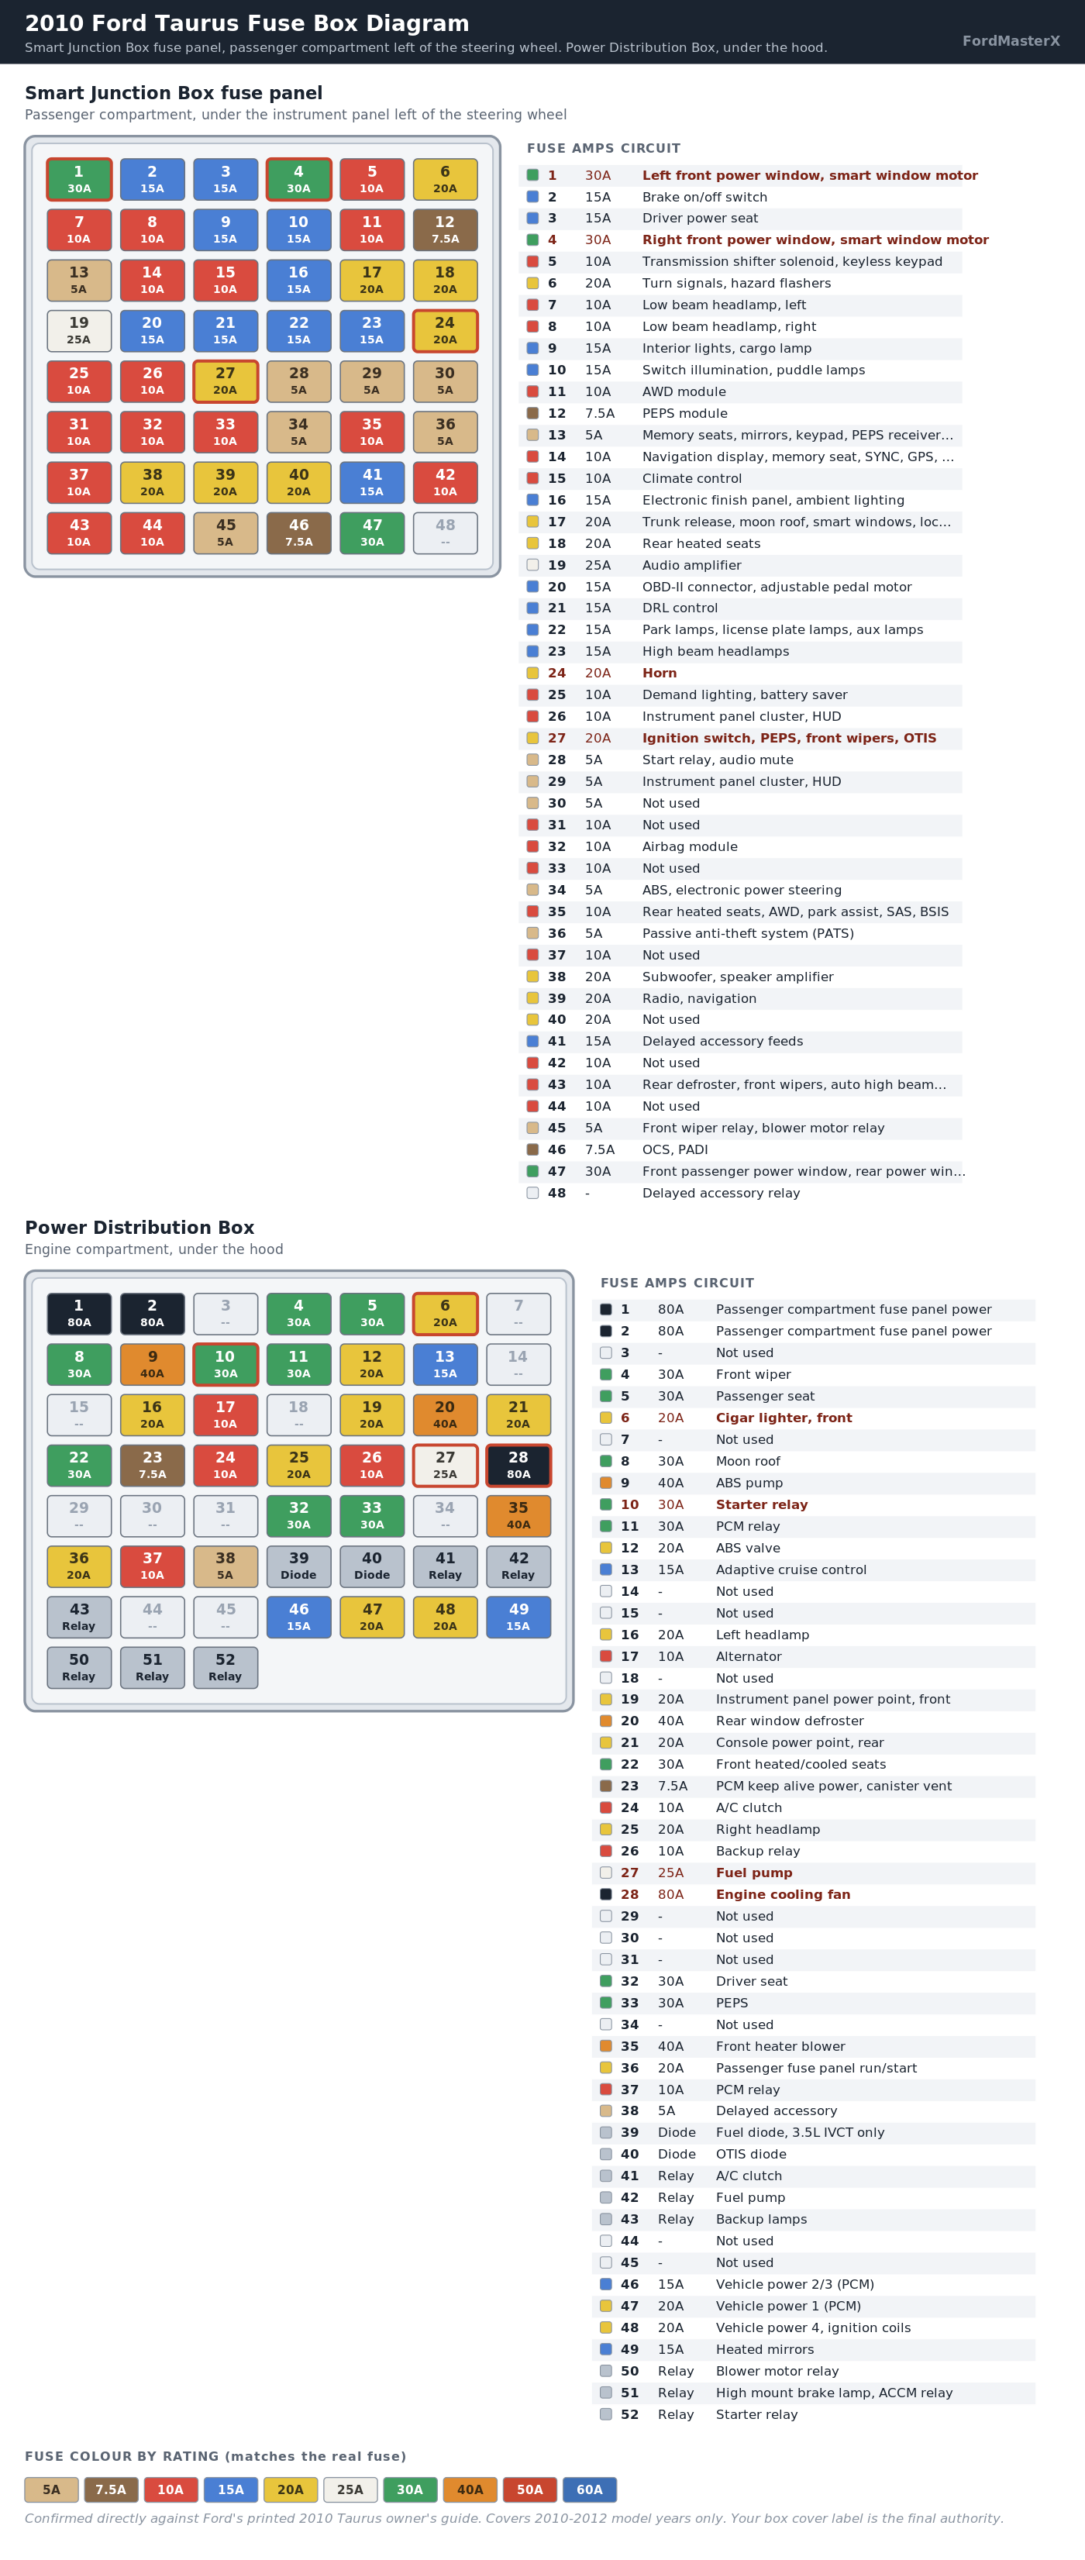
| Fuse | Amps | Circuit protected |
|---|---|---|
| 1 | 30A | Left front power window, smart window motor |
| 2 | 15A | Brake on/off switch |
| 3 | 15A | Driver power seat |
| 4 | 30A | Right front power window, smart window motor |
| 5 | 10A | Transmission shifter solenoid, keyless keypad |
| 6 | 20A | Turn signals, hazard flashers |
| 7 | 10A | Low beam headlamp, left |
| 8 | 10A | Low beam headlamp, right |
| 9 | 15A | Interior lights, cargo lamp |
| 10 | 15A | Switch illumination, puddle lamps |
| 11 | 10A | All wheel drive (AWD) module |
| 12 | 7.5A | Passive entry/passive start (PEPS) module |
| 13 | 5A | Memory seats, mirrors, keypad, PEPS receiver, driver’s door module |
| 14 | 10A | Navigation display, memory seat, SYNC, center information display, GPS, driver seat |
| 15 | 10A | Climate control |
| 16 | 15A | Electronic finish panel, ambient lighting |
| 17 | 20A | Trunk release, moon roof, smart windows, lock/unlock |
| 18 | 20A | Rear heated seats |
| 19 | 25A | Audio amplifier |
| 20 | 15A | Diagnostic connector (OBD-II), adjustable pedal motor |
| 21 | 15A | Daytime running lamps (DRL) control |
| 22 | 15A | Park lamps, license plate lamps, auxiliary lamps |
| 23 | 15A | High beam headlamps |
| 24 | 20A | Horn |
| 25 | 10A | Demand lighting (battery saver) |
| 26 | 10A | Instrument panel cluster, heads up display |
| 27 | 20A | Ignition switch, PEPS, front wipers, one touch integrated start (OTIS) |
| 28 | 5A | Start relay, audio mute |
| 29 | 5A | Instrument panel cluster, heads up display |
| 30 | 5A | Not used, spare |
| 31 | 10A | Not used, spare |
| 32 | 10A | Airbag module |
| 33 | 10A | Not used, spare |
| 34 | 5A | Anti-lock brake system (ABS), electronic power steering |
| 35 | 10A | Rear heated seats, AWD, rear park assist, steering angle sensor, blind spot information system, multi-contour seats |
| 36 | 5A | Passive anti-theft system (PATS) |
| 37 | 10A | Not used, spare |
| 38 | 20A | Subwoofer, speaker amplifier |
| 39 | 20A | Radio, navigation |
| 40 | 20A | Not used, spare |
| 41 | 15A | Delayed accessory feeds |
| 42 | 10A | Not used, spare |
| 43 | 10A | Rear window defroster, front wipers, automatic high beam controller, rain sensor |
| 44 | 10A | Not used, spare |
| 45 | 5A | Front wiper relay, blower motor relay |
| 46 | 7.5A | Occupant classification sensor (OCS), passenger airbag deactivation indicator (PADI) |
| 47 | 30A circuit breaker | Front passenger power window, rear power windows |
| 48 | – | Delayed accessory relay |
Power Distribution Box fuse chart: fuses 1 to 52
The same owner’s guide covers the engine bay box. Positions 39 and 40 are diodes. Positions 41 through 43 and 50 through 52 are relays rather than blade fuses. Each is listed with its function instead of an amperage.
| Fuse/Relay | Amps | Circuit protected |
|---|---|---|
| 1 | 80A | Passenger compartment fuse panel power |
| 2 | 80A | Passenger compartment fuse panel power |
| 3 | – | Not used |
| 4 | 30A | Front wiper |
| 5 | 30A | Passenger seat |
| 6 | 20A | Cigar lighter, front |
| 7 | – | Not used |
| 8 | 30A | Moon roof |
| 9 | 40A | Anti-lock brake system (ABS) pump |
| 10 | 30A | Starter relay |
| 11 | 30A | Powertrain Control Module (PCM) relay |
| 12 | 20A | ABS valve |
| 13 | 15A | Adaptive cruise control |
| 14 | – | Not used |
| 15 | – | Not used |
| 16 | 20A | Left headlamp |
| 17 | 10A | Alternator |
| 18 | – | Not used |
| 19 | 20A | Instrument panel power point, front |
| 20 | 40A | Rear window defroster |
| 21 | 20A | Console power point, rear |
| 22 | 30A | Front heated or heated/cooled seats |
| 23 | 7.5A | PCM keep alive power, canister vent |
| 24 | 10A | A/C clutch |
| 25 | 20A | Right headlamp |
| 26 | 10A | Backup relay |
| 27 | 25A | Fuel pump |
| 28 | 80A | Engine cooling fan |
| 29 | – | Not used |
| 30 | – | Not used |
| 31 | – | Not used |
| 32 | 30A | Driver seat |
| 33 | 30A | Passive entry/passive start (PEPS) |
| 34 | – | Not used |
| 35 | 40A | Front heater blower |
| 36 | 20A | Passenger compartment fuse panel run/start |
| 37 | 10A | PCM relay |
| 38 | 5A | Delayed accessory |
| 39 | Diode | Fuel diode, 3.5L IVCT only |
| 40 | Diode | One touch integrated start (OTIS) diode |
| 41 | Relay | A/C clutch |
| 42 | Relay | Fuel pump |
| 43 | Relay | Backup lamps |
| 44 | – | Not used |
| 45 | – | Not used |
| 46 | 15A | Vehicle power 2 and vehicle power 3 (PCM) |
| 47 | 20A | Vehicle power 1 (PCM) |
| 48 | 20A | Vehicle power 4, ignition coils |
| 49 | 15A | Heated mirrors |
| 50 | Relay | Blower motor relay |
| 51 | Relay | High mount brake lamp with ACCM relay |
| 52 | Relay | Starter relay |
Every position in both boxes is accounted for here. Ford’s manual marks every empty slot “Not used” rather than leaving it undocumented. That level of detail is rare for a chart this old.
A cheap fuse assortment kit covers both the mini and standard blade sizes used across these two boxes. It costs less than a single dealer fuse and saves a second trip. Any brand meeting the ATO/ATC standard fits.
2010 Ford Taurus symptom to fuse guide
Readers usually arrive with a symptom, not a fuse number. This maps the common ones.
| What is not working | Check this fuse |
|---|---|
| Front cigar lighter or 12V power point dead | Fuse 6, 20A (Power Distribution Box) |
| Rear console power point dead | Fuse 21, 20A (Power Distribution Box) |
| No crank, no start | Fuse 10, 30A, starter relay (Power Distribution Box) |
| Engine will not start, fuel pump suspected | Fuse 27, 25A (Power Distribution Box) |
| No air movement at any blower speed | Fuse 35, 40A, front heater blower (Power Distribution Box) |
| Horn will not sound | Fuse 24, 20A (Smart Junction Box) |
| High beam headlamps out | Fuse 23, 15A (Smart Junction Box) |
| Low beam headlamp out, left side | Fuse 7, 10A (Smart Junction Box) |
| Driver power window dead | Fuse 1, 30A (Smart Junction Box) |
| Passenger rear power window dead | Fuse 47, 30A circuit breaker (Smart Junction Box) |
| Airbag warning light on | Fuse 32, 10A, airbag module (Smart Junction Box) |
| ABS warning light on | Fuse 9, 40A, or fuse 12, 20A (Power Distribution Box), or fuse 34, 5A (Smart Junction Box) |
| Rear window defroster dead | Fuse 20, 40A (Power Distribution Box) |
| Radio or navigation dead | Fuse 39, 20A (Smart Junction Box) |
| Rear heated seats not working | Fuse 18, 20A (Smart Junction Box) |
How do you tell if a fuse is actually blown?
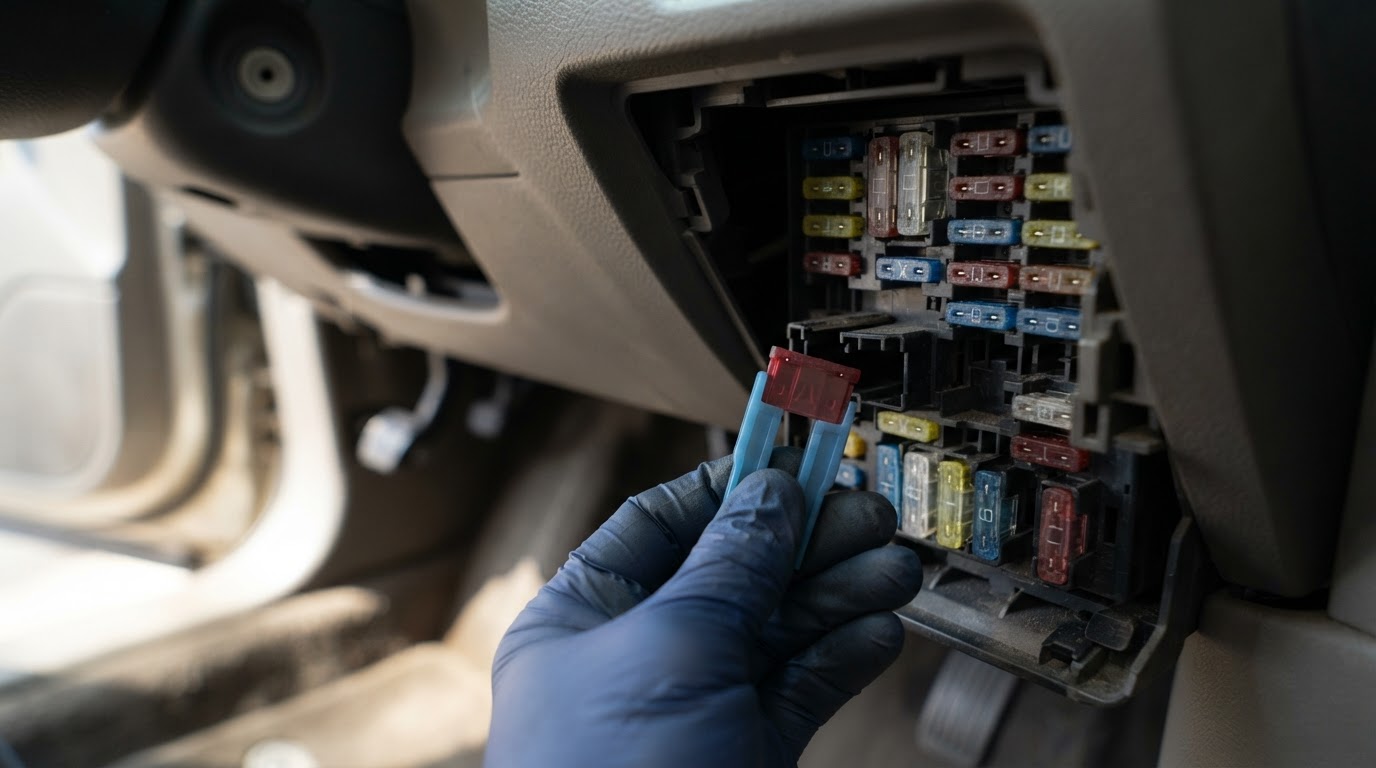
Ford’s own manual puts it plainly: a blown fuse is identified by a broken wire inside it. Pull the fuse and look through the plastic window at the metal strip.
A hairline break is easy to miss. Hold the fuse up to a light, or test continuity with a multimeter set to ohms. Near zero resistance means the fuse is good.
Never guess the replacement rating. Match the number printed on the old fuse, and cross check your box cover label. A higher rated fuse lets the wiring become the fuse instead. That costs far more to fix than a blown fuse ever does.
Why does the same fuse keep blowing?
A fuse that blows once is usually a one-off surge. One that blows again within days is telling you something is wrong upstream, not asking for a bigger fuse.
Unplug whatever you most recently added. A phone charger left in a power point is a common repeat offender on this car. So is an aftermarket amplifier wired into the audio fuses, or a dash cam tapped into a delayed accessory feed.
Check for chafed insulation where the harness flexes. The door jamb and anything routed near the steering column move thousands of times over a car’s life.
If a fuse blows the instant you push it in, that circuit has a hard short. Stop replacing fuses and trace the wiring with a proper diagnostic tool instead of guessing. A plastic fuse puller keeps you from cracking the housing while you work through the circuit.
Does this chart work for the 2011, 2012 and 2013 Taurus too?
For 2011 and 2012, yes. Ford kept this exact fuse scheme through the 2012 model year. A second, independent reading of the 2011 model year returned a table identical position for position to the one above.
Not for 2013 and later. Ford redesigned both boxes for the 2013 facelift and reused several position numbers for different circuits. Fuse 27 switches from the fuel pump relay to the front cigar lighter and power point instead. See the 2013 Ford Taurus fuse box diagram for that chart.
The box names change too. 2010 to 2012 cars use a Smart Junction Box and Power Distribution Box, the two boxes covered on this page. 2013 and later cars use a Body Control Module panel and a renumbered Battery Junction Box instead.
2010 Ford Taurus fuse quick reference
The fuses owners look up most, in one place.
| What you want | Fuse | Amps | Box |
|---|---|---|---|
| Cigar lighter, front power point | 6 | 20A | Power Distribution Box |
| Starter relay | 10 | 30A | Power Distribution Box |
| Fuel pump | 27 | 25A | Power Distribution Box |
| Engine cooling fan | 28 | 80A | Power Distribution Box |
| Front heater blower | 35 | 40A | Power Distribution Box |
| Driver power window | 1 | 30A | Smart Junction Box |
| Horn | 24 | 20A | Smart Junction Box |
| Airbag, restraints | 32 | 10A | Smart Junction Box |
| High beam headlamps | 23 | 15A | Smart Junction Box |
| Radio, navigation | 39 | 20A | Smart Junction Box |
Not sure your car matches this exactly? Your box cover label is the final authority. Options such as all wheel drive, memory seats and the SHO or Limited trim packages add or remove specific fuses. This guide notes those variants where Ford’s own manual lists them.