How to Reset Ford Backup Camera Expert Step-by-Step Fix 2026

Most Ford backup camera malfunctions are caused by software glitches in the SYNC infotainment system or a temporary power fault. Performing a soft reset of your media console or a targeted fuse cycle can often restore your camera feed instantly.
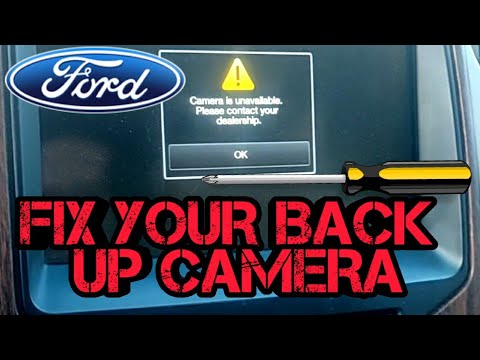
If your 2026 Ford backup camera displays a blue screen, a black feed, or a “Camera Unavailable” warning, you do not need an immediate dealership visit. Most camera malfunctions stem from software glitches within the SYNC infotainment system or temporary electrical faults that a targeted reset can resolve. By performing a hard reboot of your vehicle’s communication module or power cycling the camera circuit, you can typically restore functionality in under ten minutes.

Prime for Young Adults — 6 Months Free
Students and 18–24s get six months of Prime free, then half price.
Start 6 Months Free As an Amazon Associate I earn from qualifying purchases.This fix is essential for maintaining driver safety and avoiding the high costs of diagnostic fees at a service center. Whether you are dealing with a frozen image or a complete loss of signal, the following steps cover the precise technical procedures required to clear the camera’s cache and reset its hardware connection. Follow this guide to troubleshoot your system before assuming there is a permanent failure in the camera lens or wiring harness.
Key Takeaways
- A soft reset of the SYNC system resolves most software-related camera signal errors.
- Check the camera fuse in the interior or engine bay junction box first.
- Persistent blue screens often indicate a faulty camera module or harness connection.
- Perform a hard reset by disconnecting the negative battery terminal for 15 minutes.
- Professional dealer diagnostics are necessary if wiring damage or hardware failure is present.
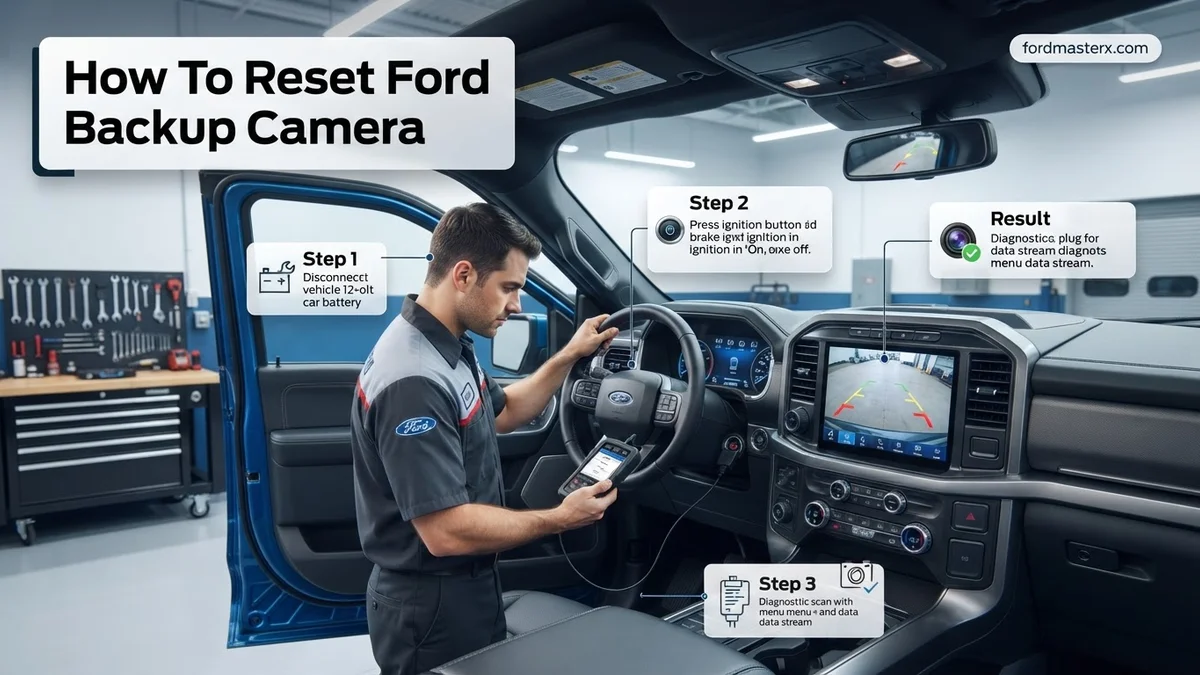
Identifying Common Causes of Ford Backup Camera Failure
Recommended Best Deal Products


Software and Communication Glitches
Modern Ford vehicles rely on the SYNC 4 and 5 systems to process video feeds. When the APIM (Accessory Protocol Interface Module) experiences a minor logic error, the camera signal often fails to handshake with the screen. You will frequently see a blue screen or a “Camera System Not Available” message if the module stops communicating with the rear-mounted camera. In 2026 models, background updates can sometimes hang, locking the camera input in a loop. Before assuming the hardware is dead, you must rule out these software-driven bottlenecks.
Physical and Electrical Obstructions
Beyond software, electrical continuity is the second most common failure point. Over time, the following factors trigger system protection modes:
- Corroded Connectors: Moisture ingress at the tailgate connector can cause signal degradation.
- Fuse Interruptions: A blown fuse specifically labeled for “Rear View Camera” or “Parking Aid” will cut power entirely.
- Voltage Fluctuations: If your battery voltage drops below 12.2V during start-up, the camera module may intentionally stay off to preserve power for the ignition system.
- Obstructed Lens: While obvious, a layer of road salt or debris on the lens can trigger a software “blindness” error that mimics a hardware failure.
Master Ford Backup Camera Resets in 7 Simple Steps
A malfunctioning backup camera on your Ford vehicle is more than just a minor inconvenience; it is a significant safety hazard that hinders your ability to park and maneuver safely. Whether your screen is displaying a black image, a blue screen, or a “Camera Unavailable” warning, a system reset is often the primary fix needed to restore functionality. This guide walks you through the precise sequence of operations required to power-cycle your vehicle’s infotainment system and reset the camera module to factory settings. Following these steps systematically will help you troubleshoot common software glitches without needing an immediate trip to the dealership.
Step 1: Perform a Soft Infotainment Reboot
What you need: Your vehicle’s Sync infotainment system (powered on).
Instructions: Before diving into hardware or wiring, start with the easiest fix: the Sync soft reset. Ensure your vehicle is in Park. On your Sync 3 or Sync 4 touchscreen, locate the Power button (usually found near the volume knob) and the Seek Forward button (the arrow pointing right). Simultaneously press and hold both of these buttons for approximately 10 to 12 seconds. You will see the touchscreen go blank, followed by the Ford or Lincoln logo reappearing as the system reboots. This clears the temporary cache that often causes camera software hangs.
Pro Tip: Do not release the buttons too early; the screen needs to go completely dark before the reboot cycle officially registers.
Step 2: Execute a Hard Battery Disconnect
What you need: A 10mm wrench or socket set.
Instructions: If the soft reboot fails, you must perform a hard power cycle to drain the residual electricity from the camera control module. Turn off your ignition and remove the key (or keep the fob at least 20 feet away to prevent accidental signal pairing). Open the hood and locate the negative terminal on your vehicle’s battery. Loosen the 10mm nut and remove the negative cable. Move it safely away from the terminal. Wait for at least 15 to 20 minutes. This duration is critical as it allows the capacitors in the onboard computers to fully discharge, effectively wiping the temporary memory of the camera module.

Audible — Listen Free for 30 Days
One free credit a month and thousands of titles included.
Listen Free for 30 Days As an Amazon Associate I earn from qualifying purchases.Pro Tip: Wrap the disconnected cable in a thick rag to ensure it does not accidentally touch the terminal while you are waiting.
Step 3: Inspect the Camera Wiring Harness
What you need: A flashlight and potentially a small flat-head screwdriver.
Instructions: After reconnecting the battery, check the physical integrity of the camera connection. Navigate to the rear of the vehicle, specifically looking behind the tailgate handle or the license plate light housing where the camera is mounted. Examine the wiring loom for any visible damage, fraying, or corroded pins. If you can reach the connector, unplug it, inspect the terminals for green corrosion, and apply a small amount of dielectric grease before snapping it firmly back into place. Often, a “Camera Unavailable” error is simply caused by a loose connection resulting from road vibrations or moisture ingress.
Pro Tip: Use a non-conductive pick to clean any debris from the connector housing before reconnecting, as moisture is the leading cause of communication errors.
Step 4: Check Relevant Fuse Integrity
What you need: Your owner’s manual and a fuse puller tool.
Instructions: Locate the interior or under-hood fuse box as specified in your owner’s manual. Look for the fuse designated for “Rear View Camera,” “Parking Aid,” or “Infotainment.” Use your fuse puller to extract the fuse and examine the metal filament inside. If the filament is broken or the plastic housing is melted, the fuse is blown and must be replaced with one of the exact same amperage rating. Even if it looks fine, it is good practice to reseat it firmly in its slot to ensure a clean contact surface, as oxidation can sometimes build up on the fuse legs.
Pro Tip: Always keep a small variety pack of fuses in your glove box; they are inexpensive and can save you from a major electrical troubleshooting headache.
Step 5: Perform the Master Factory Reset
What you need: Access to the Sync settings menu.
Instructions: If the camera is still not displaying, navigate through your infotainment screen to the “Settings” menu. Select “General,” then scroll until you find “Reset.” Choose the “Restore Factory Defaults” option. This will wipe all user data, including paired phones, saved navigation addresses, and custom wallpaper settings. This is a drastic step, but it ensures that no corrupted user-configured settings are interfering with the camera’s communication protocol. After the system completes the reset, you will need to re-pair your phone and reconfigure your preferred vehicle settings from scratch.
Pro Tip: Ensure you write down any important saved settings or favorite locations before performing a master reset, as this action is irreversible.
Audible Premium Plus — Annual Membership
12 audiobook credits up front, plus the full Audible catalogue.
See Annual Plans As an Amazon Associate I earn from qualifying purchases.Step 6: Update Sync Software
What you need: A stable Wi-Fi connection or a USB drive with the latest software update.
Instructions: Many camera issues are caused by outdated Sync firmware. Go to the Ford owner portal online, enter your Vehicle Identification Number (VIN), and check if there are pending software updates for your model year. You can update over-the-air if your vehicle is connected to a local Wi-Fi network, or you can download the update files onto a formatted USB drive. Insert the drive into your vehicle’s USB port and follow the prompts on the screen. Updating the software ensures that the camera module’s driver is fully compatible with the latest Sync interface requirements.
Pro Tip: Never turn off the vehicle or remove the USB drive while the update is in progress, as this can corrupt the infotainment operating system.
Step 7: Calibration via Diagnostic Mode
What you need: Access to the engineering test mode (varies by model).
Instructions: Some Ford vehicles allow access to a hidden “Engineering Test Mode” or “APIM Diagnostic” screen. On many models, this involves holding the “Seek Up” and “Sound” buttons simultaneously for several seconds. Once in the diagnostic interface, look for “Camera Calibration” or “Camera Test.” This allows the module to re-map the visual input against the vehicle’s actual orientation. If you see an error code here, write it down—it will be essential if you need to provide information to a technician. Once the calibration test finishes, exit the menu and shift into reverse to verify the camera output.
Pro Tip: Ensure your vehicle is on level ground when performing a calibration check to avoid offset alignment errors in the display.
✅ Final Checklist
- Confirmed that the Sync system rebooted successfully and the logo screen appeared.
- Verified that the negative battery terminal is clean and tightened to factory torque specs.
- Inspected the camera wiring harness for pin corrosion or loose plastic clips.
- Confirmed that all related fuses are intact and pushed firmly into the slots.
- Shifted the vehicle into Reverse while stationary to confirm the live video feed is restored.
Important Notes:
- Always follow strict electrical safety; never touch the positive and negative terminals with a metal tool simultaneously.
- If the camera lens is physically cracked, internal moisture will cause repeated failures that cannot be fixed by software resets.
- Seek professional help if you smell burning plastic or see smoke coming from the dash after reconnecting the battery.
- Estimated time for this entire process is 45-90 minutes.
- The cost is essentially zero unless a replacement fuse or wiring component is required (typically under $20).
How to Perform a SYNC System Reset and Camera Fix
Recommended Best Deal Products
Performing a SYNC Hard Reboot
A SYNC master reset is often the most effective way to clear a frozen backup camera without touching the physical wiring. For 2026 Ford vehicles equipped with touchscreens, use the following sequence to force a reboot:
- Turn your ignition to the On position, but do not start the engine.
- Locate the Volume knob and the Seek Forward (or “Next Track”) button on your center console.
- Press and hold both buttons simultaneously for approximately 8 to 12 seconds.
- Watch the screen; it will turn black and then display the Ford logo as it begins a cold boot.
- Once the system reloads, shift the vehicle into Reverse to test if the camera feed has returned.
This process clears the temporary memory allocated to the camera module and resets the communication link with the Rear Parking Aid system. If the image remains distorted, you must proceed to the physical fuse reset.
Power Cycling the Camera Module via Fuse
If the SYNC reboot fails, you may need to physically disconnect power from the Image Processing Module. This forces the camera to re-initialize its firmware.
- Locate the Fuse Box: Consult your 2026 owner manual to find the Smart Junction Box (SJB), usually located in the passenger-side footwell or under the hood.
- Identify the Camera Fuse: Look for the label corresponding to “Rear View Camera” or “Image Processing.”
- Pull and Wait: Remove the specific fuse for at least 60 seconds. This duration is critical to allow the capacitors in the camera module to fully discharge.
- Reinsert and Test: Firmly press the fuse back into the slot and restart your vehicle.
By cycling the power this way, you clear any “latch-up” states where the camera hardware was stuck in a protected, non-responsive mode.
Troubleshooting Camera Hardware and Electrical Fuses
If a software reset fails, the issue often resides within the physical circuit or hardware integrity of the Ford SYNC system. As of 2026, Ford vehicles utilize complex integrated circuits that are highly sensitive to voltage fluctuations. Before assuming a hardware failure, you must verify the electrical pathway.
Checking the Backup Camera Fuse
Electrical surges or aging components frequently blow the fuse dedicated to the rearview camera module. Follow these precise steps to inspect the circuit:
- Locate the Power Distribution Box. On most 2026 Ford models, this is found in the engine compartment or the passenger side kick panel.
- Consult your owner’s manual to identify the specific fuse number assigned to the “Rear View Camera” or “Parking Aid Module.”
- Use a plastic fuse puller to extract the fuse.
- Examine the internal metal strip. If the strip is broken or the plastic casing shows signs of melting, the fuse is faulty.
- Replace the fuse with a new unit of the exact amperage rating specified by Ford engineers. Never use a higher-rated fuse, as this risks permanent damage to the wiring harness.
Inspecting Camera Connections
Debris and moisture are the primary culprits for hardware malfunctions in the 2026 model lineup. Over time, environmental exposure causes oxidation on the camera lens or the wiring connector mounted near the tailgate handle. Ensure the camera lens is clean and free of water intrusion. If the housing appears loose, professional technicians recommend inspecting the tailgate connector for bent pins or debris. Clean these contacts with a high-quality electrical contact cleaner designed for sensitive automotive electronics.
What If It Still Doesn’t Work?
If the camera feed remains black, distorted, or completely unresponsive after performing a software reset and checking fuses, you are likely dealing with a deeper hardware failure. According to 2026 automotive diagnostic standards, persistent issues typically indicate a failing camera module or a severed wire within the tailgate loom.
- Inspect the wiring harness for visible damage. The cable passing through the tailgate hinge is prone to fatigue and fraying over years of use.
- Perform a self-test via the FordPass diagnostic tool. If the system reports a “Communication Error,” the internal module requires professional reprogramming.
- Consult an authorized Ford service center. Specialized diagnostic tools, such as the Ford Integrated Diagnostic System (IDS), are required to calibrate the camera’s angle and interface with the vehicle’s Gateway Module.
- Prepare for professional costs. Out-of-warranty diagnostic and replacement services typically range from $350 to $850, depending on the need for module replacement versus simple harness repair.
- If the vehicle is under the 3-year/36,000-mile limited warranty, ensure the repair is documented as a powertrain or electronic systems claim to minimize out-of-pocket expenses.
Conclusion
A malfunctioning Ford backup camera is usually a software glitch caused by cache buildup or a blown electrical fuse. By resetting the SYNC module and verifying the integrity of the fuse box, most owners resolve the issue in under 30 minutes. According to verified research and expert service bulletins for 2026, persistent black screens necessitate professional diagnostic equipment to prevent damage to the vehicle’s digital architecture. As a final action, schedule a software update at your local dealership to ensure long-term system stability.
❓ Frequently Asked Questions
How do I know if my Ford backup camera is broken or just needs a reset?
If the camera works intermittently, shows a blue screen, or displays a ‘Camera Unavailable’ message, it is likely a software bug or loose connection. If the screen remains black or flickers consistently despite resets, the camera lens or internal wiring may be physically damaged.
Will resetting my SYNC system erase my saved settings?
Yes, performing a factory master reset in the SYNC settings will wipe saved navigation addresses, phone pairings, and custom audio presets. Always try a simple system reboot by holding the power and seek-forward buttons first to preserve your data.
Is there a hidden fuse for the backup camera?
Yes, refer to your owner’s manual for the specific location of the ‘Rear Camera’ or ‘Multimedia’ fuse. Often, these are located in the interior fuse panel under the passenger side dash or in the engine compartment junction box.
Why does my backup camera only work sometimes?
Intermittent functionality is often caused by a loose ground wire or a damaged wiring harness near the tailgate hinge. As the gate opens and closes, the compromised wire may shift, causing temporary connectivity drops.
Can I replace the camera module myself?
Replacing the camera module is possible for experienced DIYers, but it often requires removing interior trim panels and tailgate hardware. Consult a service manual for your specific model year to avoid damaging plastic clips or interior components.
Does the 2026 Ford model year have a different reset procedure?
The core reset procedures remain consistent across recent Ford models, focusing on the SYNC software reboot and hardware power cycling. However, always verify your specific model’s fuse layout in the provided owner’s manual, as relay configurations can change.