
Ford Explorer Lug Nut Torque by Model Year and Wheel Hardware

Ford lists two different lug nut torque figures for the 2019 Ford Explorer. Its second-printing PDF owner’s manual gives 100 lb-ft (135 N·m). Its online 2019 Explorer owner’s manual gives 110 lb-ft (149 N·m). Ford’s online manual directs owners to treat the manual originally supplied with their vehicle as the primary reference. If you cannot establish which specification applies to your Explorer, ask Ford or a Ford dealer to confirm it for your VIN before tightening the wheels.
For comparison, Ford’s 2020 and 2026 Explorer manuals each list 150 lb-ft (204 N·m) for the factory M14 × 1.5 hardware in the editions checked. The 2011 manual checked for this guide gives 100 lb-ft (135 N·m). These are individual model-year references for factory wheel hardware in the U.S. market. Start by matching your model year and manual, especially if the Explorer is new to you or the wheels have been replaced.


Ford Explorer Lug Nut Torque Chart
| Year | Ford reference | Hardware | Published torque |
|---|---|---|---|
| 2011 | U.S. guide, fourth printing, p. 348 | ½ × 20 | 100 lb-ft (135 N·m) |
| 2019 | PDF, second printing, p. 338 | 1/2-20 × 1.5 | 100 lb-ft (135 N·m) |
| 2019 | U.S. online owner’s manual | 1/2-20 × 1.5 | 110 lb-ft (149 N·m) |
| 2020 | First printing, p. 370 | M14 × 1.5 | 150 lb-ft (204 N·m) |
| 2026 | Owner’s manual, p. 449 | M14 × 1.5 | 150 lb-ft (204 N·m) |
2019 owners: Start with the Ford manual supplied with your vehicle. If the applicable specification is unclear, ask Ford to confirm it for your VIN and wheel hardware before tightening.
For a 2019 Explorer, use your vehicle’s applicable Ford specification. The two 2019 rows record a difference between documents. They do not form an allowable torque range. The metric figures are reproduced as Ford published them, so readers using a metric wrench can match the units on the applicable manual entry.
The chart covers the editions listed in each row. If your year does not appear, look up that year’s manual and read its wheel nut section. The 2020 and 2026 rows are two verified reference points. They do not establish the value for every intervening vehicle or special-duty configuration. This chart excludes Police Interceptor Utility models, vehicles sold under the Explorer name in other markets, and wheels or hardware with separate manufacturer instructions.
Where the Two 2019 Explorer Torque Figures Come From


The 2019 Explorer PDF owner’s manual, second printing prints 100 lb-ft (135 N·m) under wheel lug nut torque specifications on page 338. The edition footer identifies a July 2018 edition for Canada and the United States. That footer and the printed page number make it possible to identify the exact table when comparing manuals. Use the number printed on the manual page if the PDF viewer counts the cover and introductory pages differently.
The 2019 Explorer online owner’s manual displays 110 lb-ft (149 N·m) in its wheel lug nut torque table. Both references show the same nominal hardware row. The discrepancy is in the specified torque. Ford’s online introduction says the information can differ from the manual originally provided with the vehicle and tells owners to consider their original manual the primary source.
The two tables establish that Ford published different values. Neither table provides a VIN range, production-date split, wheel-diameter exception, or trim-by-trim rule to explain the difference. There is no support in these two references for assigning 100 lb-ft to one trim and 110 lb-ft to another. Finding the online value more recently or seeing it on a second website does not settle which Ford instruction applies to the vehicle in your garage.
This also rules out the tempting compromise of setting the wrench to 105 lb-ft. An average would be a third number with no supporting entry in either manual. Likewise, the higher figure deserves no automatic preference just because it is higher. Treat the year, manual edition, and wheel hardware as the lookup inputs. When they do not lead to a clear result, a vehicle-specific check is the next step.


How to Find the Specification for Your Explorer


1. Confirm the model year and vehicle identity
Use the vehicle’s VIN and ownership records to identify the model year. The date of purchase, first registration, or manufacture can differ from the designated model year. This distinction matters near the 2019–2020 change. Someone who bought an Explorer in 2019 might have a 2019 or a 2020 model. A torque result found by searching the purchase year can therefore point to the wrong manual and hardware listing.


Make sure the source names the vehicle you actually have. An Explorer manual for the U.S. market is the scope of this guide. The name on a search result can look familiar even when the page relates to an export model, a fleet vehicle, or a different model year. For a used vehicle, check that the manual in the glove box belongs to that Explorer. A loose manual from another vehicle is possible, especially if an earlier owner replaced it.
2. Open the wheel nut entry in the matching manual


In the 2019 PDF, look under Wheels and Tires, then Technical Specifications, on printed page 338. The 2026 reference places Wheel Nuts under Changing a Road Wheel on page 449. If the table is hard to find, use the manual’s search for “wheel lug nut torque,” “wheel nut torque,” or “wheel nuts.” A general search for “torque” can land on unrelated fastener or engine entries.
Read the table heading, hardware row, torque units, and footnote together. Write down the model year, manual edition, page or section, and the value in the units your wrench uses. If you are working from a screenshot, retain enough of the page to identify the edition and heading. A cropped image with a torque figure alone cannot tell the next person which vehicle the screenshot applies to.


3. Verify the wheel and fastener setup
Ask whether the wheels, lug nuts, and studs are original or use Ford-recommended replacement hardware for that application. If a previous owner made changes, record the wheel and fastener part numbers where available. A wheel may mount to the same stud pattern and still require different seating hardware or manufacturer instructions. The torque chart cannot establish that an unknown combination is compatible.
If the Explorer has aftermarket wheels, confirm the requirements for the exact wheel, nuts, and vehicle as a combination. This is especially important with spacers, adapters, or replacement studs. If the instructions appear to disagree or the parts cannot be identified, have the installer or a qualified shop inspect the assembly. Matching a wrench setting does not resolve an incompatible nut seat or wheel that fails to sit flush.
4. Ask for VIN-specific confirmation when the manuals disagree


Tell Ford or the servicing dealer that your 2019 Explorer has two published references. Give the VIN and state whether the wheel and fastener setup is factory, aftermarket, or unknown. Identify page 338 of the second-printing PDF and the online page by its wheel lug nut torque heading. Ask which torque and service procedure apply to that vehicle and hardware.
A useful question is, “Can you confirm the wheel lug nut torque in lb-ft and N·m for this VIN and tell me which Ford specification you are using?” If a tire shop is doing the work, relay the confirmed figure and conditions to the technician. Keeping a copy with the service record helps if another person rotates the tires later and encounters a different number online.
What Changes Between the 2019 and 2020 Manuals?
The 2020 Explorer first-printing owner’s manual lists M14 × 1.5 and 150 lb-ft (204 N·m) on page 370. The two 2019 sources show a different hardware designation and lower figures. If you work on both model years, save the references separately. Reusing one vehicle’s torque setting for the other can bypass a real hardware and specification change.
The 2026 Explorer owner’s manual also lists M14 × 1.5 and 150 lb-ft (204 N·m) in its regular road-wheel section. In a manual with multiple sections, the section title matters alongside the number. Look for the entry about ordinary road-wheel installation for your vehicle, and use any special procedure only if the manual identifies it as applicable to your use and equipment.
Hardware designations help distinguish what you are reading. They do not provide enough information to calculate a torque figure independently. The fact that both 2019 tables name the same nominal hardware yet show different torque values makes that clear. When a fastener catalog, a wheel listing, and the vehicle manual each describe the same-looking wheel differently, use the application instructions to establish the torque and the parts documentation to establish fit.
If you reached this page while working on a different Ford vehicle, FordMasterX’s Ford lug nut torque chart is a starting point for locating the correct model. Confirm the final setting against the applicable Ford manual before service.
Wheel Seating, Tightening Order, and the Recheck
Inspect the surfaces that actually touch
The Ford references checked for this guide call for clean threads and clean mounting surfaces. Look at the flat mounting face on the back of the wheel and the mating surface on the hub or brake component it contacts. Ford also directs owners to check the wheel’s center bore and mounting surface for visible corrosion and loose debris. The center bore can help center the wheel. The flat mating faces must still sit together properly for the assembly to clamp as intended.
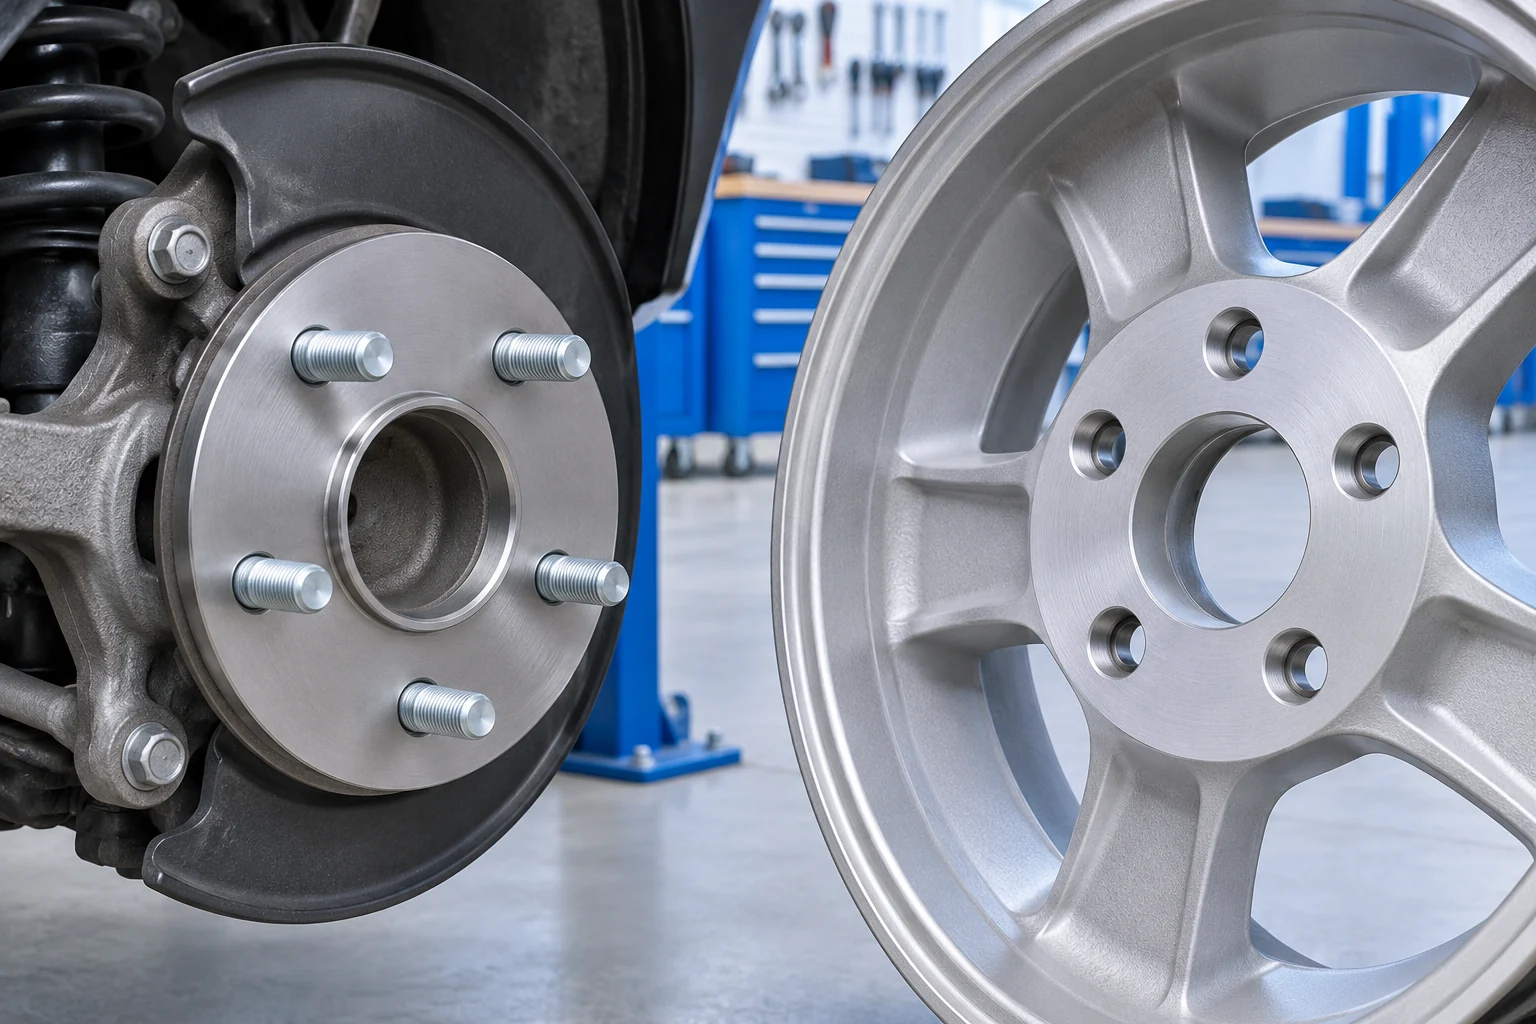
Pause if the wheel rocks against the hub, leaves a visible gap, or contacts something before sitting flush. Tightening a nut to the specified value does not prove the wheel is seated correctly. Resistance at the wrench can come from binding or interference. The Ford manuals also caution that rotor-to-hub fasteners should be secure and positioned so they do not interfere with the wheel’s mounting surface.
Inspect the nuts and studs before trying to torque them. A nut that binds early, will not start smoothly by hand, or sits visibly differently from the others calls for inspection. The same applies to obvious thread damage or an uncertain replacement part. The manuals specify Ford-recommended replacement hardware for their covered applications. If the threads already have a compound on them or a part has been modified, have the applicable service procedure confirmed before applying the chart value.
Follow the tightening order in the correct manual


The 2019 PDF illustrates a five-position star sequence. With one lug at the top, the illustration moves from top to lower right, upper left, upper right, and lower left. Use the order shown in the applicable Ford manual even if you reviewed another vehicle’s instructions recently. In the 2019 PDF’s spare-wheel procedure, Ford tells the reader to seat the wheel snugly before lowering and perform final tightening in the illustrated order after lowering. Use the complete procedure from the matching manual if you are changing a wheel, including its lifting instructions.
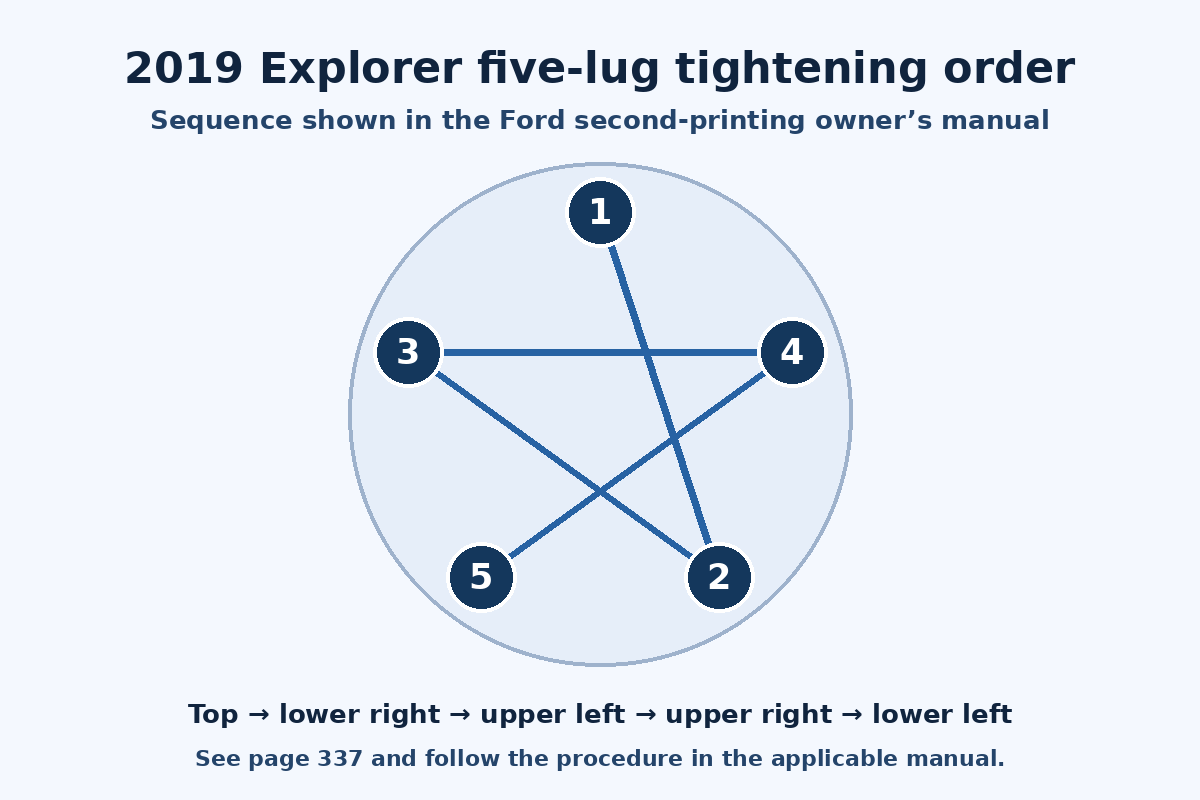
Use a torque wrench set to the confirmed vehicle specification for final tightening. Check the unit marking first because lb-ft and N·m use different numbers for the same torque. An impact wrench setting or the feel of a hand wrench cannot verify the final value. If a shop has already installed the wheel, ask what specification it used and have the shop verify the installation if the figure or hardware is uncertain.
Record the wheel service and recheck within 100 miles
The Ford references used in the chart call for retightening to the specified torque within 100 miles (160 km) after an action that disturbed the wheel. The manuals give examples such as a tire rotation, a flat-tire change, and wheel removal. In practical terms, a routine shop rotation can trigger the same recheck as replacing a tire. Use the applicable torque for that vehicle when you return for the check.
Write down the mileage at installation and set a reminder before the next 100 miles. If a shop did the work, ask whether you should return there for the recheck. If you notice a loose nut, a wheel that appears to shift, a new knock, or other signs the wheel is not secure, stop safely and have the assembly inspected before driving farther. The mileage interval is for a properly installed wheel; it does not address suspected looseness during driving.
Frequently Asked Questions
Is a 2019 Ford Explorer 100 or 110 lb-ft?
The Ford second-printing PDF gives 100 lb-ft (135 N·m), and Ford’s online manual gives 110 lb-ft (149 N·m). Start with the manual originally supplied with your Explorer, as the online Ford introduction directs. If you cannot identify the applicable reference or the wheel hardware is uncertain, ask Ford to verify the specification for your VIN before applying a setting.
Can I use the 2020 Explorer’s 150 lb-ft setting on a 2019?
The 2020 figure is paired with the M14 × 1.5 hardware specified in the 2020 manual. The 2019 records in this guide list different hardware and different figures. Match the manual to the 2019 vehicle and confirm the applicable specification for that assembly.
Does a larger wheel automatically need higher lug nut torque?
The appropriate torque comes from the vehicle and wheel hardware instructions. Wheel diameter alone does not identify the fastener, seating design, or torque. If you have changed wheel size, check the specific wheel and fastener instructions and resolve any uncertainty with the installer before tightening.
Where does the torque figure come from if a quick lookup disagrees?
First compare the year, market, model, manual format, and edition behind both results. Then look for the wheel nut entry in the manual supplied with your vehicle. If the original manual is missing or the sources still disagree, have the vehicle manufacturer or servicing dealer verify the applicable instructions against your vehicle and hardware.