1966-1977 Early Bronco Front Suspension Diagram: Repair 2026

The Early Bronco front suspension is a radius-arm design featuring coil springs and a track bar. The radius arm frame-side bushings must be torqued to 80-100 ft-lbs. If handling feels vague, check the track bar bushings for wear, as these often trigger handling issues mistaken for ECU or steering electronic faults.
📌 Key Takeaways
- Radius arm frame bushings require a torque spec of 80-100 ft-lbs for proper alignment.
- The track bar is critical; ensure no lateral play exists to prevent Death Wobble.
- Always verify alignment after any component replacement to avoid uneven tire wear.
- Modern OBD-II systems do not monitor these mechanical linkages, so ignore check engine light scanners for suspension diagnostics.
- Seek professional help if the axle housing shows stress cracks or damaged mounting points.
The first-generation Ford Bronco, produced from 1966 to 1977, remains a benchmark for off-road engineering due to its unique coil-sprung front end. Unlike the leaf-sprung setups common in contemporary light trucks, the early Bronco utilized a sophisticated radius-arm design that provided superior articulation for uneven terrain. Mastering the early bronco front suspension diagram is essential for any technician tasked with restoring or modifying these vehicles. Whether you are addressing wandering steering, death wobble, or simply performing routine maintenance, understanding how the track bar, drag link, and C-bushings interact is critical. This guide provides the technical specifications and diagnostic frameworks necessary to maintain the integrity of this classic platform, ensuring it performs as reliably as a modern vehicle.
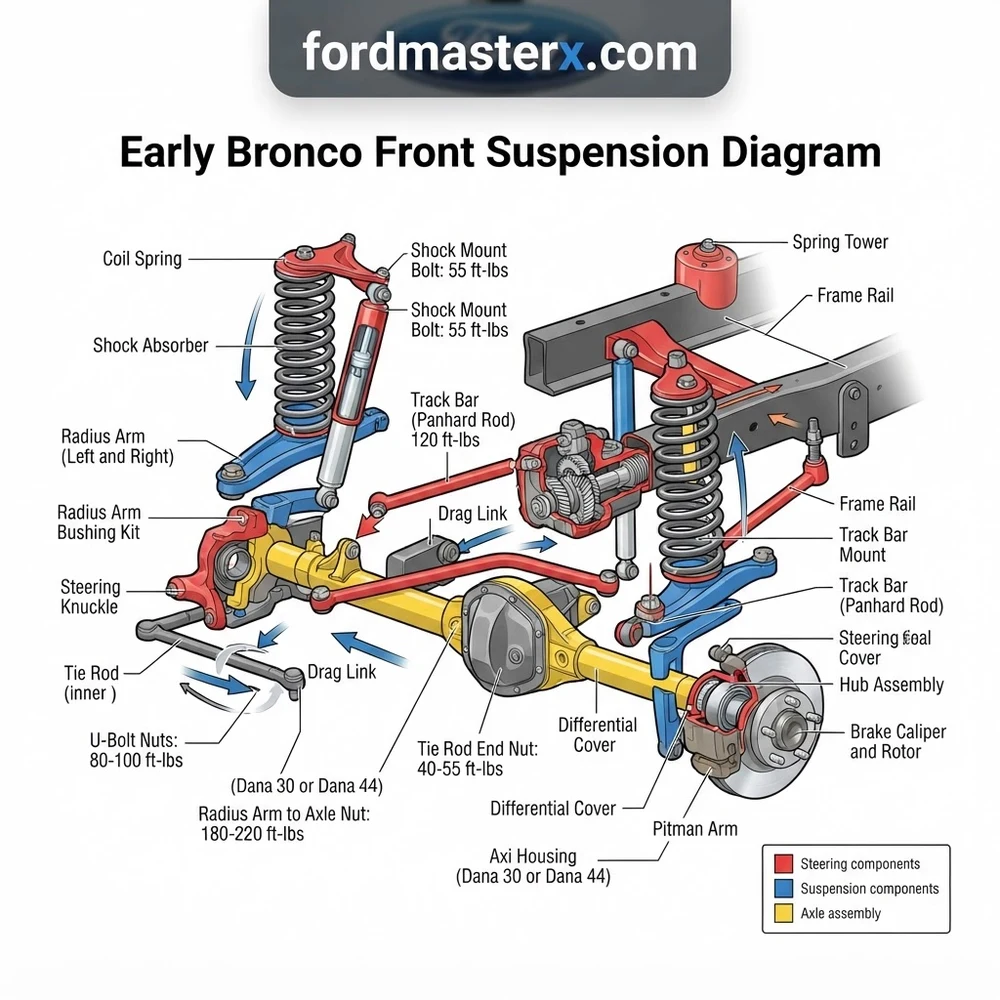
Early Bronco Front Suspension Diagram: Key Components Identified

To perform a professional inspection, you must identify each node within the early bronco front suspension diagram. The platform relies on a Dana 30 or Dana 44 front axle supported by two radius arms that extend rearward to the chassis frame mounts. This triangulation is what defines the vehicle’s handling characteristics. Below is a breakdown of the primary hardware and their specific roles in the suspension geometry.


| Component | Function | Primary Failure Point |
|---|---|---|
| Radius Arm | Controls axle longitudinal position | Bushings / Frame bolt shear |
| Track Bar | Limits lateral axle movement | Frame-side bolt hole elongation |
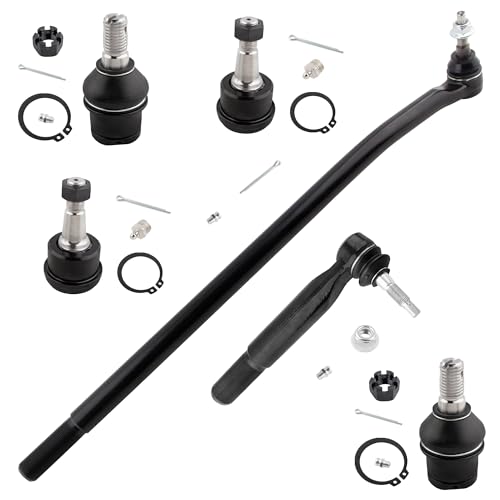
| Drag Link | Transmits steering box input to spindle | Tie rod end (TRE) play |
| C-Bushings | Allows axle rotation (caster) | Dry rot / Compression set |
The radius arms are anchored to the frame via large rubber or polyurethane bushings. Over time, these degrade, causing the axle to shift under load, which introduces unpredictable steering geometry. The track bar is arguably the most critical component for lateral stability; because it connects the axle directly to the frame at an angle, any play in the mounting hardware results in immediate steering feedback issues.
When performing a service, verify the axle wrap-up and rotational clearance. The coil springs, which sit atop the radius arm wedges, must remain seated properly. In modern builds, these are often replaced with high-travel springs, but the fundamental architecture remains identical to the 1966 factory blueprint. If you are comparing this against engine-side diagnostics—such as monitoring oil pressure or troubleshooting a check engine light on a fuel-injected engine swap—ensure your focus remains on the geometry. Suspension mechanical wear often mimics the sensation of drivetrain vibration, which can be misdiagnosed if the engine ECU or related sensors are the primary focus. Always prioritize mechanical integrity before moving to electrical troubleshooting.
Common Symptoms of Early Bronco Suspension Failure


Recognizing behavioral indicators is the first step in successful diagnosis. The early bronco front suspension diagram highlights a system that is sensitive to minor changes in geometry. When one component fails, the entire front end enters a state of instability.
Bump Steer: This occurs when the drag link and track bar are no longer parallel. As the suspension cycles, the axle moves laterally, forcing the wheels to steer without driver input.
Death Wobble: Often triggered by an imbalance in the tires or worn track bar bushings, this violent oscillation requires an immediate inspection of the drag link and ball joints.
Caster Issues: If the vehicle drifts or refuses to return to center, the C-bushings are likely worn or are of the wrong degree for the installed lift height, which directly alters the caster angle.
Excessive Body Roll: While the sway bar is the primary control, worn radius arm bushings allow the entire axle to pivot excessively during cornering, causing a disconnected feel.
Do not confuse suspension-related steering wander with powertrain issues. If the vehicle feels sluggish, verify there is no diagnostic code stored in the ECU if you are running a late-model engine conversion. Unrelated issues like low oil pressure or fluctuating coolant flow can distract from steering geometry faults.
If you experience a vibration that seems tied to road speed, inspect your driveshaft angles and U-joints. Unlike modern OBD-II vehicles that use sensors to help pinpoint issues, the early Bronco is entirely mechanical. You must rely on tactile feedback and visual inspection of the radius arms and track bar mounts.
Diagnostic Steps for the Early Bronco Front Suspension Diagram
A professional diagnostic workflow is non-negotiable when addressing a system as critical as the Bronco front end. Start by lifting the vehicle using jack stands placed on the frame rails, allowing the axle to hang at full droop.
1. Check Ball Joint Integrity: With the wheels off, grasp the tire at the 12 and 6 o’clock positions. Apply a push-pull motion to identify play in the ball joints. Any movement indicates a requirement for replacement.
2. Inspect Radius Arm Bushings: Use a pry bar to apply force to the radius arm where it meets the frame bracket. If you observe significant movement or cracking in the rubber, the geometry of the front axle is compromised.
3. Validate Track Bar Hardware: Check the frame-side mounting hole. On many early Broncos, the hole becomes “egged out” over time. This creates a slack condition that cannot be fixed by simply tightening the torque spec; the hole must be welded and re-drilled or fitted with a heavy-duty bracket.
4. Pitman Arm and Steering Linkage: Verify that the pitman arm is tight on the steering box sector shaft. Use a torque wrench to ensure the nut meets the OEM torque spec of 150-175 ft-lbs, depending on the specific model year and steering gear.
5. C-Bushing Alignment: Inspect the C-bushings for signs of pinching. If you have installed a suspension lift, ensure the bushing degree (e.g., 2, 4, or 7-degree) compensates correctly for the new pinion angle.
For standard Dana 44 front-end configurations, the track bar bolt should be tightened to 80-100 ft-lbs. Always use grade 8 hardware. When dealing with steering tie rod ends, ensure cotter pins are used, as these are critical for preventing catastrophic failure during operation.
When troubleshooting steering, keep in mind that the steering box itself may be the culprit rather than the linkage. A worn sector shaft bushing within the steering gear can mimic the symptoms of a failed drag link. Distinguishing between these requires removing the steering link from the pitman arm and testing the gear directly. If you are also maintaining the engine, ensure your maintenance logs note that internal engine components—like the timing chain or coolant flow sensors—are separate from your steering and suspension diagnostic cycles.
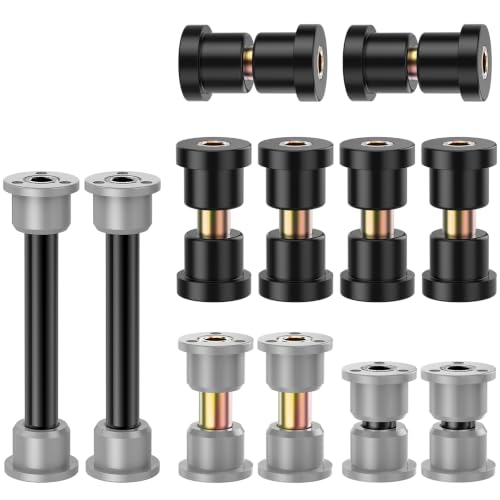


Upgrading for Performance: Stock vs Long-Arm Kits


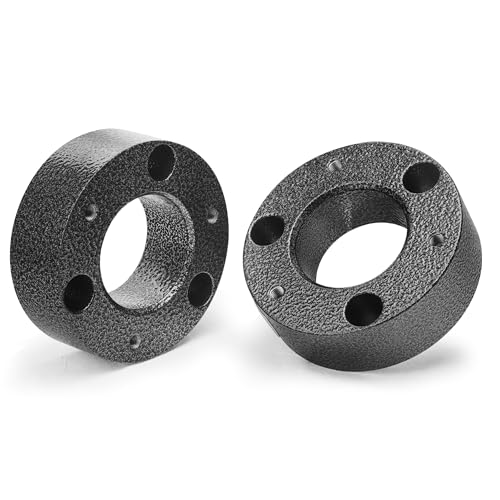
For many owners, the factory suspension geometry is insufficient for modern rock crawling or high-speed desert driving. The transition from short-arm to long-arm kits is the most common upgrade. The primary benefit of a long-arm configuration is a reduction in the “bind” experienced by short radius arms during heavy articulation. By extending the pivot point further back on the chassis, the axle arc is flatter, which results in better caster stability throughout the full range of vertical travel.
However, moving to a long-arm kit requires significant fabrication. You must install new frame brackets, which necessitates professional welding. Furthermore, upgrading to long-arm kits often requires re-indexing the track bar to ensure the drag link remains parallel, preventing bump steer. While performance is significantly increased, the complexity of the installation means that any misalignment will be magnified.
If you are installing long arms, check for clearance issues with exhaust piping and fuel lines. Many early Bronco setups, especially those with custom engine swaps, have tight clearances near the transmission tunnel and frame rails that can be impacted by extended radius arm movement.
When debating between stock restoration and long-arm upgrades, consider the intended use. Stock radius arms are perfectly adequate for trail riding and street driving if the bushings are high-quality polyurethane. Long-arm kits should only be pursued if you require maximum suspension articulation. Always remember that suspension modifications affect the vehicle’s center of gravity and braking behavior.


Early Bronco Front Suspension Diagram Questions Answered
How often should I check the torque spec on my radius arm bolts?
Due to the constant vibration and heavy load, you should inspect the radius arm and track bar mounting hardware during every oil change interval. Use a high-quality torque wrench and ensure you are meeting the specific torque spec listed for your grade of hardware.
Can a bad front suspension cause a check engine light to trigger?


No, a mechanical suspension failure does not store a diagnostic code in the ECU. However, if your vehicle has been modified with a modern engine and electronic transmission, severe vibrations from a misaligned suspension can occasionally trigger false knock sensor codes or impact delicate electrical connections.
What are the signs that my C-bushings need to be replaced?
The most common sign is a failure of the front axle to maintain proper caster, leading to a “wandering” sensation on the highway. Visually, the bushing will appear flattened or squeezed out from the wedge at the radius arm, indicating the rubber has lost its structural integrity.
Is it necessary to upgrade the track bar when installing a lift?


Yes. A lift changes the distance between the frame and the axle, pulling the track bar out of its parallel position relative to the drag link. An adjustable track bar is required to re-center the axle under the vehicle and restore proper steering geometry to avoid bump steer.
How do I differentiate between steering box wear and suspension play?
With the engine off, have an assistant move the steering wheel back and forth. Observe the pitman arm. If the steering shaft rotates but the pitman arm does not immediately move, the issue is internal to the steering gear. If the pitman arm moves but the wheels do not react, the play is in the linkage, such as the drag link or tie rod ends.
Step-by-Step Guide to Understanding the Early Bronco Front Suspension Diagram
Identify – Inspect all rubber bushings and metal joints for signs of dry rot, cracking, or grease leakage.
Locate – Use the diagram to map the connection points for the radius arms and the track bar.
Reference – Verify the correct order of washers and sleeves on the radius arm mounts as depicted in the schematic.
Connect/Route – Install new hardware, ensuring that all castle nuts are aligned with cotter pin holes.
Verify – Torque all chassis-side fasteners to the specific range, typically 80-100 ft-lbs for primary suspension bolts.
Troubleshoot – Perform a test drive; if steering pull persists, check alignment specs rather than looking for diagnostic code faults in the vehicle electrical system.
{
“@context”: “https://schema.org”,
“@type”: “FAQPage”,
“mainEntity”: [
{
“@type”: “Question”,
“name”: “What does the early bronco front suspension diagram show?”,
“acceptedAnswer”: {
“@type”: “Answer”,
“text”: “The diagram illustrates the layout of the Dana 30 or Dana 44 front axle, including the radius arms, coil springs, track bar, and steering linkage. It identifies the spatial relationship between the axle housing and the frame, essential for maintaining proper geometry during lift kit installations or bushing replacements.”
}
},
{
“@type”: “Question”,
“name”: “How do I read the early bronco front suspension diagram?”,
“acceptedAnswer”: {
“@type”: “Answer”,
“text”: “Start by identifying the fixed frame points, then move to the mobile components like the radius arms and steering drag link. The diagram uses standard automotive symbols to denote attachment points, hardware sizes, and orientation of the coil spring buckets relative to the axle C-wedges.”
}
},
{
“@type”: “Question”,
“name”: “What are the main components in early bronco front suspension diagram?”,
“acceptedAnswer”: {
“@type”: “Answer”,
“text”: “Primary components include the radius arms (for axle location), coil springs (for load bearing), track bar (for lateral control), and steering tie rods. The diagram highlights critical hardware, including castle nuts and cotter pins that require periodic inspection for security and alignment.”
}
},
{
“@type”: “Question”,
“name”: “What are common problems with early bronco front suspension diagram?”,
“acceptedAnswer”: {
“@type”: “Answer”,
“text”: “Common issues include worn radius arm bushings causing vibration, track bar play resulting in steering instability, and sagging coil springs. Unlike modern vehicles, there is no ECU to trigger a check engine light; you must rely on tactile inspection of parts for signs of metal fatigue or excessive play.”
}
},
{
“@type”: “Question”,
“name”: “Can I use early bronco front suspension diagram for DIY repair?”,
“acceptedAnswer”: {
“@type”: “Answer”,
“text”: “Yes, the diagram is essential for ensuring correct part orientation during reassembly. When performing DIY repairs, strictly follow torque specifications for suspension hardware. While these models lack electronic diagnostic codes, mechanical precision is vital to ensure vehicle stability and safety during highway driving.”
}
},
{
“@type”: “Question”,
“name”: “What tools do I need for early bronco front suspension diagram?”,
“acceptedAnswer”: {
“@type”: “Answer”,
“text”: “You will need a high-capacity torque wrench, a set of deep-well impact sockets, a pickle fork for tie rod separation, and a ball joint press. Ensure you have high-grade replacement hardware, as original 1970s fasteners often suffer from fatigue and should be replaced during any major overhaul.”
}
}
]
}