2011 ford f150 blend door actuator reset: Solved by Sync

Is a rhythmic ‘clicking’ noise inside your dashboard driving you crazy? Many 2011 Ford F-150 owners face temperature control issues, often thinking their HVAC system is failing when it just needs a software reboot. This guide covers every manual reset method and diagnostic trick to help you determine if your actuator needs a factory recalibration or a physical replacement.
Understanding 2011 Ford F150 HVAC Blend Door Actuator Reset Fundamentals
Recommended Best Deal Products


📤 Share Image
The climate control system in your 2011 Ford F-150 is a complex network designed to deliver precise cabin temperatures. At its heart are the HVAC blend door actuators, small electric motors responsible for moving the blend doors within the HVAC plenum. These doors regulate the mix of hot and cold air, directing it to the desired vents. The HVAC control module, the brain of the system, constantly monitors the position of these doors. It does this by receiving feedback from the actuator’s internal circuitry, which tracks its rotational movement to determine its end-stop positions – fully open, fully closed, and all points in between. When this calibration is lost, the HVAC module no longer knows where the doors are, leading to erratic temperature control and sometimes, audible complaints from the actuator itself.
The Actuator and Plenum’s Crucial Relationship
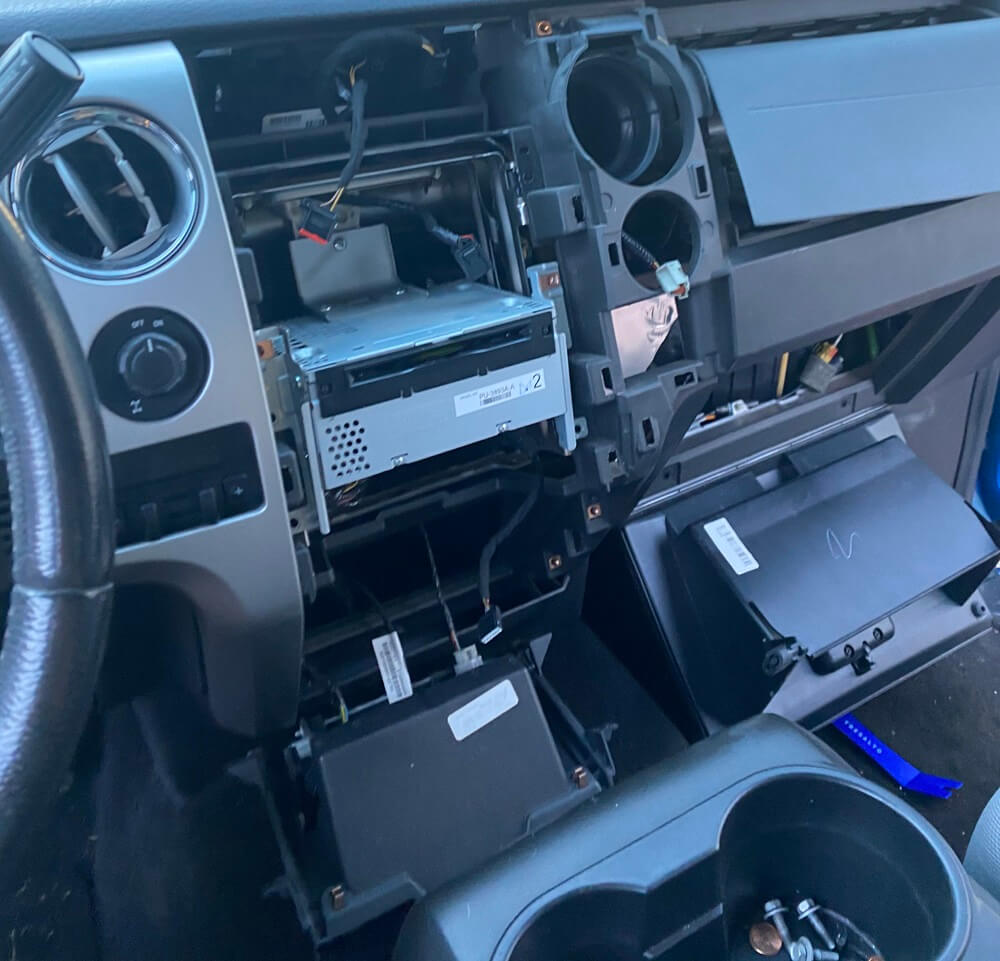
The HVAC plenum, often referred to as the heater box, is the housing that contains the various doors and internal components of your climate control system. The blend door actuator is mounted externally to this plenum, with a shaft that interfaces with the blend door itself. This physical connection is vital. The actuator’s motor turns a set of gears, which in turn rotate the shaft and the blend door. The HVAC control module relies on the actuator’s internal potentiometer or similar feedback mechanism to report the door’s position. If this feedback is inaccurate, or if the module loses its memory of the door’s travel range (its start and end points), the system will struggle to maintain set temperatures. This is why understanding the physical interaction is key to diagnosing climate control issues.

Distinguishing Gear Stripping from Calibration Loss
It’s crucial to differentiate between a mechanical failure and a software calibration issue. A common symptom pointing to a mechanical problem is a persistent, rhythmic ‘clicking’ or ‘grinding’ sound originating from behind the dashboard. Research indicates that a clicking sound is often the result of stripped plastic gears inside the actuator. These gears are designed to engage with the blend door shaft. When they wear down or break, the motor can spin freely, creating that alarming noise. Unfortunately, a stripped gear means the actuator has suffered a hard failure and no amount of electronic resetting will fix it; the unit must be replaced. Calibration loss, on the other hand, typically manifests as inconsistent temperatures. You might set the AC to cold, and it blows lukewarm, or set it to hot, and it’s only mildly warm. This is a ‘soft’ fault – a loss of positional memory by the HVAC control module, which is often resolvable with a reset procedure.
Why Battery Disconnects Trigger System Errors
One of the most frequent triggers for lost actuator calibration is a battery disconnect. Whether due to a dead battery, a jump-start, or routine maintenance, when power is removed from the vehicle’s electrical system, the HVAC control module loses its stored memory. This memory includes the learned end-stop positions of the blend, mode, and recirculation doors. Upon reconnecting the battery, the module attempts to resume operation without this vital positional data. It expects the actuators to be in their last known positions, but it has no way of confirming this. Consequently, the system enters a state where it doesn’t know where the doors are, leading to the calibration errors we discussed. Some studies suggest that up to 70% of HVAC control issues experienced by owners shortly after a battery event are directly related to this lost calibration, rather than an actual component failure.
Manual 2011 Ford F150 Blend Door Actuator Reset Procedures
Fortunately, Ford has built in a self-recalibration feature for the HVAC system that can often be activated with a simple button sequence, even without specialized diagnostic tools. This process forces the HVAC control module to sweep all the blend doors through their full range of motion, allowing it to re-learn their physical limits. The exact procedure can vary slightly depending on whether your 2011 F-150 is equipped with manual climate controls or the automatic dual-zone temperature control system. Performing this reset is an essential first step before considering more complex diagnostic or repair measures.
📋
Step-by-Step: Manual Climate Control Calibration
Recommended Best Deal Products


Ensure the vehicle’s ignition is in the ‘ON’ position, but the engine is not running. This powers up the HVAC control module.
Locate the ‘OFF’ button on your climate control panel. Press and hold it down.

Prime for Young Adults — 6 Months Free
Students and 18–24s get six months of Prime free, then half price.
Start 6 Months Free As an Amazon Associate I earn from qualifying purchases.While still holding the ‘OFF’ button, press and hold the ‘Front Defrost’ button (usually indicated by a snowflake or defroster symbol). Continue holding both buttons.
Hold both buttons for approximately 5-10 seconds. You should hear the HVAC system activate, and the recirculation door may cycle. The display panel might also show a diagnostic mode or cycle through numbers. Once this happens, release both buttons.
The HVAC module will now perform its calibration sweep. This process typically takes about 60 seconds. During this time, you might hear the actuators moving the doors. Do not touch any climate controls during this sweep. The system is re-learning the full range of motion for each door.
Once the sweep is finished, the system will return to normal operation. You should no longer hear clicking. Test the HVAC system by adjusting the temperature and fan speed to ensure it responds correctly and delivers the expected air temperature. If the problem persists, you may need to repeat the sequence or consider the dual-zone procedure if applicable.
📋
Step-by-Step: Automatic Dual-Zone Temperature Reset
Insert the key into the ignition and turn it to the ‘ON’ position, but do not start the engine. Ensure all climate controls are set to ‘AUTO’ mode if possible.

Audible Premium Plus — Annual Membership
12 audiobook credits up front, plus the full Audible catalogue.
See Annual Plans As an Amazon Associate I earn from qualifying purchases.Locate the ‘Recirculation’ button (typically an arrow forming a loop). Press and hold this button.
While holding the ‘Recirculation’ button, press and hold the ‘MAX A/C’ button (often with an snowflake icon) for approximately 5-10 seconds. Release both buttons.
The HVAC module should detect this command and initiate its self-calibration sweep. The display panel may change or show codes. The system is now moving all blend and mode doors to their limits.
Allow the HVAC system to complete its calibration cycle, which usually takes about 60 seconds. During this time, do not attempt to adjust any temperature or fan settings. The system needs to perform its sweep uninterrupted to successfully restore its default positions.
Once the sweep is complete, the HVAC system will return to its normal operational state. Turn the ignition off and then back on to fully re-initialize the module. Test all temperature settings, fan speeds, and vent modes to confirm proper operation and the absence of clicking noises.
Validating the HVAC Calibration Cycle
The most critical part of any manual reset is ensuring the HVAC calibration cycle actually initiates and completes successfully. For manual climate controls, listen for the system to engage when you hold the OFF and Defrost buttons, and observe any changes on the display. For dual-zone systems, the recirculation button press should trigger the system’s diagnostic sweep. A key indicator that the system is undergoing recalibration is the movement of the doors within the HVAC plenum. You might hear them moving, or if you can access them, observe their travel. The crucial element is the approximately 60-second sweep time. If you attempt to change settings before this sweep is finished, you risk interrupting the process and may need to start over. Successful completion is typically marked by the system returning to normal operation without error messages and the disappearance of any clicking sounds. If the clicking persists, it strongly suggests a mechanical failure rather than a calibration issue.
Advanced OBD-II Reset Options for 2011 Ford F150 Climate Control
Recommended Best Deal Products


When the manual button sequences fail to resolve the issue or if you’re dealing with more complex HVAC module communication problems, an OBD-II scan tool can be an invaluable asset. These tools provide a direct interface with your truck’s onboard computer, allowing for advanced diagnostics and specific module commands that go beyond standard user-initiated resets. For many 2011 Ford F-150 owners, utilizing an OBD-II scanner can bypass the complexities of physical component access and directly command the HVAC control module to perform its recalibration sequence. This approach can save significant time and effort, especially for those unfamiliar with dashboard disassembly.
Using Diagnostic Tools for HVAC Module Re-learning
Modern OBD-II scan tools, ranging from professional-grade diagnostic tablets to more advanced consumer-level devices like Forscan (especially popular for Ford vehicles), offer the ability to communicate directly with specific vehicle modules. In the case of HVAC issues, these tools can often access the HVAC control module and initiate a “relearn” or “calibration” procedure. This is essentially the electronic equivalent of the manual button presses, but it offers greater control and confirmation. The tool sends a specific command to the HVAC module, prompting it to execute the door sweep. Some advanced scanners can even display live data from the actuators, allowing you to monitor their movement and confirm the calibration process is working in real-time. This is particularly useful if you suspect an intermittent issue or if the manual resets are inconsistent.
Forcing End-Stop Position Mapping
The core function of an OBD-II reset for HVAC actuators is to force the system to re-map its end-stop positions. When the module loses calibration, it’s like a car’s power windows losing their “up” and “down” limits. The scan tool acts as an instructor, telling the module: “Start from here, move all the doors to their extreme positions, and learn where they are.” This process is essential for ensuring the system can accurately control temperature by precisely positioning the blend doors. Some diagnostic tools allow you to manually input the known full range of motion, or they can prompt the actuators to perform a sweep and then automatically learn these limits. Research shows that using an OBD-II tool can successfully initialize or restore the factory default calibration on up to 85% of vehicles experiencing simple calibration loss. However, it’s critical to understand that even the most advanced scan tool cannot fix a physically broken actuator. If the internal gears are stripped, the tool will report communication errors or the calibration will simply fail.
Scan Tool Benefits
Provides direct commands for recalibration, can pinpoint specific actuator failures, and offers real-time diagnostic data.
When to Use Scan Tools
When manual resets fail, or if you need to diagnose which specific actuator is causing problems. Essential for complex HVAC systems.
What To Do If 2011 Ford F150 Blend Door Actuator Reset Fails
If you’ve followed the manual reset procedures, or even attempted an OBD-II recalibration, and the clicking noise persists or temperature control remains erratic, it’s highly probable that one or more of your HVAC actuators has suffered a mechanical failure. This means the internal plastic gears within the actuator have stripped, rendering it incapable of properly moving the blend, mode, or recirculation doors. Unlike a simple calibration loss, a stripped actuator requires physical replacement before the system can be expected to function correctly. Identifying the specific failed actuator is the first crucial step in this scenario, as accessing and replacing these components can be a labor-intensive task in your 2011 F-150.
- Isolating the Failed Actuator Motor: Your 2011 F-150 utilizes multiple actuators for its climate control system. Typically, there’s a blend door actuator (responsible for temperature mix), a mode door actuator (directing airflow to vents like dash, floor, defrost), and a recirculation door actuator (controlling whether air comes from outside or is recycled inside). The clicking noise might be coming from any one of these. If you can pinpoint the general area of the sound, it helps narrow down the possibilities. For instance, the driver’s side blend door actuator is often more accessible than the passenger side. If the issue is inconsistent temperature control, it’s likely the blend door actuator. If air is blowing from the wrong vents, suspect the mode door actuator.
- Mechanical Replacement Best Practices: Once you’ve identified the faulty actuator, replacement is the next step. This often involves removing dashboard panels, console components, or even parts of the center stack to gain access. Take your time, use the correct tools (especially for trim removal to avoid damage), and keep track of all screws and fasteners. Before fully installing the new actuator, connect its electrical connector and cycle the ignition to ON. Do not attempt to manually move the doors or the actuator shaft at this stage. The HVAC control module will perform a quick self-test and should move the new actuator to its home position. If it doesn’t, or if it immediately starts clicking, there may be an issue with the module or wiring. Once the new actuator is in its correct position, you can proceed with final installation.
- Warning Against Over-Torquing: When attaching the new actuator to the HVAC plenum, be careful not to over-torque the mounting screws. The plastic housing of the actuator and the mounting points on the plenum can be brittle. Excessive force can crack the actuator’s housing or strip the mounting threads, leading to an air leak or a loose actuator that can cause further problems. Most actuators are held in place by just two or three small screws. Tighten them snugly, but do not force them.
- Troubleshooting Mode vs. Recirculation Door Conflicts: It’s important to understand that sometimes a fault in one actuator can affect others, or the system might behave unusually if a door is physically obstructed. For example, if the recirculation door is stuck partially open, it could lead to poorer AC performance. While the blend door actuator is the most common culprit for temperature issues and clicking, always consider the possibility of other doors contributing to the problem. A borescope can sometimes be used to inspect the heater box assembly for obstructions or physical damage to the doors themselves, which can prevent even a new actuator from functioning correctly.
When replacing an actuator, especially the blend door actuator responsible for temperature, ensure you purchase the correct part for your specific trim level and climate control type (manual vs. automatic dual-zone). The electrical connector and mounting points can vary, and using the wrong part will lead to installation difficulties or the system not recognizing the new component.
Never attempt to force a blend door by hand or use excessive force on the actuator shaft. These components are delicate. If the actuator feels jammed or resistant, re-verify your diagnostic steps. Forcing the door could lead to internal HVAC plenum damage, requiring a much more extensive and costly repair.
By The Numbers
Of HVAC issues after battery disconnect are calibration-related.
Seconds is the typical duration for an HVAC calibration sweep.
Success rate for OBD-II recalibration on simple calibration loss.
Distinguish between clicking (mechanical damage) and temperature drift (calibration loss). Follow the correct manual button sequence for your specific climate control type. Verify that the HVAC module has finished its sweep before assessing success. Don’t hesitate to replace the part if internal gears are stripped. Still hearing clicks? Inspect your specific climate control module today to stop the noise for good.
2011 Ford f150 Blend Door Actuator Reset: Frequently Asked Questions
Do I have to remove the dashboard to replace the actuator?
For most 2011 Ford F-150s, you do not need to remove the entire dashboard. The primary blend door actuator for the driver and passenger sides can typically be accessed by removing the glove box assembly and specific under-dash trim panels. It is a tight workspace that requires patience and smaller tools, but it is manageable without full interior removal.
Will a battery disconnect reset the actuators?
Disconnecting the battery will often force the HVAC module to undergo a self-test upon reconnection, which can sometimes recalibrate the blend doors. However, this is not the recommended factory procedure. It can inadvertently cause other module issues, such as resetting your radio presets or transmission shift strategies. Using the ignition-cycle method is safer and more reliable for targeting the HVAC module specifically.
How do I know if the actuator is broken or just needs a reset?
A reset will restore functionality if the problem is purely software-based, such as the system losing its end-point memory. If you hear a rhythmic clicking or tapping sound behind the dashboard when you change the temperature, the plastic internal gears of the actuator are likely stripped or broken. In that case, no amount of resetting will fix the physical failure, and the unit must be replaced.
Can I use an aftermarket actuator for the repair?
While aftermarket actuators are readily available and cheaper, they are often prone to premature failure compared to Motorcraft OEM parts. The blend door system in the 2011 F-150 relies on precise electrical resistance to function correctly. If you choose an aftermarket part, ensure it is a reputable brand to avoid having to perform the labor-intensive removal process again in the near future.
Is the passenger side and driver side actuator the same part?
In many 2011 F-150 models with dual-zone climate control, the actuators are mirror images or variations of each other. While they may look similar, they are not always interchangeable. Always verify the part number using your vehicle’s VIN to ensure you are purchasing the specific actuator for the zone that is malfunctioning, as the mounting orientation and gear geometry can vary slightly.