
2007 Ford Fusion Serpentine Belt Diagram: Proper Routing (2026)

The 2007 Ford Fusion serpentine belt routing path requires the belt to weave around the crankshaft, A/C compressor, water pump, alternator, and idler pulley. Ensure the grooved side of the belt contacts the pulleys with grooves, while the smooth back of the belt rides against the belt tensioner and smooth idler pulley.
📌 Key Takeaways
- The standard serpentine belt for the 2.3L I4 is typically a 6-rib, 85-inch belt (Dayco 5060850 or Gates K060850).
- The belt tensioner is spring-loaded; use a 15mm or 17mm socket/wrench to rotate the tensioner arm clockwise to release tension.
- Always verify that all ribs are seated correctly in the pulley grooves to prevent premature fraying or immediate belt ejection.
- A common failure point is the belt tensioner pulley bearing, which often emits a chirping or grinding noise before total failure.
- Seek professional help if the tensioner bolt is stripped or if the crankshaft pulley shows signs of internal damper separation.
Maintaining the accessory drive system on a 2007 Ford Fusion is a standard procedure for fleet maintenance, yet it requires absolute precision regarding pulley orientation and belt tension. Whether you are operating a 2.3L Duratec I4 or the robust 3.0L Duratec V6, failure to follow the specific belt routing path can lead to catastrophic accessory failure or premature wear on the tensioner assembly. This technical guide provides the necessary data to facilitate a successful belt replacement. By adhering to the OEM specifications outlined in the following 2007 Ford Fusion belt diagram analysis, technicians can ensure optimal component longevity and engine performance for this specific model year.
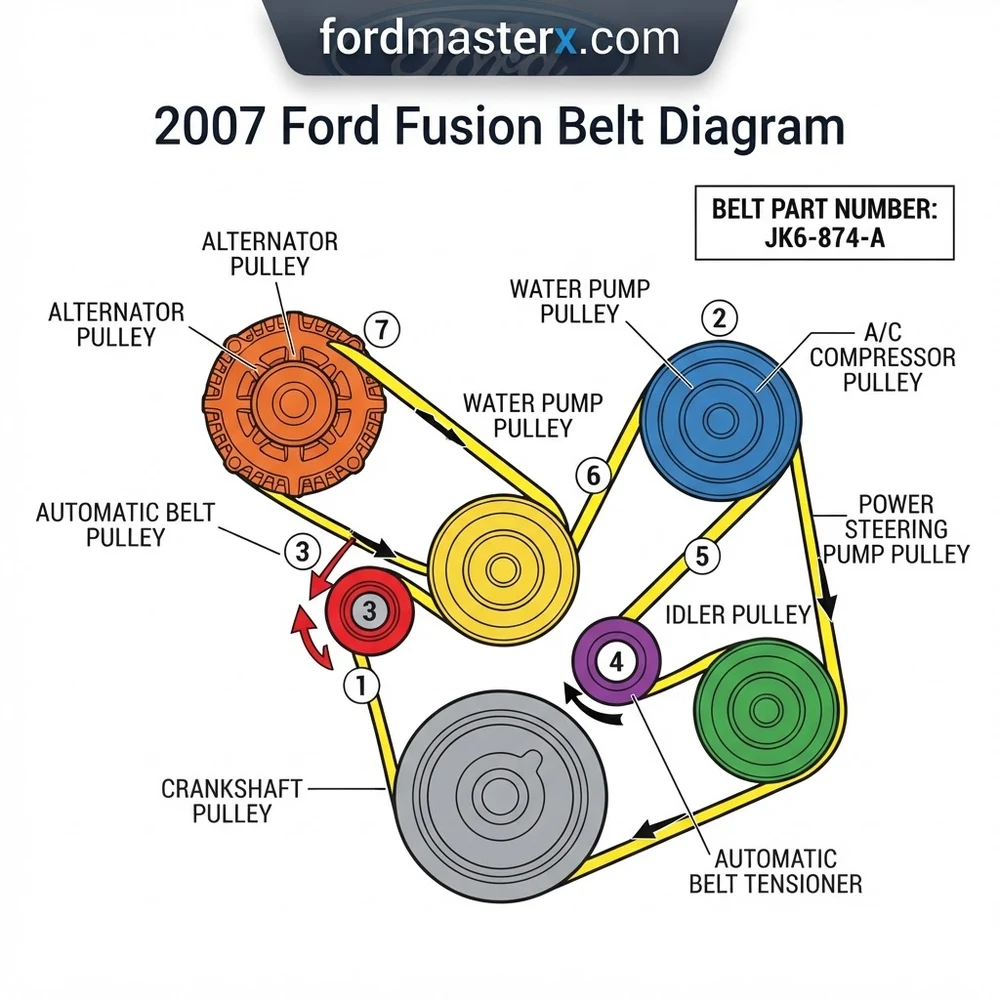
Understanding the 2007 Ford Fusion Belt Diagram Paths

The 2007 Ford Fusion utilizes two distinct serpentine belt routing configurations depending on the engine displacement. Misidentifying the configuration is a common failure point that results in the belt contacting itself or spinning pulleys in the incorrect direction.


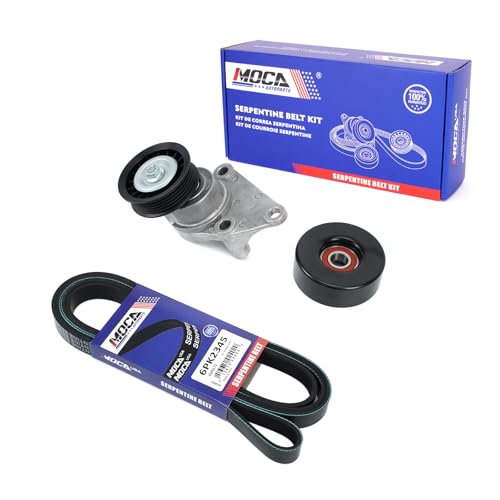
The 2.3L I4 engine features a single serpentine belt that drives the alternator, water pump, and A/C compressor. In this setup, the belt routing path must weave precisely around the idler pulley to ensure adequate wrap—or deck engagement—around the accessory shafts. The crankshaft pulley serves as the primary drive, and the belt tensioner is positioned to maintain constant pressure against the outer belt surface.
Conversely, the 3.0L V6 utilizes a more complex routing arrangement. Given the wider engine bay footprint and the layout of the dual-bank exhaust manifold, the belt must navigate additional idler pulleys to maintain proper drive tension for the power steering pump. In the 3.0L configuration, the alternator pulley is situated higher in the accessory stack, requiring a longer belt than the I4. Always verify that the belt ribbing aligns perfectly with the grooves of the pulleys. A single-groove misalignment—even if the belt appears seated—will inevitably lead to belt throwing under high-load conditions, such as sudden A/C compressor engagement or rapid deceleration.
For the 3.0L V6, ensure the belt is routed beneath the tensioner pulley and over the water pump. Incorrect routing here often causes the water pump to rotate in reverse, leading to immediate engine overheating symptoms.
Essential 2007 Ford Fusion Belt Part Numbers and Specs


Sourcing the correct components is paramount for long-term reliability. Using an OEM belt ensures the correct ethylene propylene diene monomer (EPDM) compound, which resists the heat cycles common to the Ford Duratec engine series. Below are the reference specifications for belt selection.
| Engine Type | Belt Length (mm) | Rib Count |
|---|---|---|
| 2.3L I4 | 2285 mm | 6 Ribs |
| 3.0L V6 | 2415 mm | 6 Ribs |
When procuring parts, match the belt size to your specific VIN-derived configuration. Aftermarket retailers often list multiple options; always confirm that the belt part number corresponds to a 6-rib design, as older 5-rib configurations from earlier domestic models will not provide the necessary torque transfer for the Ford Fusion’s high-output alternator.
How to Navigate the 2007 Ford Fusion Belt Diagram Step by Step
Executing a belt replacement requires more than just physical strength; it requires the correct leverage and an understanding of the spring-loaded belt tensioner mechanism.
1. Preparation: Engage the parking brake and disconnect the negative battery terminal. On the 2.3L I4, removal of the passenger-side front wheel and the inner splash shield provides critical access to the crankshaft pulley.
2. Tooling: Utilize a serpentine belt tool with a low-profile 15mm or 17mm socket. The restricted clearance in the engine bay often makes standard ratchets ineffective.
3. Tensioner Release: Place the serpentine belt tool on the tensioner pulley bolt. Apply force in the direction indicated by the tensioner spring—typically clockwise for the 2.3L engine—to slacken the belt.
4. Belt Removal: With the tensioner compressed, remove the belt from the most accessible pulley, such as the idler pulley or the alternator. Slowly release the tensioner to its resting position before completely extracting the belt.
5. Routing: Refer to your 2007 Ford Fusion belt diagram. Begin by looping the new belt around the crankshaft pulley, working upward toward the idler pulley and the alternator. Ensure the ribs are seated in the grooves of the crankshaft pulley before attempting to route the belt over the tensioner.
6. Final Seating: For the final step, re-apply pressure to the belt tensioner. Slide the belt over the remaining smooth idler pulley. This minimizes the risk of slipping or damaging the belt edge.
Never release the tensioner handle abruptly. The high-tension spring can cause the tool to kick back or pinch fingers against engine components. Always verify that the belt is centered on all ribbed pulleys before starting the engine.
Tensioner Maintenance and Accessory Drive Adjustment


The longevity of the serpentine belt is directly tied to the health of the belt tensioner and the idler pulley. A common symptom of an aging tensioner is a rhythmic chirping noise at idle, which often fluctuates as the A/C compressor cycles.
The tensioner is a dampening device designed to absorb engine vibration and maintain consistent pressure across the belt routing path. Over 150,000 miles, the internal spring loses its “K-factor,” resulting in insufficient deck engagement and belt slippage. When replacing the belt, you should manually rotate the idler pulley while the belt is off. If you detect grinding, lateral movement, or an uneven rotation, the bearing is failing.


If replacing the tensioner assembly, the mounting bolts typically require a torque setting of 18-22 lb-ft. Ensure the mating surface is free of oil or debris to prevent the tensioner from shifting during high-RPM operation.
Technicians should also inspect the alternator pulley for “clutching” behavior. Some 2007 Ford Fusion models utilize an Overrunning Alternator Decoupler (OAD) pulley. If the pulley is locked or excessively loud, the belt will be subjected to violent vibrations during engine speed changes, leading to premature snapping. Always verify the status of the power steering pump shaft as well; if the shaft displays radial play, no amount of belt tensioning will resolve the whining noise or pulley misalignment.
2007 Ford Fusion Belt Diagram Questions Answered
Is it possible to use a slightly longer belt if the correct size is unavailable?
No. The belt tensioner on the 2007 Ford Fusion has a limited operating range. A longer belt will place the tensioner at the edge of its physical stop, providing inadequate pressure to the system. This results in the belt slipping during cold starts and wet weather conditions, which rapidly glazes the belt surface and destroys the pulley grooves.
Why does my belt keep jumping off the idler pulley?


The most common cause is a seized or failing idler pulley bearing. If the pulley does not rotate freely or has a slight wobble, it will throw the belt during high-RPM transitions. Secondly, check for any oil leaks from the front main seal or the valve cover gasket; even a small amount of oil contamination on the ribbed side of the belt will cause it to lose grip and jump the pulley path.


Do I need to replace the idler pulley whenever I replace the belt?
While not strictly required by the OEM maintenance schedule, it is highly recommended. The service life of the idler pulley bearing is generally comparable to the belt itself. Replacing the pulley as a preventative measure during a belt change saves significant labor time in the event of a bearing failure six months later.
How do I know if my tensioner is weak?

A weak tensioner can be identified by the “indicator mark” typically found on the tensioner base. If the tensioner arm is sitting near the end of its travel range or if the belt tensioner pulley vibrates excessively while the engine is running, the spring is likely fatigued. You can also perform a “snap test” by quickly revving the engine—if the belt tensioner bounces excessively, the dampener is failing.
Step-by-Step Guide to Understanding the 2007 Ford Fusion Belt Diagram
Identify – Verify your engine type (2.3L I4 vs 3.0L V6) to ensure you have the correct belt part number.
Locate – Find the belt tensioner on the passenger side of the engine block near the bottom of the accessory drive.
Reference – Consult your diagram to memorize the path, specifically noting which pulleys use the grooved side versus the smooth side.
Connect/Route – Thread the belt around the stationary pulleys first, leaving the belt tensioner or the easiest-to-reach pulley for the final loop.
Verify – Rotate the engine by hand using a socket on the crankshaft bolt to confirm the belt is centered in all grooves.
Troubleshoot – Start the engine and listen for chirping; if present, re-check that the belt is fully seated and the idler pulley is spinning freely.


