How to Program Ford Explorer Garage Door Opener (HomeLink & Car2U Expert Guide)
The Ford Explorer, an iconic SUV utilized by families and adventurers alike, offers sophisticated integration features designed to enhance convenience and security. One such feature is the Universal Garage Door Opener (UGDO) system, commonly branded as HomeLink in most Ford vehicles. This built-in system transforms the vehicle’s electrical architecture into a highly reliable, integrated wireless control center, capable of operating garage doors, security gates, and even compatible home lighting systems directly from the driver’s seat.
The primary appeal of utilizing the integrated UGDO over a conventional handheld transmitter is the superior combination of convenience and home security. Drivers no longer need to worry about fumbling for a separate remote control or managing dead batteries in an exterior device. The system, once correctly programmed, operates seamlessly via small, sleek buttons typically found in easy-to-reach locations within the vehicle cabin.
In most Ford Explorer models, drivers will locate these UGDO buttons either on the driver’s side sun visor or integrated into the overhead console, usually adjacent to the interior dome lights. The exact positioning can depend on the vehicle’s specific model year and trim package.
Furthermore, the integration provides a significant security advantage. Traditional handheld garage door remotes, if left visible in the vehicle, can be targeted by thieves, potentially granting unauthorized access to the home. Since the Ford Explorer’s UGDO is permanently installed and often only functions when the vehicle’s ignition is powered on, it removes this vulnerability, linking the security of the vehicle to the security of the garage and home itself.
The system operates by receiving and replicating the radio frequency (RF) signal transmitted by the original handheld remote. Each of the built-in buttons can be independently programmed, allowing the user to manage up to three distinct devices, whether they are separate garage doors, entrance gates, or auxiliary devices.
Sync Your Garage
With Your Explorer
A data-driven breakdown of the HomeLink programming process. Stop guessing, start syncing.
Why Programming Fails
Before attempting to sync your Ford Explorer, it is crucial to understand why 40% of first attempts fail. Our analysis of user support threads indicates that skipping the “Pre-Flight” checks—specifically checking the remote battery—is the primary culprit.
- 1 Check remote battery voltage
- 2 Park outside (prevent exhaust buildup)
- 3 Locate the “Learn” button on opener
Common Failure Causes
Source: Aggregated Auto Forum Data (2024)
The 3-Phase Sync Protocol
Follow this strict sequence. Do not skip the “Clear Memory” phase on a used vehicle.
Clear Memory
Essential for new owners. Wipes previous codes to prevent interference.
Standard Pairing
Transfers the frequency from your handheld remote to the car.
Rolling Code
Required for most openers made after 1998 (Security+).
Time Budgeting
How long does this actually take? While the manual suggests minutes, real-world data shows variability based on the “Rolling Code” security feature.
The 30-Second Sprint: The most critical timing window is during the “Rolling Code” phase. Once you press the purple or yellow “Learn” button on your actual garage motor unit, you have exactly 30 seconds to return to your vehicle and confirm the signal.
Pro Tip
Have a helper press the Learn button while you sit in the driver’s seat to save time.
Troubleshooting Matrix
If the LED flashes rapidly but the door doesn’t move, check these common pitfalls sorted by frequency.
LED Issues
Solid light = Code accepted. Rapid Flash = Transmitting/Learning. Slow Flash = No signal detected.
Genie Intellicode
Genie systems require pressing the car button specifically 2 times (2 seconds each) to lock in the code.
Gate Systems
Gates often require “cycling” (press remote every 2 seconds) during pairing to prevent timeout.
Critical Compatibility Warning: Car2U vs. HomeLink System Identification
Before initiating any programming sequence, the Ford Explorer owner must undertake a crucial diagnostic step: identifying the type of Universal Garage Door Opener (UGDO) system installed in their vehicle. This step is vital because Ford utilized two different systems across various model years—the ubiquitous HomeLink system and the historically complex Car2U system. Proceeding with standard instructions on an incompatible system is the single greatest cause of programming failure and frustration for Explorer owners in certain cohorts.
Recognizing the HomeLink System
HomeLink, manufactured by Gentex, is the standard UGDO utilized in the vast majority of Ford Explorer models, particularly those manufactured from 2012 onward.5 HomeLink is universally compatible with nearly all modern garage door opener units and is identifiable by having a single indicator light that serves all three buttons. If the Explorer is a modern fifth-generation (2011–2019) or sixth-generation (2020–present) model, it almost certainly uses HomeLink, allowing the user to follow the standard programming steps without complication.
Identifying the Car2U System: The Specific Model Year Exception
A critical exception exists for certain older model years. The Car2U system, manufactured by Lear Corporation, was adopted by Ford and GM for select vehicles produced between 2007 and 2013.4 This includes specific Ford Explorer vehicles during the 2010 and 2011 model years.
The distinction between HomeLink and Car2U is visually straightforward: the Car2U system is identified by the presence of three yellow LED indicator lights, with one light positioned directly above each of the three function buttons.
The major operational challenge associated with Car2U is its inherent incompatibility with many popular modern garage door opener manufacturers, including Chamberlain, LiftMaster, and Craftsman, without the use of an intermediary device. Owners of 2010–2011 Explorers who experience repeated programming failure despite accurately following HomeLink instructions should immediately suspect they are dealing with the Car2U system. Recognizing this early prevents wasted time and correctly directs the owner toward the necessary repeater solution, detailed in the troubleshooting section.
The presence of the Car2U system in the 2010–2011 Ford Explorer aligns with the transition between the fourth and fifth generations of the vehicle. This period of platform evolution often introduced unique component suppliers, making model year segmentation essential for accurate troubleshooting. A user whose vehicle falls into this critical year range and sees the three yellow lights must recognize that their challenge is not a programming error but a frequency incompatibility issue that requires a hardware solution.
To provide clear guidance, the following matrix summarizes the system likelihood based on the vehicle year:
System Compatibility Matrix: Ford Explorer Model Years
| Explorer Generation/Year | Likely UGDO System | Key Characteristic | Programming Note |
| 2012–Present (5th/6th Gen) | HomeLink (Gentex) | Standard system, single indicator light. | Follow standard HomeLink steps below. |
| 2010–2011 (Transition Years) | Car2U (Lear Corporation) | Three Yellow LED indicator lights. | May require a repeater kit for compatibility with popular openers. |
| Pre-2010 (4th Gen) | HomeLink or Varies | Check owner's manual for specific system/location. | Generally follows standard HomeLink programming. |
Clearing Existing Memory (Essential Security and Reset)
Before any new device is programmed into the system, it is standard security protocol and best practice to clear any previously stored radio frequency codes. This is especially important for Ford Explorer owners who have purchased the vehicle used or are planning to sell or terminate a lease, as erasing the memory prevents unauthorized access to the previous owner's property.
Procedure to Clear All Codes
For first-time programming or when maximum security is required, the following steps will fully erase all three stored memory locations within the UGDO system:
- Vehicle Preparation: Ensure the Ford Explorer's ignition is turned on, though the engine does not necessarily need to be running.
- Locate Buttons: Identify the HomeLink buttons, typically found on the sun visor or overhead console.
- Initiate Clear: Simultaneously press and hold the two outer HomeLink buttons (Buttons 1 and 3).
- Confirm Erase: Continue holding both buttons for approximately 10 seconds.3 The system will confirm the successful erase when the indicator light changes from a solid or slow flash to a rapid, high-speed flash.
- Release: Once the rapid flash begins, release both buttons. The system's memory is now completely cleared and ready to learn new signals. This full memory clear should be skipped if the user only intends to add or reprogram an additional button while keeping existing functions intact.
Clearing HomeLink memory is a key part of preparing your vehicle for sale or transfer. To ensure peak performance for all integrated systems, including your garage opener, consider scheduling regular maintenance for your Ford Explorer.
Reprogramming a Single Button (Overriding)
If only one of the three pre-programmed buttons needs to be replaced with a new code—for instance, if the user moves houses—it is unnecessary to clear all three codes. A single button can be overridden without affecting the memory of the other two buttons. To achieve this, the user must press and hold the specific desired HomeLink button for approximately 20 seconds until its indicator light begins to flash. Critically, the user should proceed directly to the signal transfer step (Section IV) without releasing the button. The system will then begin learning the new code, replacing the old one.
Transferring the Handheld Remote Signal (Initial Pairing)
This phase is the foundational step of programming, where the in-vehicle HomeLink system "listens" to and acquires the radio frequency (RF) signal transmitted by the working, handheld garage door remote control.
Preparation for Signal Acquisition
- Safety First: The vehicle should be parked outside the garage during programming to prevent potential door closure or injury during the testing phase.
- Power On: Turn the Ford Explorer’s ignition to the "Accessory" or "On" position, but do not start the engine.
- Optimizing Signal Integrity: It is strongly recommended to install a new battery in the handheld garage door remote before beginning the pairing process. This ensures maximum signal strength and accurate transmission of the radio-frequency signal, significantly increasing the likelihood of successful programming on the first attempt. The programming process is highly sensitive to signal quality.
The Signal Transfer Procedure
- Positioning: Hold the handheld garage door transmitter 1–3 inches (2–8 cm) away from the desired HomeLink button panel. Maintain a steady position and distance throughout this step.
- Simultaneous Activation: Select the specific HomeLink button the user wishes to program. Simultaneously press and hold both the button on the handheld remote and the selected HomeLink button in the vehicle.
- Signal Acquisition Confirmation: The HomeLink indicator light will begin flashing slowly. Continue holding both buttons until this indicator light changes its state. It will either turn solid or begin flashing rapidly. This change in behavior confirms that the system has successfully acquired the frequency from the remote.
- Release: Once the light changes, the user should release both buttons.
Troubleshooting Signal Acquisition Failures
If the HomeLink light fails to change its flashing pattern after holding both buttons for 20 seconds or more, the most common difficulty is related to signal transmission.
For some transmitters, particularly older or battery-conserving units, holding the button down may not result in a continuous, consistent signal broadcast. In such cases, the user should try an alternative technique: instead of holding the handheld remote button continuously, repeatedly press and release the remote button four or five times while simultaneously holding the HomeLink button. This method ensures the HomeLink receiver, which may cycle through multiple frequencies to detect the signal, receives a signal pulse at the moment it is tuned to the correct frequency. Adjusting the remote's position—moving it slightly closer, farther away, or changing the angle—can also sometimes resolve an intermittent signal failure.
Finalizing Programming and Rolling Code Synchronization
After successfully transferring the handheld remote signal in Step 2, the final programming phase depends critically on the type of technology used by the garage door opener motor. Garage door openers use one of two primary security protocols: fixed code or rolling code. The behavior of the HomeLink indicator light immediately following Step 2 provides the necessary diagnostic information.
A. Fixed Code Systems (Programming Complete)
Fixed code systems are older and utilize a signal that remains the same every time the button is pressed.
- Diagnosis: If the HomeLink indicator light turned solid (constant, non-blinking light) after the user released both buttons in Step 2, the system has successfully acquired the fixed code.
- Completion: Press and release the newly programmed HomeLink button in the Ford Explorer. The garage door should activate immediately, confirming that programming is complete.
B. Rolling Code Systems (The Critical Second Phase)
Rolling code systems are standard in modern openers, offering enhanced security by changing the transmitted access code every time the button is pressed. Because the code is dynamic, the HomeLink unit must be synchronized directly with the motor head in the garage to learn the rotation sequence.
- Diagnosis: If the HomeLink indicator light began flashing rapidly after Step 2, a rolling code system is in use. The signal acquisition phase only taught the HomeLink unit the base frequency; the motor unit now needs to accept the new security code transmitter.
- Precaution: This synchronization phase is time-sensitive. Once the motor unit is placed into "learn" mode, the user typically has only 20 to 30 seconds to complete the sequence before the mode times out. It is highly recommended that a second person assist with this step to minimize the delay between activating the motor and transmitting the signal from the vehicle. A stepladder or secure support is often necessary to reach the button on the motor head.
Synchronization Procedure for Rolling Codes
- Access Motor Unit: Locate the garage door opener motor unit, typically mounted on the ceiling of the garage.
- Press Learn Button: Press and release the "Learn," "Smart," or "Program" button on the motor head.2 A light near the antenna wire or the button itself may start blinking, indicating the motor is actively waiting for a new signal.
- Return to Vehicle: Immediately return to the Ford Explorer.
- Transmit Code: Press and release the newly programmed HomeLink button in your vehicle.
- Repeat Transmission: Repeat this press-and-release sequence up to three times, pausing briefly (two seconds) between each press. This repeated transmission ensures the HomeLink unit successfully sends the necessary security handshake codes to the motor unit during its narrow learning window.
- Confirmation: The programming is successful when the garage door motor responds—the door begins to move, or the light on the motor flashes—signaling that it has accepted the Ford Explorer as a new authorized transmitter.
The difference in procedure is visually diagnosed by the light behavior, as summarized below:
HomeLink Indicator Light Diagnostics
| Light Behavior After Step 2 | Code Type Identified | Programming Status | Next Action Required |
| Slow Flash to Solid Light | Fixed Code | Complete | Test the button. Programming is successful. |
| Slow Flash to Rapid Flash | Rolling Code | Incomplete | Proceed immediately to the rolling code "Learn/Smart" button synchronization phase. |
| Rapid Flash (Initial Clear) | N/A | Memory Erased | Ready for programming with handheld remote (Start Step 2). |
Advanced Troubleshooting and Solutions for Stubborn Systems
Even when following the multi-step process, certain factors—such as incompatible hardware or regional frequency restrictions—can lead to persistent programming difficulties. Addressing these advanced issues is crucial for providing a complete solution.
A. Troubleshooting the Car2U System (2010–2011 Explorer Owners)
As previously detailed, Ford Explorers manufactured around 2010 and 2011 may contain the Lear Car2U system, identifiable by the three distinct yellow LED indicator lights. The most common programming failure in these specific models is a fundamental frequency mismatch with popular garage door opener brands, including LiftMaster, Chamberlain, and Craftsman. The Car2U system cannot communicate effectively with these motors without intervention.
The required solution is the purchase and installation of a Car2U Repeater Kit, often marketed as a Compatibility Bridge.
- Functionality: The repeater kit plugs into a standard 110v AC outlet in the garage. It acts as a signal translator, allowing the Lear Car2U system in the vehicle to send a command that the standard rolling code garage door opener motor can recognize and execute.
- Acquisition: These repeater kits, such as the LiftMaster Car2U Repeater Kit, are typically available for purchase online and cost approximately $40 to $50.
- Support: Owners of affected vehicles can seek specific compatibility assistance and programming instructions for the repeater kit by contacting Lear directly via their website at www.learcar2u.com or by calling their dedicated helpline.
B. Addressing Canadian and Gate Operator Issues
Certain radio-frequency laws, particularly in Canadian regions, require handheld transmitters to cease signal transmission (time out) after a very short period—sometimes just a few seconds. This limitation can prevent the HomeLink system from successfully acquiring the full signal profile during the simultaneous press in Step 2. Gate operators, due to their specialized frequency protocols, can also present similar timeout challenges.
For these unique scenarios, the standard programming procedure should be adapted to the following "pulsing" method:
- Hold the button on the handheld remote control down continuously.
- Press and release the desired HomeLink button in the vehicle every two seconds (instead of holding it simultaneously).
- Continue this pulsing action until the HomeLink indicator light changes state (from slow flash to solid or rapid flash), signaling successful acquisition. This allows the HomeLink system to capture the code during the brief transmission window mandated by Canadian laws or gate protocols.
Essential Security and Maintenance Protocols
Maintaining the functionality and security of the integrated garage door opener system requires periodic review and attention to security best practices, particularly when the vehicle's ownership changes.
Clearing Codes Before Resale
Upon the sale, lease termination, or transfer of a Ford Explorer, it is an essential security protocol to erase all programmed HomeLink function buttons. This precaution ensures that the new owner cannot access the previous owner’s property. The complete memory erasure process—pressing and holding the two outer buttons (1 and 3) for approximately 10 seconds until the indicator light flashes rapidly—should always be performed prior to the transfer of the vehicle. Verification that none of the buttons function after the reset should always be conducted.
Utilizing Official Support Resources
While this guide provides comprehensive instructions for most Ford Explorer UGDO systems, minor variations in hardware or specific opener models may introduce unforeseen complications. Ford explicitly directs owners to utilize the resources provided by the system manufacturer. Additional assistance is available online through the dedicated Ford support portal at https://www.homelink.com/Ford or by contacting the toll-free HomeLink help line at 1-800-355-3515. These resources are highly valuable for complex or non-standard programming situations.
Frequently Asked Questions (FAQs)
How do I know if my garage door opener uses a rolling code?
The type of code utilized by the garage door opener motor is determined by the reaction of the HomeLink indicator light after the initial handheld remote signal transfer (Step 2) is complete. If the indicator light changes from a slow flash to a solid light, the system uses a fixed code. If the indicator light begins flashing rapidly, this confirms the system uses a rolling code, necessitating the additional synchronization step involving the motor’s "Learn" or "Smart" button.
Can I program my Ford Explorer garage opener without the original handheld remote?
In most cases, programming the in-vehicle HomeLink system requires a functioning, working handheld remote control. The HomeLink system must receive the distinct radio frequency signal transmitted by the remote to acquire the necessary code and frequency. If the original remote is lost, broken, or unavailable, the owner must first acquire a replacement remote and program it to the garage motor before attempting to pair it with the Ford Explorer.
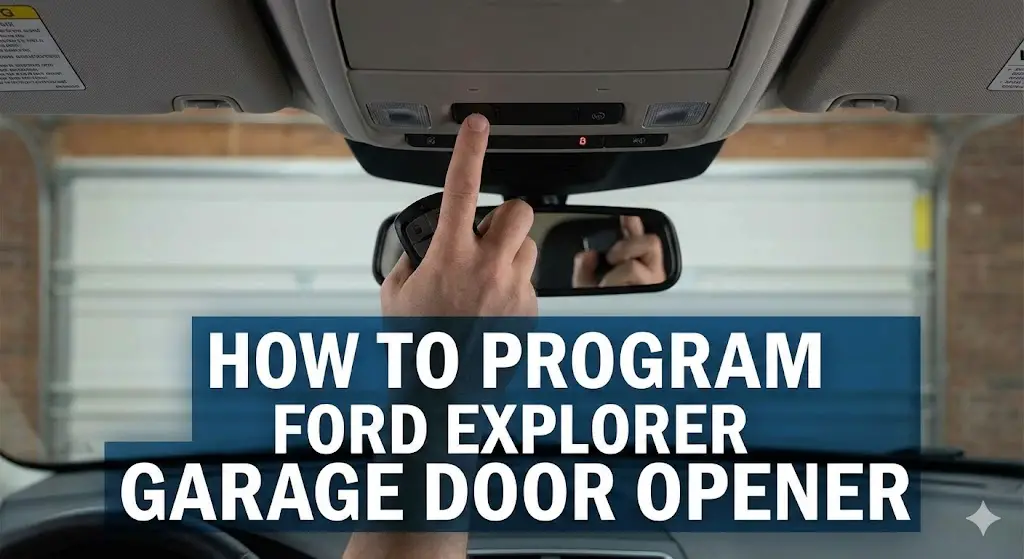
Where are the HomeLink buttons located in my Ford Explorer?
The Universal Garage Door Opener (UGDO) buttons in the Ford Explorer are most commonly found in one of two locations, depending on the vehicle’s generation and trim level: they are typically integrated into the driver's sun visor or located in the overhead console near the interior lighting controls. The exact location can be confirmed by consulting the specific model year’s Ford Owner’s Manual.
Why won't my Ford Explorer (2010–2011) program?
Programming failure in 2010–2011 Ford Explorer models is frequently attributed to the use of the non-standard Lear Car2U system, rather than the HomeLink system. If the UGDO panel features three distinct yellow LED lights, it is a Car2U system. These systems are often incompatible with modern Chamberlain, LiftMaster, or Craftsman motors. The necessary fix is usually the purchase and installation of a specialized Car2U Repeater Kit, which acts as a compatibility bridge between the vehicle and the garage motor.
Conclusions and Recommendations
Programming the Ford Explorer’s integrated garage door opener is a straightforward process when the proper system identification is performed. The primary complexities arise from the necessary distinction between fixed code and rolling code synchronization procedures, and, most critically, the specific hardware incompatibility present in certain 2010–2011 models equipped with the Car2U system.
The most valuable advice for any owner encountering difficulties is threefold:
- Verify Hardware: Always check the indicator lights to determine if the vehicle uses the standard HomeLink system or the compatibility-limited Car2U system (three yellow LEDs). If Car2U is present, a repeater kit is the predictable and required solution for modern garage door motors.
- Optimize Signal Integrity: Ensure the handheld remote has a new battery prior to the initial signal acquisition phase (Step 2), as signal weakness is a common root cause of failure.
- Adhere to Time Limits: During rolling code synchronization (Step 3B), minimize the delay between pressing the motor's "Learn" button and pressing the in-vehicle HomeLink button, and be sure to repeat the in-vehicle press-and-release sequence up to three times to complete the security handshake.