2013 F150 Lug Nut Torque Specifications And Professional Installation Guide
Precision is the difference between a secure journey and a catastrophic mechanical failure when it comes to the heavy-duty wheels of your Ford truck. Many owners and novice technicians guess at lug nut tightness, unaware that the 2013 F-150 requires a specific, high-torque value that is significantly higher than most passenger vehicles. Failure to adhere to these specifications can lead to wheel vibration, snapped studs, or even wheel separation. This guide provides the authoritative 2013 F150 lug nut torque specifications, the professional star-pattern sequence, and expert solutions for the common issue of swollen lug nuts, ensuring your vehicle remains safe and reliable on the road.
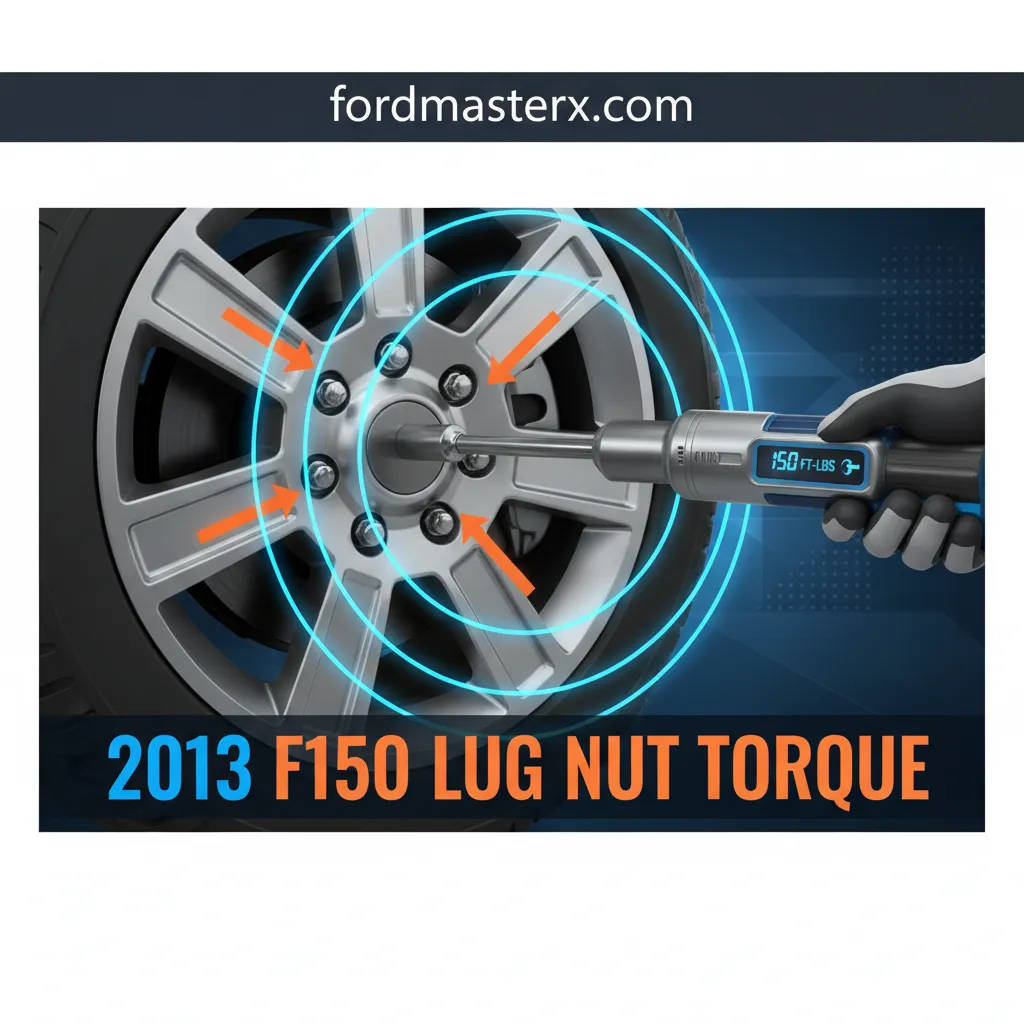
All 2013 Ford F-150 models require a lug nut torque of 150 lb-ft (204 Nm). This applies to both 6-lug and 7-lug configurations, utilizing M14 x 2.0 threads and a standard 21mm hex size.
Section 1: Standard 2013 F150 Lug Nut Torque Specs and Fastener Dimensions

📤 Share Image
In the world of light-duty trucks, the Ford F-150 stands out for its robust chassis and high towing capacities. To support these capabilities, Ford engineered the wheel interface with significantly higher clamping force requirements than a standard automobile. For the 2013 model year, the factory-specified torque for the F-150 is 150 lb-ft (204 Nm). This value is uniform across all factory wheel types, whether you are running the base 17-inch steel wheels or the premium 22-inch limited edition alloys.
Understanding the technical hardware is vital for professional wheel retention. The 2013 F-150 uses M14 x 2.0 wheel studs. The “M14” denotes a 14mm diameter, while the “2.0” refers to the thread pitch. This is a coarse thread designed to handle the high-torque load. When sourcing replacement parts, verifying the 2.0 thread pitch is critical, as later F-150 models transitioned to a finer 1.5 pitch; using the wrong pitch will instantly ruin the hub’s studs.
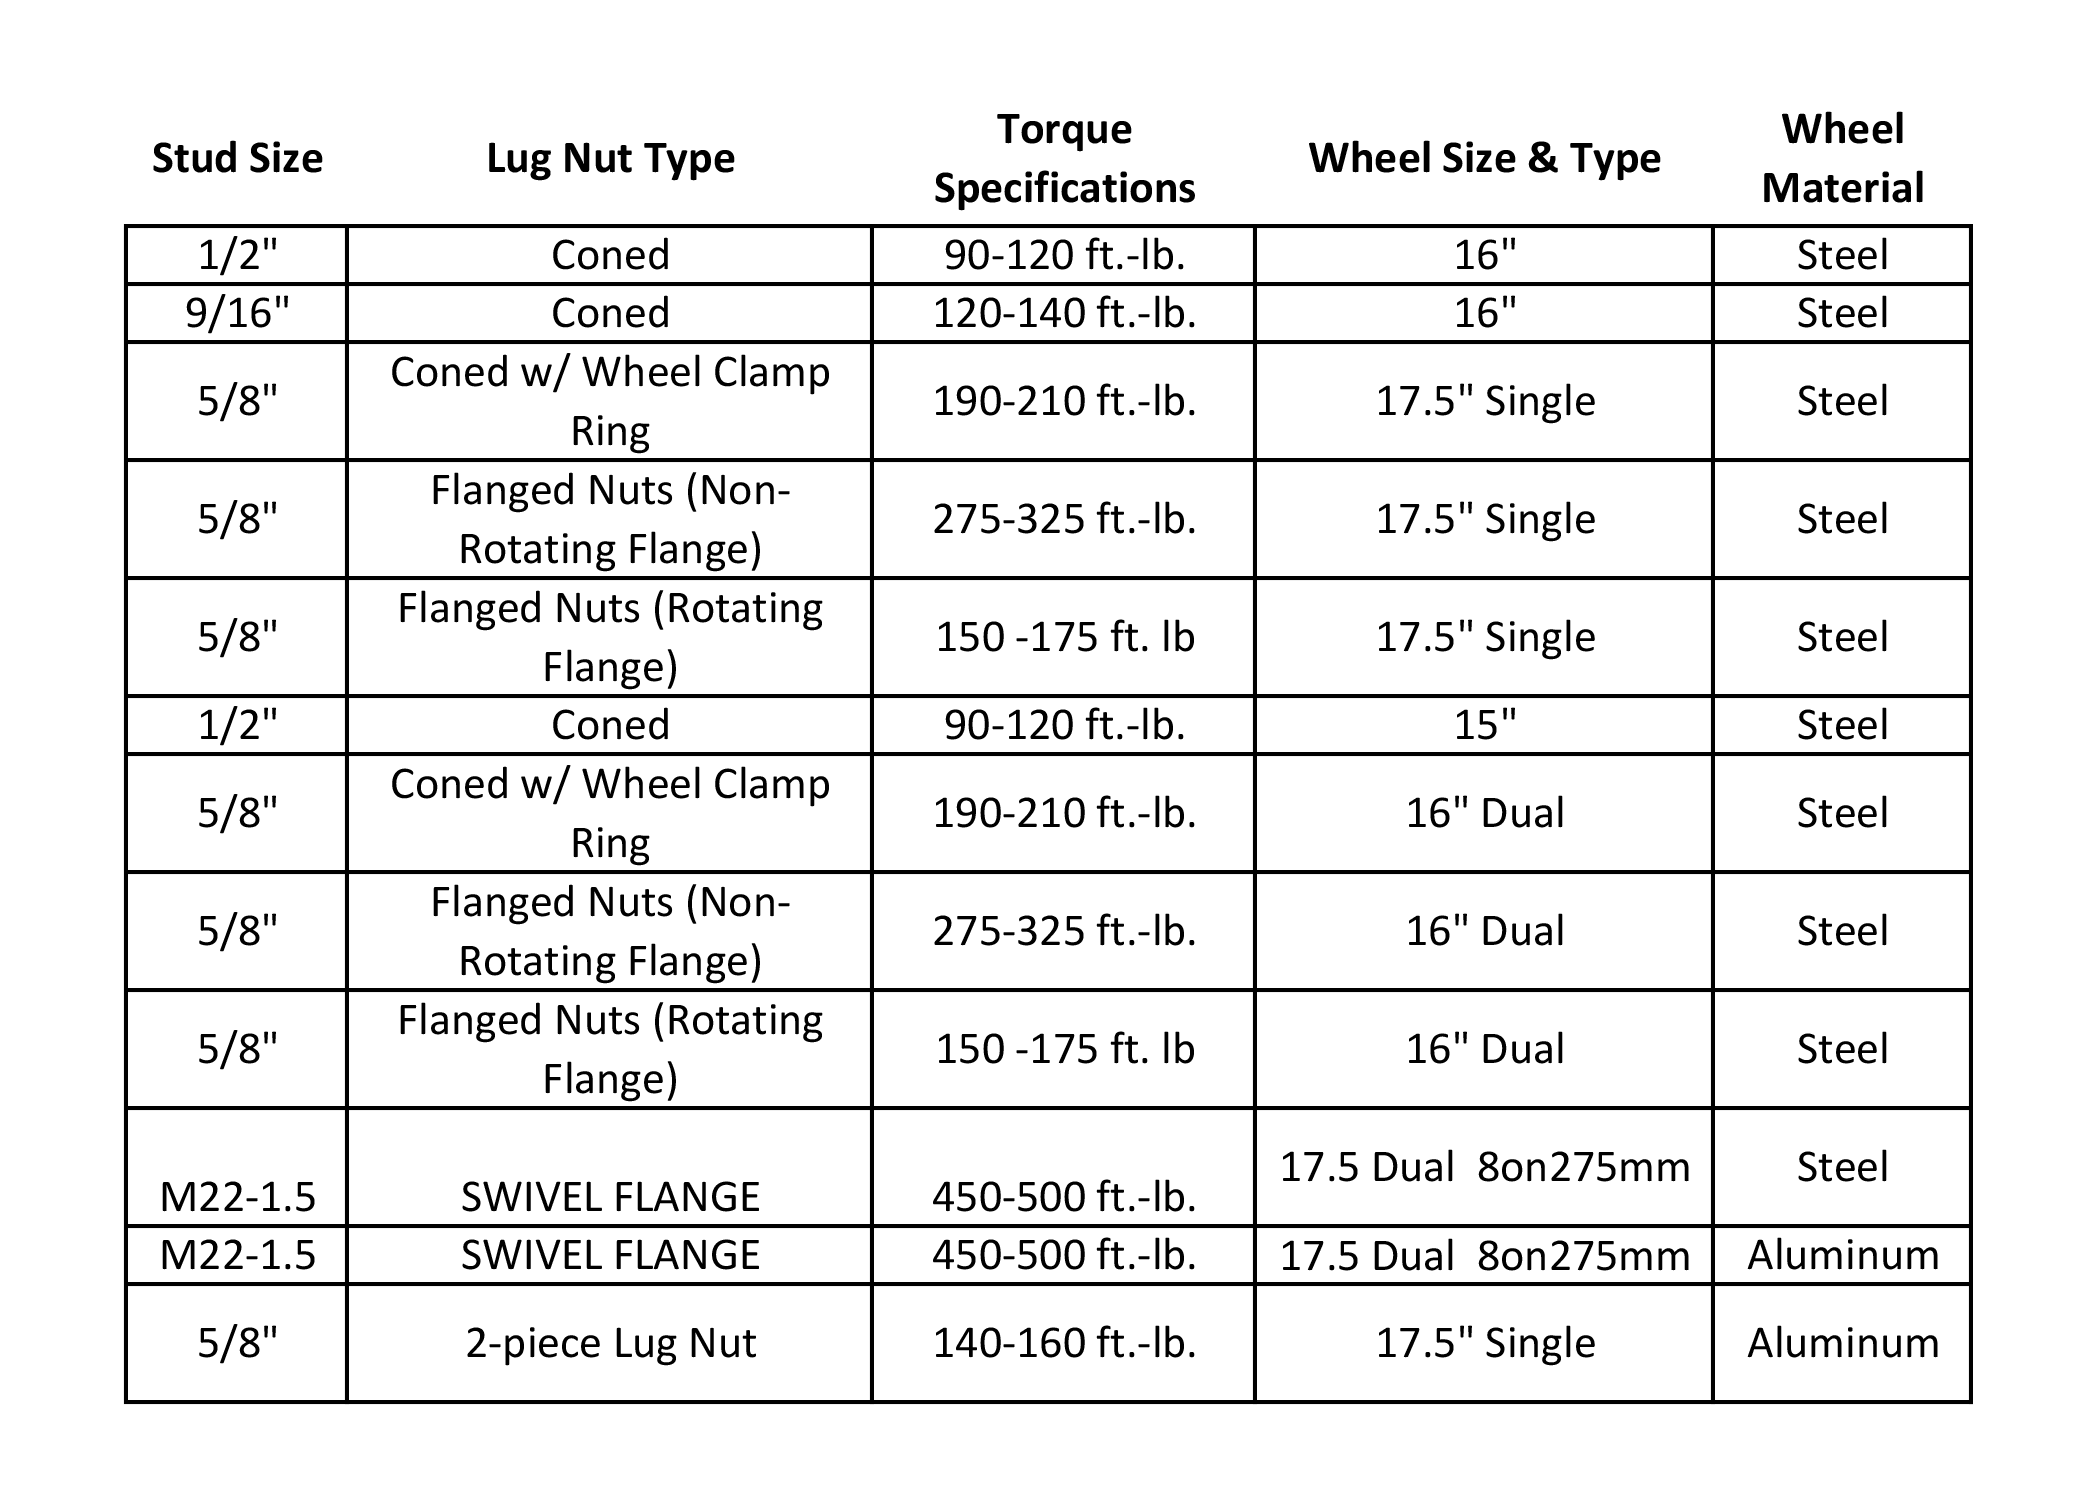
Technical Specifications Matrix
Torque (lb-ft)
Thread Size
Hex Socket Size
Most 2013 F-150s feature a 6-lug bolt pattern (6x135mm). However, trucks equipped with the Heavy-Duty Payload Package (HDPP) feature a 7-lug configuration. Regardless of the lug count, the 150 lb-ft specification remains constant. This heavy-duty requirement is vastly different from a typical sedan, which usually requires 80 to 100 lb-ft. If you apply sedan-level torque to an F-150, the fasteners will likely vibrate loose under the stress of the truck’s mass and braking loads.
Section 2: Step-by-Step 6-Lug Tightening Sequence for Reliable Wheel Seating
Proper torque is not just about the final number; it is about how you reach that number. Implementing a professional tightening sequence prevents the wheel from “cocking” on the hub, which is a leading cause of highway-speed vibrations and brake rotor warping. To ensure a trusted and complete installation, you must use a star-pattern (crisscross) sequence.

📋
Professional Installation Sequence
Use a wire brush to remove rust and debris from the hub face and wheel mounting surface. Debris can cause a ‘false torque’ reading, leading to a 20% loss in clamping force as the debris compresses over time.
Thread all lug nuts by hand to avoid cross-threading. Use a socket to snug them to approximately 50 lb-ft while the wheel is in the air, following the 1-4-2-5-3-6 star pattern.
Lower the vehicle until the tires touch the ground to prevent spinning. Perform a mid-stage torque at 100 lb-ft, then a final pass at 150 lb-ft until the torque wrench clicks. Use the star pattern for every pass.
The 1-4-2-5-3-6 sequence for a 6-lug wheel involves moving from one lug to the one nearly opposite it. Imagine the lugs are numbered like a clock: if you start at 12 o’clock (1), move to 6 o’clock (4), then 2 o’clock (2), then 8 o’clock (5), then 4 o’clock (3), and finally 10 o’clock (6). This graduated, balanced approach ensures the wheel is perfectly centered on the hub pilot, which is the only way to guarantee a vibration-free ride at highway speeds.
Section 3: The Danger of Swollen Lug Nuts and Quality Replacement Options
The 2013 F-150 is notorious for a specific design flaw: the factory “two-piece” lug nuts. These consist of a steel core with a decorative chrome-plated aluminum cap pressed over the top. Over time, moisture penetrates the gap between the cap and the nut, causing corrosion (oxidation). As the corrosion expands, it pushes the outer cap outward—a phenomenon known as swollen lug nuts.
This expansion is more than a cosmetic nuisance; it is a major safety hazard. A swollen 21mm lug nut may expand to 21.5mm or even 22mm. When this happens, the factory-supplied lug wrench in your trunk will no longer fit. In an emergency roadside situation, you may find yourself unable to remove the wheel. Statistics show that 90% of 2013 F-150s operating in humid or salt-heavy “rust belt” regions will eventually experience this swelling.
If your socket won’t fit, do not force it with a hammer, as this further deforms the cap. Professional technicians often use a specialized 21.5mm “flip socket” to remove swollen nuts. Once removed, these fasteners must be discarded immediately.
As a professional recommendation, I advise all 2013 F-150 owners to upgrade to solid one-piece steel lug nuts. Unlike the factory units, solid steel fasteners have no cap to swell, ensuring a lifetime of reliable service. Brands like McGard or Gorilla produce high-quality, cold-forged steel options that maintain the required 60-degree conical seat for factory wheels. During the replacement, inspect the wheel studs for signs of stretching or cross-threading; if the threads appear flattened or the stud looks narrowed in the middle, it has been over-torqued past its yield point and must be replaced.
Section 4: Essential Tools for Accurate Torque Measurement and Maintenance
To achieve a comprehensive and expert result, you must use the right equipment. Using a standard lug wrench or a “feel” for tightness is unacceptable on a vehicle with a 150 lb-ft requirement. A calibrated click-type or electronic torque wrench is mandatory. While impact guns are excellent for removing stubborn nuts, they should never be used for final tightening. Even with “torque sticks” (extension bars designed to flex at a certain torque), results are often inconsistent, varying by up to 30 lb-ft depending on the air pressure and the gun’s power.
✅ Recommended Tools
- 1/2″ Drive Calibrated Torque Wrench (250 lb-ft max)
- 21mm Deep-Well Thin-Wall Impact Socket
- Steel Wire Brush (for stud cleaning)
- 1/2″ Drive Breaker Bar (for removal)
❌ Avoid These
- Torque Sticks (Inaccurate)
- Standard 4-Way Lug Wrenches
- Lubricants/Anti-seize on threads
- Uncalibrated “Beam” style wrenches
One of the most critical distinctions in professional maintenance is Dry Torque vs. Wet Torque. Ford’s 150 lb-ft specification is a “dry” spec. This means the threads should be clean and free of oil, grease, or anti-seize. Applying anti-seize to the studs reduces friction, which can cause you to accidentally over-tighten the fastener by up to 40% while waiting for the wrench to click. This over-tensioning often stretches the wheel studs beyond their elastic limit, leading to failure. Clean the studs with a wire brush to ensure the accuracy of your measurement.
Always return your torque wrench to its lowest setting (usually 20-30 lb-ft) before storing it. Leaving it dialed to 150 lb-ft puts constant tension on the internal spring, which will cause the tool to lose calibration and provide inaccurate readings over time.
Section 5: Post-Installation Safety Protocol and Re-Torque Intervals
The job is not finished once the truck leaves the driveway. Professional tire shops and experienced mechanics adhere to the 50-to-100-mile re-torque rule. When a wheel is first installed, minor imperfections in the paint, rust, or metal can allow the wheel to “settle” against the hub after a few heat cycles and vibrations. This settling can lead to a slight reduction in lug nut tension.
Settling Mitigation
Re-checking at 50 miles ensures that any micro-compressions in the wheel finish haven’t loosened the fasteners.
Heat Cycle Management
Towing or mountain driving generates extreme heat in the rotors, which can affect fastener tension; always re-check after heavy use.
Improper torque is often the hidden culprit behind common truck complaints. For instance, “warped” rotors are frequently caused by uneven lug nut torque rather than heat alone. When one nut is at 180 lb-ft and another is at 120 lb-ft, it creates a lateral runout (uneven pull) on the rotor face, leading to brake pulsation. Furthermore, steering wheel vibrations or a rhythmic clicking sound from the wheel area are immediate indicators that the lug nuts may be loosening.
Establish a recurring inspection schedule. Check your lug nut torque during every oil change or tire rotation, typically every 5,000 miles. This ensures that your F-150 remains safe for hauling and towing, providing the trusted performance you expect from a Ford truck. By following this professional safety protocol, you eliminate the risk of wheel-off incidents and prolong the life of your hubs, rotors, and tires.
Maintaining the integrity of your 2013 F-150 requires attention to detail and adherence to factory standards. By using a calibrated torque wrench to hit the 150 lb-ft specification, utilizing a proper 6-lug star pattern, and replacing vulnerable two-piece lug nuts with solid steel alternatives, you ensure your truck is professional-grade in every sense. Regularly check your lug nuts every 5,000 miles and always perform a re-torque after any wheel service to ensure your Ford remains trusted and road-ready for the miles ahead.
Frequently Asked Questions
What is the exact lug nut torque for a 2013 F150?
The professional specification for the 2013 Ford F-150 lug nut torque is 150 lb-ft (204 Nm). This value applies to both factory alloy and steel wheels. It is critical to use a calibrated torque wrench rather than an impact gun to achieve this precise level of tension, ensuring the wheel remains securely fastened to the hub without damaging the studs.
Why won’t my 21mm socket fit my 2013 F150 lug nuts?
This is likely due to the common ‘swollen lug nut’ issue. Ford used a two-piece design where a chrome cap is pressed over a steel core. Moisture can get trapped between these layers, causing the cap to expand and distort. In these cases, a 21.5mm or 22mm socket might be necessary for removal, and the damaged nuts should be replaced with professional-grade solid steel fasteners.
Should I apply anti-seize to the wheel studs before torquing?
No, experts recommend torquing lug nuts ‘dry.’ The 150 lb-ft specification is based on the friction coefficient of dry threads. Applying lubricant like anti-seize reduces friction, which can lead to over-tightening and stretching the wheel studs even if the torque wrench clicks at the correct setting. Keep threads clean and free of rust with a wire brush instead.
Is the torque the same for aftermarket wheels on a 2013 F150?
Generally, yes, the 150 lb-ft specification remains the standard for the M14 x 2.0 studs on the 2013 F-150. However, always verify with the aftermarket wheel manufacturer’s documentation. Some custom wheels may require specific seat types (conical vs. flat) and different lug nuts, but the clamping force requirement of the vehicle’s hub stays consistent.
How often should I check the torque on my F150 lug nuts?
You should check the torque every time a wheel is removed and reinstalled, specifically performing a re-torque after the first 50 to 100 miles of driving. For professional maintenance, it is also advisable to verify the torque during every tire rotation or every 5,000 miles to account for any settling or vibration-induced loosening over time.
Related Posts
- How Much Is the Ford Family Discount? Full Guide for 2025
- 3.5 Ecoboost Timing Chain Replacement
- Ford Expedition Towing Capacity Chart: Max Ratings, Payload, and the Class IV Tow Package
- How to Easily Identify Apim Module in Ford Vehicles: Expert Tips
- 7 Best LED Headlights for Ford F150: Expert-Approved Quality
Author
-
 View all posts
I'm a long-time Ford and automotive enthusiast, and I've been writing about cars. I started Fordmasterx as an effort to combine my two passions – writing and car ownership – into one website.
I hope that you find everything you need on our website and that we can help guide you through all your automotive needs.


