Ford Power Steering Hose Diagram: Diagnosis & Fix Guide
A Ford power steering hose diagram illustrates the routing of hydraulic fluid between the pump, steering gear, and reservoir. It differentiates the high-pressure feed line from the low-pressure return hose, allowing technicians to identify leak points and ensure correct hose placement for optimal steering performance and system durability.
📌 Key Takeaways
- Primary purpose is identifying high-pressure vs. low-pressure fluid paths
- The high-pressure hose is the most critical component to seal correctly
- Always check for proper hose clearance to avoid heat damage or friction
- Apply the correct torque spec to fittings to prevent future leaks
- Use this diagram when diagnosing heavy steering or fluid loss
Navigating the engine bay of a modern vehicle can be an overwhelming experience, especially when you are faced with a puddle of red fluid on your driveway or a groaning noise every time you turn the wheel. For Ford owners, identifying the specific routing of hydraulic lines is the first step toward a successful repair. A ford power steering hose diagram serves as your essential roadmap, illustrating the complex path from the pump to the steering gear and back to the reservoir. Whether you are dealing with a pinhole leak in a high-pressure line or replacing a dry-rotted return hose, having the correct visual reference ensures that components are routed safely away from high-heat zones and moving parts. This guide will teach you how to interpret these diagrams, identify critical sensors, and execute a professional-grade replacement that restores your vehicle’s handling precision.
Decoding the Ford Power Steering Hose Diagram
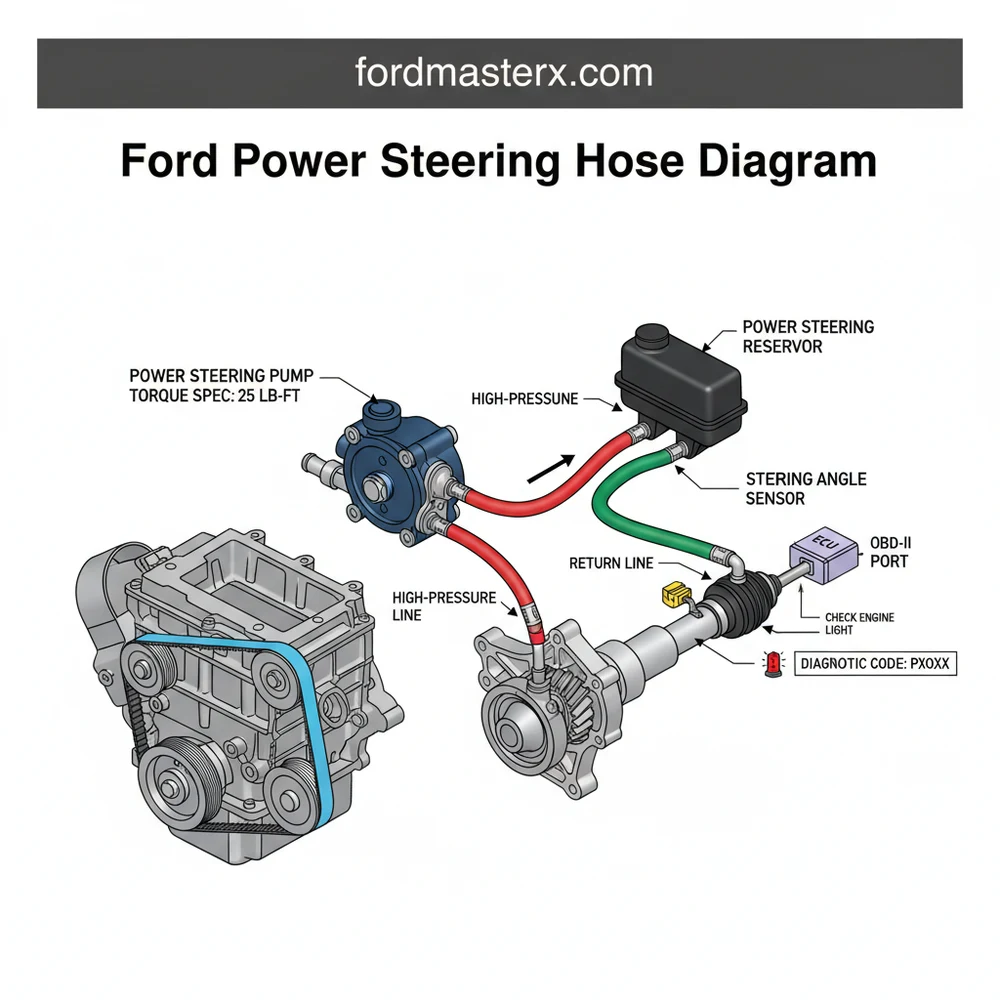
When you first examine a ford power steering hose diagram, you are looking at a closed-loop hydraulic system designed to multiply the force you apply to the steering wheel. The diagram typically splits the system into two distinct circuits: the high-pressure side and the low-pressure (return) side. Understanding the visual cues in the diagram is vital for ordering the correct parts and understanding how the system interacts with the engine’s ECU and other vital components.
The high-pressure hose is usually depicted with thicker lines and metal “hard-line” sections at both ends. This hose connects the power steering pump outlet directly to the inlet port on the steering rack or gear box. Because this line must withstand pressures exceeding 1,500 PSI, it features crimped hydraulic fittings and often includes a Power Steering Pressure (PSP) sensor. In the diagram, look for a small electrical connector branching off this line; this sensor sends data to the ECU to adjust engine idle speed when steering loads are high, preventing the engine from stalling during tight parking maneuvers.
The return circuit, by contrast, is shown with thinner lines or dashed paths in some technical manuals. This side of the system operates under much lower pressure, usually returning fluid from the steering gear to the reservoir or an external cooler. On many Ford models, the return line consists of a length of reinforced rubber hose secured by simple tension clamps. The diagram will also illustrate the “S-turn” or “U-turn” routing paths which are specifically designed to allow for engine movement without stressing the fittings. Pay close attention to the proximity of these lines to the coolant flow paths and radiator hoses, as improper routing can lead to heat-soak and premature fluid degradation.
Step-By-Step Guide: Using the Diagram for Installation
Replacing a power steering hose is a task that requires patience and precision. By following the ford power steering hose diagram, you can ensure that the new lines are seated correctly and that the system remains airtight. Before beginning, ensure you have a set of flare nut wrenches, as standard open-end wrenches are notorious for stripping the soft metal fittings on hydraulic lines.
- System Depressurization and Inspection: Start by cleaning the area around the pump and steering gear with a degreaser. Use your OBD-II scanner to check for any stored diagnostic code related to the steering system, such as a P0550 (Power Steering Pressure Sensor Circuit Malfunction). This ensures you aren’t overlooking an electrical issue while performing a mechanical repair.
- Draining the Reservoir: Use a fluid syringe or turkey baster to remove as much old fluid from the reservoir as possible. This minimizes the mess when you eventually disconnect the hoses. Locate the lowest point in the system, usually the return line at the steering rack, and place a catch pan beneath it.
- Disconnecting the High-Pressure Line: Consult your diagram to locate the high-pressure fitting at the pump. Use a flare nut wrench to loosen the fitting. Once the pump side is free, move to the steering rack side. Note the orientation of the line—Ford often uses specific “clocking” for these fittings to ensure they don’t rub against the timing chain cover or frame rails.
- Removing the Return Hose: Loosen the spring clamps or screw clamps on the return side. If the hose is stuck to the metal nipple, carefully slit the end of the hose with a utility knife rather than prying it, which can bend the delicate aluminum tubing.
- Routing the New Lines: This is the most critical phase where the ford power steering hose diagram is indispensable. Thread the new high-pressure hose through the engine bay, following the exact path of the original. Ensure the hose has adequate clearance from the accessory belt and any hot exhaust manifolds. If the hose touches the coolant flow tubes, it can pick up excess heat, thinning the fluid and reducing steering assist.
- Seating and Torque: Hand-thread all fittings before using a wrench to avoid cross-threading. Once hand-tight, apply the manufacturer-specified torque spec. For most Ford high-pressure fittings, this is between 20 and 25 lb-ft. Over-tightening can crush the O-ring or flare, causing a permanent leak.
- Fluid Refill and Air Bleeding: Fill the reservoir with the recommended Mercon fluid. With the front wheels off the ground, turn the steering wheel lock-to-lock 20 times with the engine off. This “burps” the air out of the rack. Finally, start the engine and repeat the process, topping off the fluid as the level drops.
Never hold the steering wheel at “full lock” (all the way to one side) for more than 5 seconds. This creates maximum pressure within the high-pressure hose and can cause a brand-new hose to burst or damage the internal seals of the pump.
Common Issues & Troubleshooting

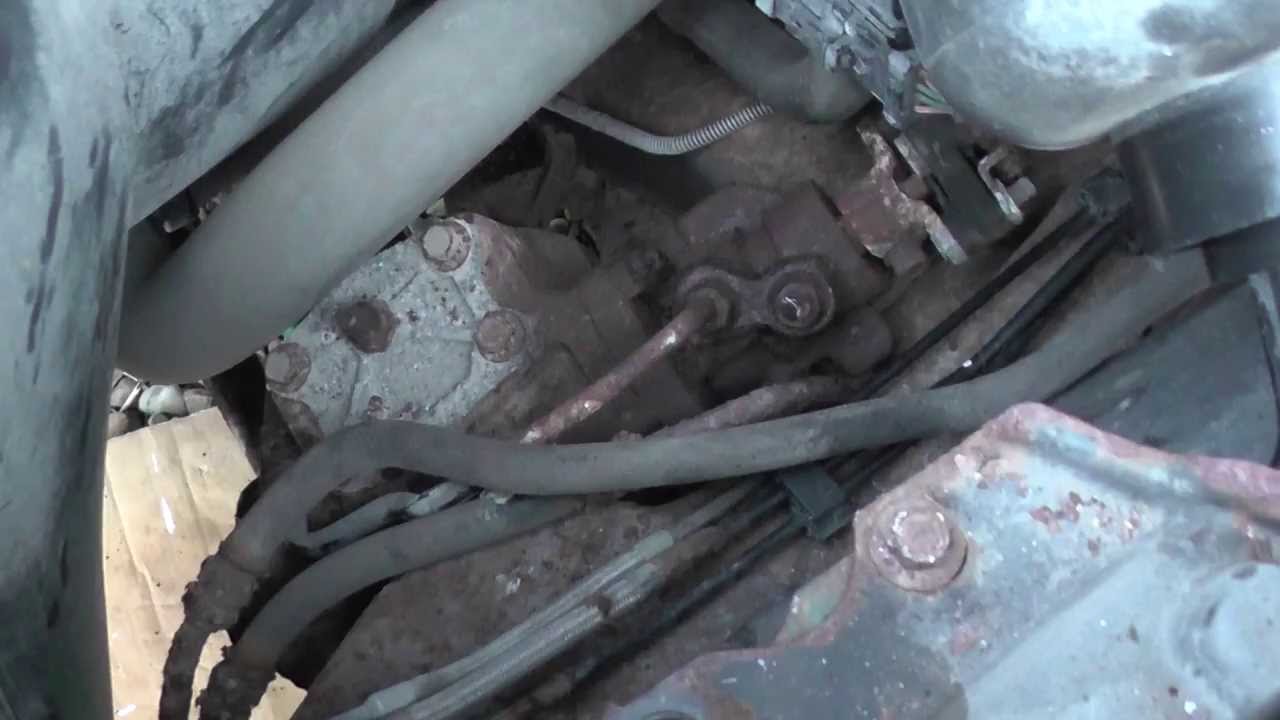
Identifying problems in the steering system often begins with a visual inspection aided by your ford power steering hose diagram. The most frequent issue Ford owners face is a fluid leak at the crimp connection where the rubber hose meets the metal fitting. These leaks often start as a “seep” that attracts dirt, eventually turning into a drip that can contaminate the accessory belt, causing it to slip or squeal.
Another common failure point is the Power Steering Pressure switch. If this sensor fails, it may trigger a check engine light. Because the sensor is integrated into the high-pressure line, a failure here might look like a hose leak when it is actually an internal seal failure within the sensor body. Use an OBD-II tool to monitor the “PSP Switch” live data; if the status doesn’t change when you turn the wheel, the sensor or its wiring is faulty. Furthermore, if you notice the steering is stiff only when the engine is cold, it may indicate a restriction in the return hose or a collapsing inner liner, which your diagram can help you locate for physical testing.
A whining noise that increases with engine RPM usually indicates air is trapped in the system or the pump is cavitating due to a low fluid level. Always check the hose connections on the suction side (between the reservoir and pump) first, as a loose clamp here can suck in air without leaking fluid out.
Tips & Best Practices for Maintenance
To maximize the lifespan of your steering components and ensure the accuracy of your ford power steering hose diagram application, follow these professional maintenance tips. First, always replace the Teflon O-rings or crush washers whenever a fitting is loosened. These are one-time-use components designed to deform and create a seal; reusing them is a guaranteed recipe for a slow, frustrating leak.
- ✓ Check Heat Shields: Many Ford trucks and SUVs use heat shields on the high-pressure lines near the exhaust. Always transfer these to the new hose to prevent premature rubber failure.
- ✓ Fluid Quality: Use only the specific Mercon fluid type listed in your owner’s manual. Using generic “Power Steering Fluid” can cause the seals in the rack and pump to swell or shrink.
- ✓ Vibration Dampening: Ensure all plastic loom clamps shown in the diagram are reinstalled. Without these, the hoses will vibrate against the frame or engine block, eventually wearing through the outer casing.
- ✓ Belt Inspection: While the system is apart, inspect the accessory belt. If it is contaminated with power steering fluid, it must be replaced, as the oil breaks down the rubber compounds.
When installing the high-pressure line into the steering rack, it is often easier to gain access through the wheel well by removing the front tire and the plastic inner fender liner. This gives you a straight shot at the torque spec application with a long extension.
In conclusion, mastering the ford power steering hose diagram is about more than just knowing where the tubes go; it is about understanding the synergy between hydraulic pressure, electronic monitoring via the ECU, and mechanical integrity. By following the correct routing, respecting torque specifications, and utilizing OBD-II diagnostics when the check engine light appears, you can maintain a steering system that is both quiet and responsive. Regular inspection of your hoses for signs of “sweating” or cracks will prevent roadside failures and keep your Ford performing safely for miles to come.
Step-by-Step Guide to Understanding the Ford Power Steering Hose Diagram: Diagnosis & Fix Guide
Identify – Start with identifying the high-pressure and low-pressure lines using the diagram to confirm routing.
Locate – Locate the fittings at the power steering pump and the steering rack, checking for obstructions.
Understand – Understand how the hoses are secured by brackets to prevent vibration damage during vehicle operation.
Connect/Apply – Connect the new hose and apply the manufacturer-recommended torque spec to all threaded fittings.
Verify – Verify that there are no kinks in the hoses and that they do not touch the exhaust manifold.
Complete – Complete the process by filling the reservoir and bleeding the air out of the hydraulic system.
Frequently Asked Questions
Where is the power steering hose located?
The Ford power steering hoses are located in the engine bay, connecting the pump (usually belt-driven) to the steering rack or gear box. The high-pressure line typically runs from the pump to the rack, while the return hose carries fluid back to the reservoir, often routed near the radiator.
What does this diagram show?
The diagram shows the complete hydraulic circuit, including the high-pressure hose, return hose, and cooling lines. It identifies fitting types, hose diameters, and routing paths to prevent interference with moving parts. This is essential for ensuring that fluid flows correctly from the pump to the steering gear and back.
How many connections does a power steering hose have?
Most systems feature two primary connections: the high-pressure line and the return line. The high-pressure side uses threaded flare fittings to withstand intense hydraulic force, while the return side often uses simple hose clamps. Some models may include an additional line for an external power steering fluid cooler.
What are the symptoms of a bad power steering hose?
Common symptoms include whining noises, heavy steering, and visible fluid leaks. While hydraulic leaks don’t always trigger a check engine light, a faulty pressure sensor may send a diagnostic code to the ECU. Use an OBD-II scanner to check for codes related to power steering pressure or electronic assist.
Can I replace this myself?
Replacing a power steering hose is a manageable DIY task for those with basic mechanical skills. However, it requires working in tight spaces and handling messy hydraulic fluid. You must ensure all air is bled from the system afterward to prevent pump damage and ensure smooth steering operation.
What tools do I need for replacement?
You will need a set of flare nut wrenches to prevent stripping the high-pressure fittings, a socket set, a drain pan, and fresh Ford-approved power steering fluid. A torque wrench is also necessary to meet the specific torque spec for the fittings to prevent leaks or thread damage.


