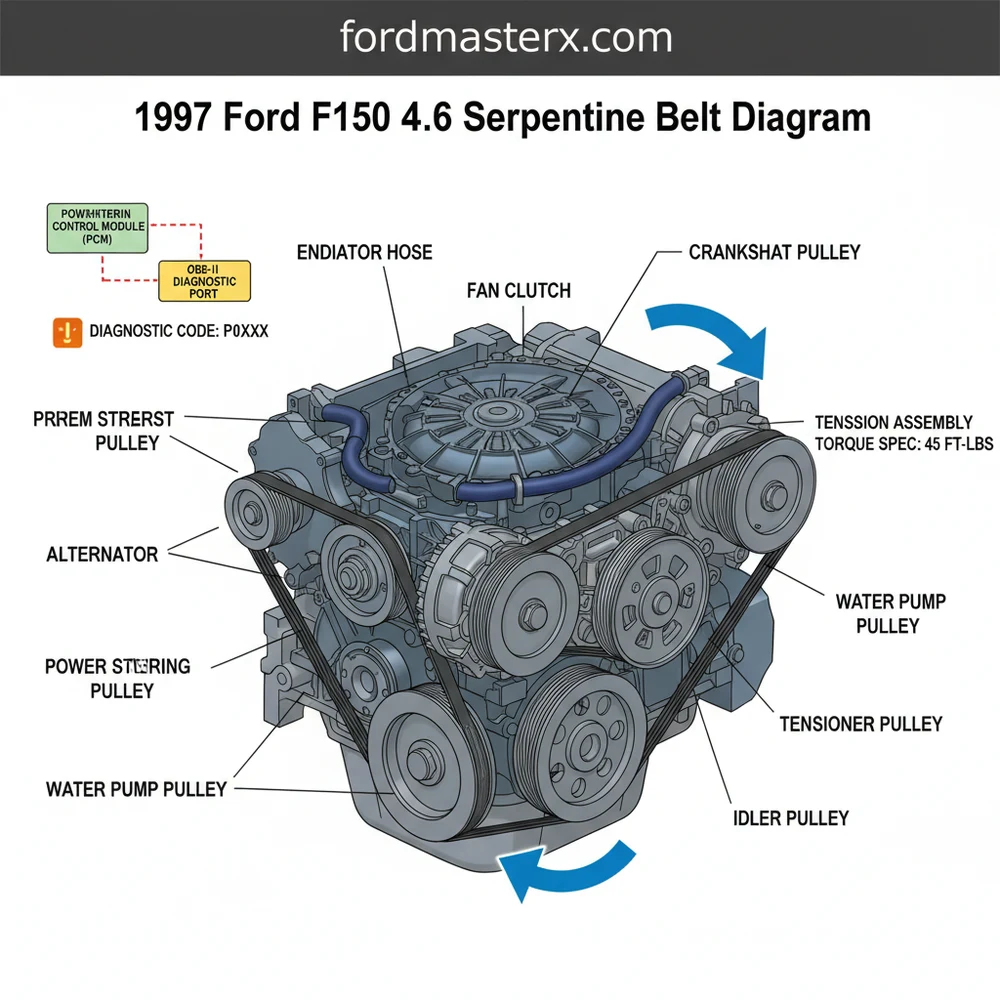
Ford F150 4.6 Serpentine Belt Diagram: Routing Guide
The Ford F150 4.6 serpentine belt routing follows a specific path around the crankshaft, alternator, power steering pump, and water pump. To install, use a breaker bar to rotate the spring-loaded tensioner counterclockwise. Ensure the belt ribs align perfectly with the pulley grooves to prevent slippage and maintain proper accessory function.
📌 Key Takeaways
- Visual guide for correct belt routing across all engine pulleys
- The automatic tensioner is the most critical component for adjustment
- Always disconnect the battery and wait for the engine to cool before starting
- Inspect pulleys for wear or misalignment while the belt is removed
- Use this diagram during maintenance or when replacing a squealing belt
Maintaining your vehicle requires accuracy, especially when dealing with the intricate routing of the 1997 ford f150 4.6 serpentine belt diagram. For many owners of this classic Ford truck, the serpentine belt—often referred to as the accessory belt—is the lifeline of the engine’s external components. Without a clear understanding of how the belt winds through various pulleys, a simple replacement can turn into a frustrating ordeal. This guide provides a comprehensive breakdown of the belt routing, component identification, and technical specifications needed to ensure your Triton V8 engine runs smoothly. You will learn the exact path the belt takes, the tools required for the job, and how to troubleshoot related system failures.
Understanding the 1997 Ford F150 4.6 Serpentine Belt Diagram
The 1997 Ford F150 4.6L V8 engine utilizes a single, long serpentine belt to drive multiple vital components. Understanding the diagram is less about memorizing a line and more about identifying the function of each pulley. The diagram typically features a series of circles representing the alternator, power steering pump, air conditioning compressor, water pump, and idler pulleys, all driven by the large crankshaft pulley at the bottom.
In the 1997 Ford F150 4.6 serpentine belt diagram, you will notice two types of pulleys: grooved and smooth. The grooved pulleys interact with the multi-ribbed side of the belt, while the smooth pulleys contact the flat back of the belt. The routing is designed to maximize “wrap” around each pulley to prevent slippage under load. For instance, the water pump pulley is often smooth because the back of the belt drives it, which is essential for maintaining consistent coolant flow throughout the engine block.
The most critical component in the diagram is the automatic belt tensioner. On the 4.6L Triton engine, this is located on the passenger side of the engine front. It features a spring-loaded arm with a smooth pulley. When you look at the diagram, the tensioner is the “gatekeeper” that allows you to create slack for installation. Most diagrams will also indicate the direction of rotation, which is clockwise when viewed from the front of the vehicle.
The 4.6L V8 engine in the 1997 F150 uses a 1/2-inch square drive or a 15mm bolt head on the tensioner pulley to release pressure. Always verify if your specific truck has California emissions or heavy-duty cooling, as these can occasionally alter pulley diameters, though the routing remains largely identical.
Step-by-Step Installation and Interpretation Guide
Reading the 1997 ford f150 4.6 serpentine belt diagram and translating it to the engine bay requires a systematic approach. Before starting, ensure the engine is cool to the touch to avoid burns from the radiator or timing chain cover.
- ✓ Step 1: Locate the Tensioner. Identify the tensioner assembly on the front of the engine. On the 1997 4.6L, it is situated between the alternator and the crankshaft.
- ✓ Step 2: Release Tension. Insert a 1/2-inch drive breaker bar or a dedicated serpentine belt tool into the square hole on the tensioner arm. Rotate it clockwise (toward the driver’s side) to compress the spring and loosen the belt.
- ✓ Step 3: Remove the Old Belt. While holding the tensioner back, slide the belt off the uppermost pulley (usually the alternator). Slowly release the tensioner and remove the belt from the remaining pulleys.
- ✓ Step 4: Inspect the Pulley Bearings. With the belt off, spin each pulley by hand. They should spin freely without noise or “play.” If the idler pulley or tensioner pulley feels gritty, it is time for a replacement.
- ✓ Step 5: Route the New Belt. Begin at the bottom with the crankshaft pulley. Follow the 1997 ford f150 4.6 serpentine belt diagram specifically, looping the belt around the A/C compressor and power steering pump.
- ✓ Step 6: Final Loop. Save a smooth pulley (like the water pump or the idler) for the final step. Rotate the tensioner again, slide the belt over the final pulley, and ensure the ribs are perfectly seated in the grooves of all pulleys.
- ✓ Step 7: Verification. Double-check the routing against the diagram. A belt that is one groove off can shred within minutes of starting the engine.
Never place your fingers between the belt and a pulley while the tensioner is engaged. If the tool slips, the tensioner can snap back with enough force to cause serious injury.
Common Issues and Troubleshooting

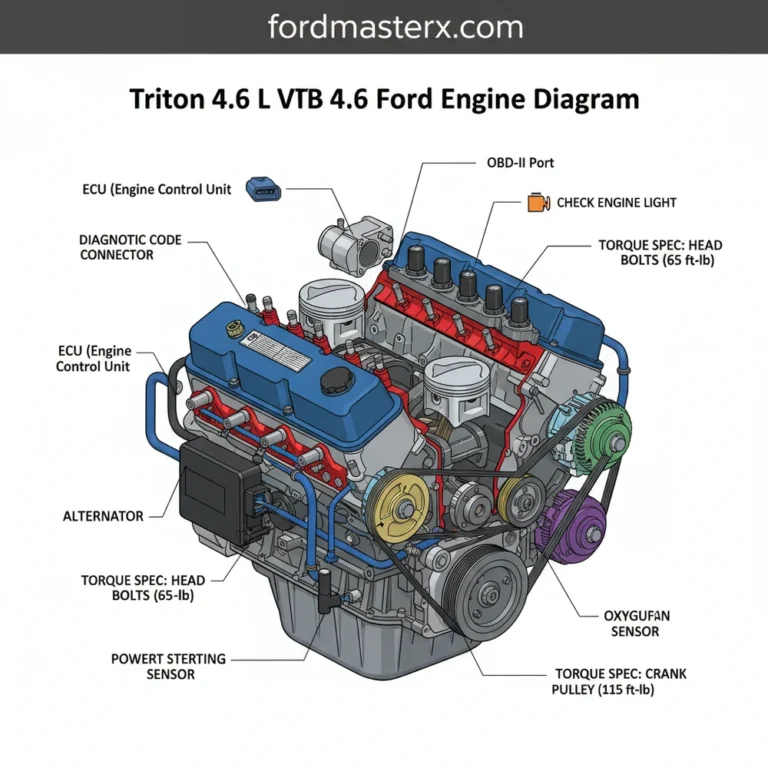
A failing serpentine belt on a 1997 F150 4.6L manifests in several ways, often triggering the check engine light or causing secondary system failures. If the belt slips, the alternator will not provide sufficient voltage to the ECU (Engine Control Unit). This can lead to erratic engine behavior or a dead battery.
In some cases, a snapped or slipping belt will hinder the water pump, immediately stopping coolant flow. This leads to rapid overheating. If your vehicle’s temperature gauge spikes, pull over immediately. You may find an OBD-II diagnostic code such as P0117 or P0118, indicating engine coolant temperature sensor issues, which are often a side effect of the belt failing to drive the pump.
Squealing is the most common symptom. This is usually caused by a stretched belt or a seized idler pulley. If you hear a “chirp,” the belt might be misaligned. Use the 1997 ford f150 4.6 serpentine belt diagram to ensure the belt hasn’t jumped a groove due to a failing tensioner. If the tensioner arm vibrates excessively while the engine is idling, the internal spring has likely weakened, and no amount of belt replacement will fix the noise.
If you are replacing a pulley, the torque spec for the idler and tensioner bolts on the 4.6L engine is typically 35-45 ft-lbs. Over-tightening can crack the timing chain cover, which is made of aluminum.
Maintenance Tips and Best Practices
To get the most out of your 1997 ford f150 4.6 serpentine belt diagram and the physical belt itself, regular inspections are mandatory. Modern EPDM (Ethylene Propylene Diene Monomer) belts do not crack as obviously as older neoprene belts. Instead, they lose material in the grooves—much like a tire loses tread.
Inspect the belt every 30,000 miles. Use a plastic belt wear gauge to check the depth of the grooves. If the belt is shedding “pills” of rubber that accumulate in the pulley grooves, clean the pulleys with a wire brush before installing a new belt. Contamination from oil leaks—specifically from the front crankshaft seal or the timing chain cover—can chemically soften the rubber, causing the belt to slip or swell.
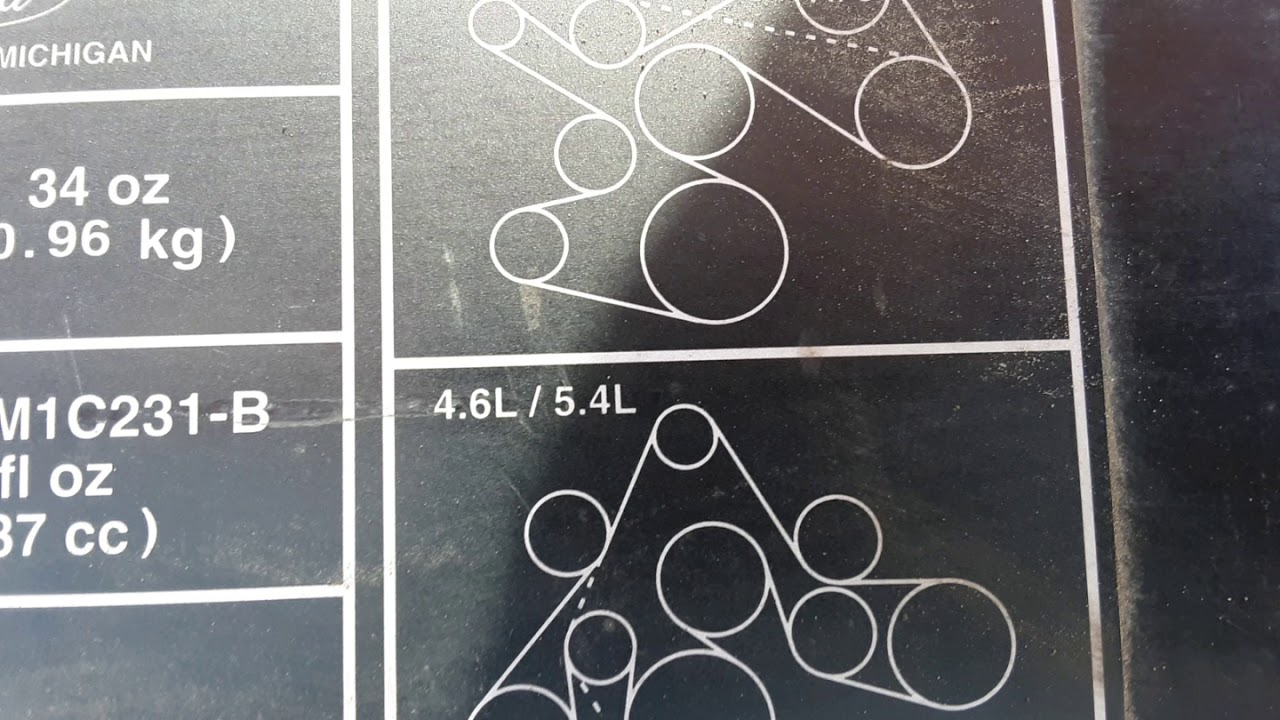
When purchasing a replacement, opt for a high-quality “quiet” belt with cross-cut ribs. These are designed to dissipate heat better and run quieter on high-mileage pulleys. Additionally, always keep a copy of the 1997 ford f150 4.6 serpentine belt diagram in your glove box. While there is often a sticker on the radiator shroud, these become illegible over time due to heat and grime.
Finally, consider the “system” approach. If your belt has reached its service life (usually 60,000 to 100,000 miles), the tensioner and idler pulleys are likely nearing the end of theirs as well. Replacing the belt, tensioner, and idler at the same time is a cost-effective way to prevent future labor costs and ensure the reliability of your F150’s accessory drive system. This proactive maintenance ensures that the ECU receives a steady voltage signal and the cooling system maintains optimal coolant flow, keeping your truck on the road for years to come.
Frequently Asked Questions
Where is the serpentine belt located?
It is located at the front of the Ford F150 4.6L engine, wound around various pulleys including the alternator and AC compressor. You can access it by opening the hood and removing the plastic fan shroud if necessary to gain better visibility and physical clearance for your tools.
What does this diagram show?
The diagram illustrates the specific path the belt must take to power engine accessories. It indicates which pulleys are grooved and which are smooth. Following this path exactly is essential to ensure the water pump and alternator spin in the correct direction for engine health and battery charging.
What are the torque specs for pulley bolts?
While the belt itself has no torque spec, the idler and tensioner pulleys typically require a torque spec of 35-45 lb-ft. If you are replacing the tensioner assembly, consult your manual to ensure the mounting bolts are tightened to prevent vibration or part failure during high-RPM engine operation.
What are the symptoms of a bad serpentine belt?
Symptoms include a loud squealing noise, visible cracks, or fraying. A snapped belt may trigger a check engine light or a diagnostic code if the alternator stops charging. If the ECU registers low voltage, use an OBD-II scanner to identify related electrical faults caused by the belt failure.
Can I replace this belt myself?
Yes, replacing a serpentine belt is a straightforward DIY task that requires basic hand tools. Most owners can complete the job in under 30 minutes. It is a cost-effective way to prevent a breakdown, though you must ensure the belt is perfectly seated in the pulley grooves before starting.
What tools do I need for this task?
You will primarily need a 1/2-inch drive breaker bar or a dedicated serpentine belt tool to rotate the tensioner. A flashlight is helpful for inspecting lower pulleys. If a check engine light appears after a stall, use an OBD-II scanner to clear any temporary voltage-related diagnostic codes.