Ford Bellhousing Bolt Pattern Drawing: Identification Guide
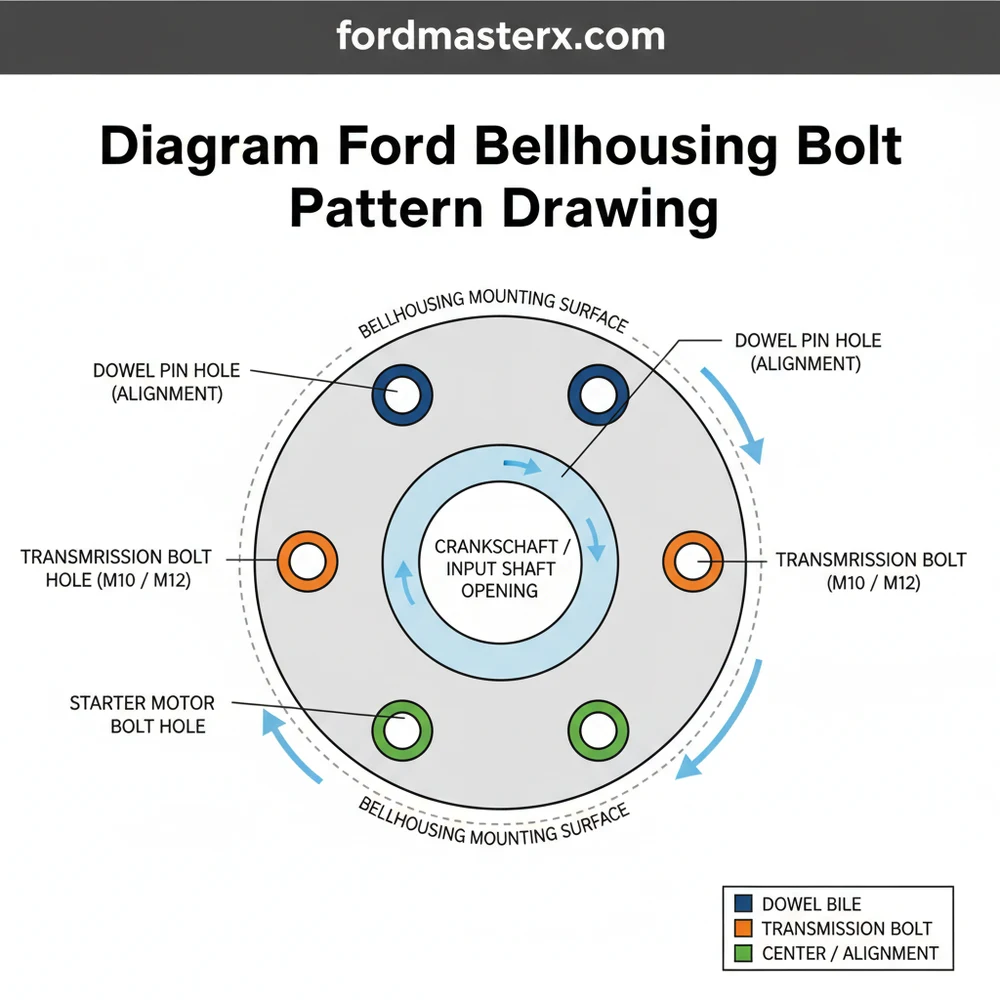
A Ford bellhousing bolt pattern drawing illustrates the specific mounting hole locations used to mate a transmission to an engine. This layout is critical for identifying engine families like the Small Block or Big Block Ford, ensuring the mounting configuration aligns perfectly for a secure drivetrain system fit.
📌 Key Takeaways
- Main purpose of this diagram is to verify engine-to-transmission compatibility
- Identifying the top two bolt holes is the most important step
- Always check for dowel pin alignment for safety and precision
- Measure center-to-center distances to confirm the engine family
- Use this diagram before performing an engine swap or gearbox replacement
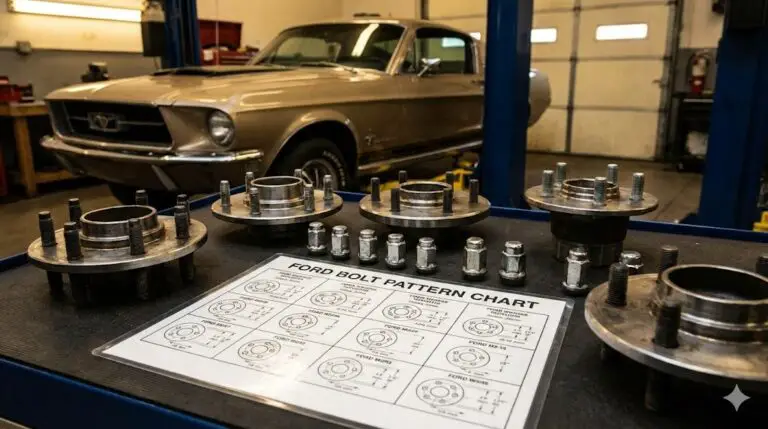
Finding the correct diagram ford bellhousing bolt pattern drawing is a critical step for any automotive enthusiast, mechanic, or restorer working on a powertrain project. Whether you are performing a modern engine swap, replacing a worn-out transmission, or mating a classic Windsor block to a later-model overdrive unit, understanding the specific dimensions and layout of the mounting points is essential. This technical overview provides a high-resolution perspective on how Ford engineered its various engine families, ensuring you have the precise schematic data needed to prevent costly alignment errors. By mastering the layout and structure of these bolt patterns, you can confidently navigate the complexities of Ford’s diverse engineering history and ensure a perfect fit every time.
Deciphering the Ford Bellhousing Bolt Pattern Layout
A comprehensive diagram ford bellhousing bolt pattern drawing serves as the primary blueprint for engine-to-transmission synchronization. At its core, the bellhousing acts as the structural bridge between the power unit and the drivetrain. The configuration of the bolt holes is not merely random; it is a highly engineered system designed to distribute torque loads evenly and maintain perfect concentricity between the crankshaft and the transmission input shaft.
The most common layouts found in Ford history include the Small Block Ford (SBF), the Big Block Ford (BBF), the FE series, and the modern Modular patterns. For instance, the Small Block pattern, often associated with the 289, 302, and 351 Windsor engines, features a distinct six-bolt configuration that evolved from an earlier five-bolt design used in the early 1960s. When viewing a schematic for these engines, you will notice that the top two bolts are spaced roughly 5.125 inches apart, while the lower mounting points widen to accommodate the starter motor pocket.
While many Ford engines look similar, the bellhousing patterns are rarely interchangeable between families. For example, a 351 Windsor (Small Block) and a 351 Cleveland share the same pattern, but a 351 Michigan (351M) uses the Big Block/385-series pattern. Always verify the engine family before purchasing an adapter plate or transmission.
In a professional diagram, color-coding or specific labeling is often used to distinguish between mounting bolts and alignment dowel holes. The dowel pins are arguably the most important component of the layout, as they ensure the transmission sits perfectly centered. Even a variance of a few thousandths of an inch can lead to premature pilot bearing failure or catastrophic input shaft damage. Modern drawings also highlight the starter motor location, which can vary from the passenger side to the driver side depending on the specific vehicle application and the generation of the engine.
Step-by-Step Guide to Interpreting and Using the Diagram

To effectively utilize a diagram ford bellhousing bolt pattern drawing, you must approach the process with precision and the right set of tools. Reading a blueprint is only the first step; applying that data to your actual hardware requires a systematic methodology.
- ✓ Digital or Dial Calipers (for measuring hole spacing)
- ✓ Thread Pitch Gauge (to identify bolt types)
- ✓ Steel Straightedge (to check surface flatness)
- ✓ High-Quality Torque Wrench
Step 1: Identify the Engine Family
Before looking at the measurements, confirm which Ford family you are working with. The most common error is confusing the Small Block (Windsor) with the 385-series (429/460). Use the diagram to count the number of mounting holes and observe the shape of the top of the “bell.” Windsor patterns are generally more rectangular at the top, while Big Block patterns have a wider, more arched appearance.
Step 2: Locate and Clean Dowel Pin Receptacles
Refer to the schematic to find the two primary alignment dowel locations. These are usually located at the 3 o’clock and 9 o’clock positions. Use a wire brush to clean these areas on both the engine block and the bellhousing. If the dowels are flattened or scarred, they must be replaced to maintain the integrity of the pattern.
Step 3: Verify Hole-to-Hole Dimensions
Using your calipers, measure the distance between the top two bolt holes. Cross-reference this measurement with the drawing. For a standard 6-bolt Small Block, this should be 5.125 inches. If your measurement differs significantly, you may be looking at a different engine revision or an aftermarket block with a multi-pattern setup.
Step 4: Dry-Fit the Transmission
Before applying any sealant or installing the clutch/flywheel, perform a dry fit. Lift the transmission and slide it onto the dowel pins. It should slide on smoothly. If you find yourself needing to “force” it with the bolts, the alignment is off, or the bellhousing does not match the block’s pattern.
Never use the bellhousing bolts to pull the transmission toward the engine. This can crack the aluminum bellhousing ear or strip the threads in the engine block. The transmission must be fully seated against the block by hand before the bolts are tightened.
Step 5: Inspect Starter Motor Clearance
The diagram will show the specific “pocket” for the starter. Check that your starter nose matches the diameter indicated on the blueprint. Some Ford patterns changed the starter offset between automatic and manual transmissions, even if the bolt pattern on the block remained identical.
Step 6: Final Torque Sequence
Once seated, install the bolts by hand. Follow a crisscross pattern as suggested in most technical manuals. This ensures even pressure across the mating surface, preventing the “tilting” that can occur if one side is tightened fully before the other.
Troubleshooting Common Pattern Mismatches

Even with a perfect diagram ford bellhousing bolt pattern drawing, you may encounter issues during the installation phase. One frequent problem is “pattern creep,” where manufacturing tolerances in aftermarket bellhousings lead to bolt holes that are slightly out of alignment. If a bolt starts to thread but then binds, do not force it. Refer back to the diagram to ensure you haven’t swapped a metric bolt for a standard SAE bolt, a common issue on late-model Ford transitions.
Another common issue is the “5-bolt vs 6-bolt” Windsor dilemma. Early Ford engines used a 5-bolt pattern that is visually similar but physically incompatible with the later 6-bolt standard. If your diagram shows six holes but your block only has five, you are likely working with a pre-transition engine. In such cases, an adapter plate is required to mate modern transmissions to the vintage block.
If you are performing an engine swap and the holes almost line up but not quite, check for the presence of a block plate (the thin metal shim between the engine and transmission). Ford uses these plates to locate the starter correctly. Without the correct block plate, your starter might grind or fail to engage, regardless of how well the bolts line up.
If you notice signs of cracking around the bolt ears or if the transmission vibrates excessively after installation, seek professional help immediately. These symptoms often point to a concentricity issue where the transmission is not perfectly centered on the crankshaft, a problem that a simple visual check of the bolt holes cannot always diagnose.
Best Practices for a Secure Configuration
To maintain the longevity of your drivetrain, follow these maintenance and installation recommendations. First, always use high-grade fasteners. Ford bellhousing bolts are subject to high shear forces; using Grade 8 hardware is standard practice to ensure the system remains rigid under heavy acceleration.
Maintenance-wise, periodically check the torque on your bellhousing bolts, especially after the first 500 miles of a new installation. Heat cycles can cause aluminum housings to expand and contract, potentially loosening the hardware. For cost-saving, consider sourcing used bellhousings from reputable recyclers, but always verify them against a known diagram ford bellhousing bolt pattern drawing to ensure they haven’t been warped or modified by a previous owner.
When choosing components, look for “SFI-rated” bellhousings if you plan on doing any high-performance driving. These are built to much tighter tolerances than factory cast-iron or aluminum pieces and are guaranteed to match the blueprint measurements exactly. Investing in a high-quality alignment tool can also save hours of frustration during the mating process.
In conclusion, having a detailed diagram ford bellhousing bolt pattern drawing is the foundation of any successful Ford powertrain project. By understanding the specific layout of your engine family—whether it’s the classic Windsor, the massive 385-series, or the modern Modular V8—you eliminate the guesswork that leads to mechanical failure. Remember to prioritize the dowel pin alignment, use the correct block plate, and always verify your measurements against a trusted schematic before turning the first wrench. With these technical insights and a disciplined approach to the installation guide, you can ensure that your engine and transmission work in perfect harmony for years to come.
Frequently Asked Questions
Where is the bellhousing bolt pattern located?
The bellhousing bolt pattern is located on the rear flange of the engine block and the front face of the transmission case. This component interface ensures the crankshaft and input shaft are perfectly concentric. Identifying this structure is vital for any Ford engine swap or transmission replacement project.
What does this Ford bolt pattern diagram show?
The Ford bellhousing bolt pattern drawing shows the precise layout and spacing of mounting holes, alignment dowels, and starter motor position. It identifies if the system belongs to the Small Block, Big Block, or Modular family, which is essential for ensuring a secure and vibration-free mechanical configuration.
How many bolt connections does a Ford bellhousing have?
Ford bellhousing patterns typically feature six to eight main bolt holes depending on the engine family. For example, the Windsor small block layout uses six bolts, while the 385-series big blocks utilize a larger, wider configuration. Always count the holes and measure distances for a correct system match.
What are the symptoms of a bad bellhousing fitment?
Symptoms of an incorrect or failing bellhousing mounting include excessive vibration, grinding noises from the starter, or input shaft failure. If the bolt pattern configuration is misaligned or loose, it compromises the entire drivetrain system, potentially leading to cracked casings or internal transmission damage during high-torque operation.
Can I replace the bellhousing myself?
You can replace or adapt bellhousings yourself if you have the correct drawing and tools. However, ensuring the layout is perfectly square to the block is difficult without a lift. It requires careful cleaning of the mounting structure and verifying that the alignment dowels are in good condition.
What tools do I need for measuring the bolt pattern?
To work with Ford bellhousing patterns, you need a high-quality socket set, a torque wrench, and a dial indicator for runout testing. A precision caliper is also helpful to verify the bolt pattern drawing measurements against the physical component to ensure a perfect system fit.